Flattery plugin for Sketchup is a free plugin useful for papercrafters. With this
plugin the papercrafters can make design of toys, generate architectural mock-ups and build up exclusive handouts at free of cost. The plugin provides a great solution while working with inexpensive models. The plugin is compatible with PCs and Macs.
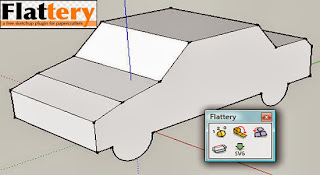
The Flattery consists of five toolbars which range from Index Edges, Unfold Faces, Reunite Edges, Add Tabs, and SVG Export.
After completing your model, when you are unfurling it, choose the
model and turn on the Index Edges button. This highlights all of the edges inside your model to let you know later on that what utilized to be connected while unfurling your model. It is significantly important for the Reunite Edges tool as well as for the Add Tabs tool.
At the time of indexing your model, apply the Unfold faces tool for the purpose of unfolding. Turn on this tool and click once for choosing a face. After that, click twice on an adjoining face. The chosen face will be unfolded in order to make it even with the second face. Now group them collectively and select them in order to keep on unfolding the two of them to the next adjoining face. To remove the selection, click away from your model. In order to opt for numerous faces at a time, just click on faces by pressing shift. After that, while selecting a face to unfold to, all of the selected faces will be unfolded all together.
Once your model is fully unfolded, use Reunite Edges tool for making modifications. Initially, by means of the pointer tool, double click on the group having the flattened model to go into the group. Subsequently apply the Reunite Edges tool. From here it can be detected how the model is unfolded. Select the faces you want to shift for selecting them. While you move over edges, their partners will be displayed in red. Click on one, and all the selected faces will be elevated and shifted with the intention that the selected edge and its partner are reunited.
Choose the Add Tab tool. For an uncomplicated 1/4 inch tube, just double-click on the edge where you prefer to include the tab. For custom sized tabs, click one time on an edge as well as shift the mouse away from. Click for a second time to build the tab. There is an option to put sizes in the Value Control Box. Turn on Control to toggle among trapezoid and triangle tabs. Then the tab tool will show up an edges partner while hovering over it. At the time of creating a tab, it will also illustrate how that tab will extend beyond the face it will be bonded to.
Now you have to export your patter. For moving out of the group, click away from your model. Then choose the group and click on the SVG Export button. Find a place to save your SVG file and click save.
Installation: For set up Flattery, just copy the file "flattery.rb" and the folder "flattery" into the SketchUp plugins folder. On Windows, to find out the folder, go to C:\Program Files\Google\Google SketchUp 7\Plugins. On Macs, the folder is /Library/Application Support/Google/Google SketchUp 7/SketchUp/plugins. After copying all the files, start SketchUp. Now the Flattery toolbar will be visible.
~~~~~~~~~~~~~~~~~~~~~~~~~~~~~~~~~
Published by Rajib Dey
Editor-in-chief
Sketchup-ur-space (An exclusive e-magazine for worldwidesketchup users)
Sketchup4architect (Downloadunlimited sketchup components, plugins, softwares, models)


