Thursday, October 30, 2014

Some disadvantages of 3D printings

The 3D printing is fast becoming a transformative force in manufacturing, the medical field and several other industries. While the excitement we are currently witnessing is partly justified, it is important to remember that 3D printing is still in its infancy and it has still many hurdles to pass before we can talk about a revolutionary force. As promising as 3D printers seem, their usefulness is still questionable. High costs, safety concerns, patents, and design complexity are all contributing to legitimate skepticism. Here are some reasons to avoid the hype around 3D printing. Yes, 3D printing stands to completely transform the way we make, replace, and transport products and will disrupt nearly every major industry. However, the technology is still geared toward passionate, motivated makers and hobbyists—not the average citizen.

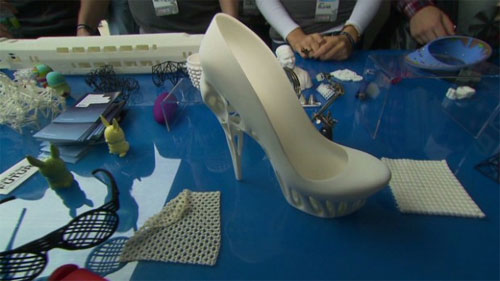
We have compiled a list of some reasons 3D printing has not quite caught on yet and what is holding the technology back.

You cannot buy a desktop 3D printer today and make anything you want.

Awaiting the breakthrough consumer model: Widespread consumer adoption will depend on 3D printers dropping in price. Currently, printers less than $1,000 use a DIY-style kit that requires assembly of the machine itself and they often don't replicate the CAD designs accurately. But, relatively cheap 3D printers do exist. At $299, the Printrbot Simple is an affordable option, though it is very basic and can't print high-quality products. Also well under $1,000 is RepRap's open-source line of printers, which have to be assembled separately. The Cubify Cube is about $1,300 and probably the best desktop option since it connects to wifi, but its plastic filament can't make anything too sturdy. For the most part, anything bigger or better than, these costs well into the thousands (or even tens of thousands) of dollars. The MakerBot Replicator 2 runs at about $2,200, which was also the roundabout figure for a top-of-the-line computer in the 1980s. Until reliable, convenient, sleek 3D printers hit the market, the revolutionary effects of the technology will be stymied.

The 3D model is still far too difficult for most people. It will take you 2000 hours in CAD to learn make very complex shapes. Most people feel inhibited when offered a blank canvas on which they can create anything. Many 3D printed things in the news have the shape of something, but are not functional parts. If I take a piping bag, put in pate and squeezed out the shape of the liver I could probably call CNN for 3D printing a liver. But, this liver will not be functional.

Expense of SLS printers: Major patents on selective laser sintering (SLS) printers expired in January, so perhaps the prices of these machines—which run as high as $250,000 will decrease. When the patents on fused deposition modeling (FDM) printers expired, there was an explosion of open source FDM printers that led the technology to become a hobby. The best example was MakerBot, which launched as the most well-known FDM printer almost immediately after the FDM patent expired. SLS printers offer the ability to print with more materials such as glass, metal, plastic, and ceramic, but with the high-powered lasers comes a higher manufacturing price. It may never be as cheap as an FDM machine, and therefore may take a longer time to catch on in the consumer market, if at all.

Patents and legal murkiness: This year, many patents on 3D printers will expire, possibly creating more competition, innovation, and lower prices. However, there are still quite a few overlapping patents out there, however, which causes a lot of murkiness. During the last decade, the Patent and Trademark Office has received more than 6,800 3D printing patent applications. Since 2007, almost 700 patents have been filed annually. Another intellectual property issue comes with what the machines are printing. Right now, it's easy to log on to Shapeways and download a CAD file of just about anything. But soon, there will be lawsuits and competition between brands over knockoffs and copyright infringement.

The usefulness gap: Sure, plastic action figures, iPhone cases, and Star Wars-themed novelties are fun to design and print with a relatively affordable desktop 3D printer like the Cube, but they aren't exactly impactful on our everyday lives, nor are they convincing consumers the machines are a worthy investment. “There's no compelling application in the present time because anything you can print on a 3D printer, besides from things that are truly customized, you can buy at a store,” said Pete Basiliere, lead Gartner analyst for 3D printing. He said a compelling consumer application—something that can only be created at home on a 3D printer—will hit the scene by 2016.

That 3D-printed gun: Before the majority of Americans could wrap their heads around how 3D printing works, a man named Cody Wilson designed, printed, and successfully fired a 3D printed gun. The STL file was available for free on his website the next day, and 100,000 people downloaded it before the U.S. Department of State ordered him to take it down. Since an all-plastic 3D gun probably won't catch on, other companies are working on using SLS technology to print a metal one. So, in December 2013, Congress voted to renew an expiring ban on plastic firearms that could slip past metal detectors, though it didn't add any new restrictions on plastic guns. Philadelphia was the first city to ban 3D printed firearms. A Chicago lawmaker wants to make it illegal to use a 3D printer to make gun parts unless the user has a federal gun manufacturer's license. Wilson's plastic 3D printed gun showcased these loopholes in the law and caused an uproar across the country about the potential dangers of 3D printing technology. Whether you agree with it or not, the ability to easily print and distribute weaponry will surely cause skepticism about this technology for some time.

Some disadvantages of 3D printings

In today’s crowded media, landscape simple messaging is the norm. This turns the media from a critical watchdog into a braying hound repeating simple messages repeatedly. Desktop 3D printers are in many cases unreliable when compared to other consumer electronics devices you own. Surface quality, strength, heat deflection & color of 3D printed parts are not adequate for most applications. Post processing means that there still is far too much labor involved. Industrial 3D printers are too slow, expensive, small & not productive enough. Many industrial optimizations such as conveyor belts and automatic processing of files or depowdering of parts have not been applied to 3D printers. Material costs are ridiculously high, inhibiting 3D printing development. Much of the analysis coming out by stock and other people about 3D printing is not based on any real understanding of the technology and is frankly hilarious. The 3D printing is a collection of many different technologies all better or worse at making various things. We are not collectively developing a Star Trek Replicator now. Company A is making a machine to make tea at home, Company B tea in the workplace, Company C is doing coffee etc. Why will everyone have a desktop 3D printer? We don’t all use our own sewing machines to make our own clothes. There is no common parts infrastructure for 3D printer parts. No wide spread motherboard, CPU or case ecosystem. We don’t have a postscript for 3D printing so “your 3D printed files are like a box of chocolates.”

The 3D printers aren't that user-friendly: Setting up a 3D printer will need to be as easy as hooking up a traditional HP printer. The 3D printer needs to have fewer wires than a television and fewer buttons than a computer for it to become a household electronics, and right now, that's not the case. The printers use high-voltage power supplies and specialized equipment and parts. Some of the cheapest printers can't even connect to wifi and most have low resolution. Because of the hype around the potential and the cute plastic toys that they produce, 3D printers have come across as easier and more useful than they actually are. The best products that have been created—think tools, musical instruments, car parts—are made using huge, high-end printers that cost hundreds of thousands of dollars. Those sub-$1,000 machines that sit on a desk just aren't going to be as productive.

Complex design software: Downloadable files from Thingiverse and Shapeways are easy to get, but they are not moderated and therefore may not work on every type of printer. If you want to design your own file, you need a working knowledge of CAD design. Setting up the model and using the printer takes quite a bit of patience and time, which is another reason the technology has primarily been used by enthusiasts up to this point.

The 3D printers are still slow: 3D printers are great for mass customization, but are still too slow for manufacturing lots of objects. To change the manufacturing industry, the parts need to be printed in minutes, not hours. It currently takes anywhere from several hours to several days to print, depending on the size of the model and the quality of the printer. Receiving an order from Shapeways, the company that customizes and 3D prints a variety of products, can take up to two weeks, depending on the materials used.

Safety concerns: The FDM printers, which use a plastic filament, are relatively safe to use—they are often made for desktops and contain both the mold and the residue—but they aren't foolproof, and they reach very high temperatures. Powder-based printers are messy and potentially explosive depending on what is being made from them. They operate at extremely high temperatures and produce waste. It's not something a consumer would want in their home office. Indoor air quality and the emissions from 3D printers, particularly SLS printers, are also cause for concern.

Mainstream 3D printing materials such as SLS and SLA degrade due to UV degradation, making parts ugly and brittle after a year in the sun.

The only 3D printing process that is food safe is ceramics. Many industrial 3D printing materials are proprietary and one has no idea what is in them. 3D printing is developing much slower than you think. Because you’ve been exposed to a lot of technologies in a short time frame it seems as it is going faster than it is. Many of the “3D printing organs” stories have not been based on publicly available research, but rather are funding requests via the media. Repeatability of 3D printing parts is very low when compared to traditional mass manufacturing technologies. Many nice and shiny 3D printed parts you’ve seen on TV require hours of post-processing to get them to look that way. At the very least, 3 3D printing Kickstarter projects have been pure fantasy. There are still no functional 3D printed shoes available, despite of what you may have heard. The “3D printing revolution” is a savvy rebranding of a decades old technology through social media and extensive spending on PR.

Some disadvantages of 3D printings

~~~~~~~~~~~~~~~~~~~~~
Published By
Rajib Dey
~~~~~~~~~~~~~~~~~~~~~
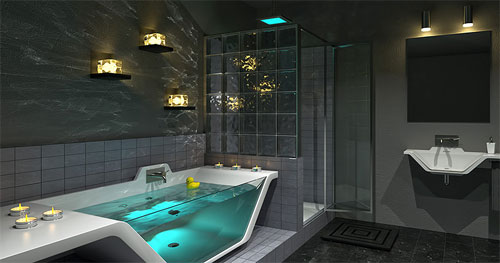
Create a compelling design of your bathroom with Sketchup

Before any designer starts the ultimate process to make a bathroom using the 3D design software, all they need to have a solid plan. However, SketchUp is the best software that can do this work.

One approach most often used by designers is adding your chosen items and design ideas to a mood board.

The will be some carefully chosen accessories in the washroom – a vintage 1930s mirror and the glass bonbon jars – are also objects that you would more usually expect to find in a living room.

The tranquility in colour scheme and accessories of the nautical theme is a popular trend and very appropriate and easy to achieve in a bathroom design.

How SketchUp can provide benefits for design?

There are some basic reasons that the designer should use SketchUp for design this.

Create a compelling design of your bathroom with Sketchup

  • SketchUp is an amazing free application for creating professional (non photo-realistic) 3D models on the fly.
  • It’s a great application for someone looking to create quick mockups rather than worrying about notoriously complex 3D modeling applications that can take years to learn, which require various setting configurations like lighting radiance adjustments, multiple cameras, UVs, etc.
  • You can share and import resources provided by many users of SketchUp, which helps avoid wasting time unnecessarily especially when someone has already sketched something to suit your needs
  • The resources and support available for using SketchUp is quite vast, which includes an official Sketchup blog, Sketchup Products Forum, Warehouse of Designs, even related to Bathrooms and How To Tutorials on Sketchup Youtube Channel.
SketchUp Make is a free version of the three-dimensional modeling application. It enables you to plan and visualise projects on your computer; not as static drawings, but as models you can take apart, put back together, and view from any angle.

This video would make the designer believ that they could use SketchUp for innovative design.


Create a compelling design of your bathroom with Sketchup

~~~~~~~~~~~~~~~~~~~~~
Published By
Rajib Dey
~~~~~~~~~~~~~~~~~~~~~
Thursday, October 23, 2014

SketchUp photorealistic rendering, its uses and features

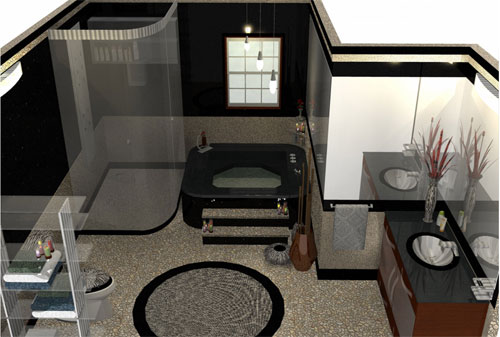
There are many plug-ins for Google SketchUp that provides high-quality photorealistic rendering – fast and easily. Renditioner works directly within SketchUp and lets you control the materials, advanced lighting components, environments, background images.

Renditioner is "one button" easy with 3 render options of Preview, Standard and Presentation. It is simple enough for novices and yet powerful enough for professionals. Powerful features are optimised in a jargon free interface. Simplicity paired with speed and working directly in SketchUp, means you can achieve design visualisation objectives more quickly. Renditioner offers 16 megapixel renderings for large-scale printing and powerful presentation of your designs.

Uses: Renditioner is a program designed specifically to work inside SketchUp, with a one – button easy to use format. With next to no setup time required, you can get straight on with producing and enhancing your renderings. Simplicity paired with speed and working directly within SketchUp, means you can achieve design visualisation objectives more quickly.

Create Moving Photorealistic Renderings! Small changes to material finishes, reflectance levels, or bumpiness can bring your textures to life. But emotional images often come from light and colour. IDX Renditioner provides pre-built lighting components that are easy to control. Change cone width, intensity, or colours, and highlight items in your scene or enhance a particular mood.

Features: Render modes - There are three preset render buttons for Preview, Standard, and Presentation renders. If you want you can change the values for those presets. You can also optimize render settings by setting the scene size (Room, Building, etc) and for advanced renders switch between lighting environments (Exterior, Interior, and Studio).

Control Environments - Click a render button and you‘ll see a background sky and ground plane that go with the lighting conditions (night, hazy, twilight, etc).

Lighting Features - Natural lighting is controlled by selecting a weather condition: clear sky, cloudy, hazy, twilight, or full moon are just a few. The SketchUp sun position can be over-ridden to position the moon or sun in a certain way. Artificial lights are provided, but it is simple to make your own from any component. One component acts like the light fixture, while a subcomponent acts like the bulb.

Camaras and Lighting

A. HDR-based Lighting: HDR, or High Dynamic Range based lighting, allows for better control of the lighting of an image or scene., by preserving image details that may be lost due to limiting contrasts ratios.

B. Predefined, Weather-based Lighting Schemes: New Renditioner Pro takes lighting further with extensive lighting controls. Choose from menus of predefined, weather-based lighting schemes including Preview Lighting, Fast Lighting, Interior Lighting and Exterior Lighting.

Lighting Controls: Twist control is available as an HDR-based lighting adjustment to rotate 3D backgrounds and associated reflections. Drop scenery effects – sky, shadow, light shadow, and reflection – includes controls for shadow quality, contrast, brightness and blur.

SketchUp photorealistic rendering, its uses and features

SketchUp photorealistic rendering, its uses and features

~~~~~~~~~~~~~~~~~~~~~
Published By
Rajib Dey
~~~~~~~~~~~~~~~~~~~~~
Wednesday, October 22, 2014

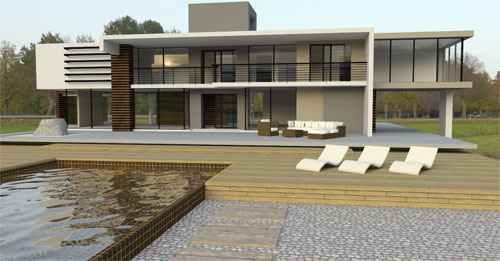
Making of Exterior Scene with vray sketchup hdri

Arch. Dario Ilardi
www.grafica2d3d.com
https://www.facebook.com/grafica2d3d


Modelling with sketchup 2014
Render with vray 2
No postproduction

THE SCENE

Making of Exterior Scene with vray sketchup hdri

SETTING RENDER

Making of Exterior Scene with vray sketchup hdri

Environment HDRI Map

Making of Exterior Scene with vray sketchup hdri

Setting Map GI SKYLIGHT

Making of Exterior Scene with vray sketchup hdri

Map HDRI download
Anti aliasing setting

Making of Exterior Scene with vray sketchup hdri

DMC sample setting

Making of Exterior Scene with vray sketchup hdri

Color mapping setting

Making of Exterior Scene with vray sketchup hdri

Indirect illumination GI setting

Making of Exterior Scene with vray sketchup hdri

Irradiance map setting

Making of Exterior Scene with vray sketchup hdri

Light cache setting

Making of Exterior Scene with vray sketchup hdri

MATERIAL SETTING
glass windows

Making of Exterior Scene with vray sketchup hdri

map reflection

Making of Exterior Scene with vray sketchup hdri

concrete

Making of Exterior Scene with vray sketchup hdri

bitmap concrete

Making of Exterior Scene with vray sketchup hdri

bump concrete

Making of Exterior Scene with vray sketchup hdri

~~~~~~~~~~~~~~~~~~~~~~
Published By
Rajib Dey
~~~~~~~~~~~~~~~~~~~~~~

Monday, October 20, 2014

SketchUp Cloud Rendering

Rendering the SketchUp model is a big thing. A photorealistic and photogenic rendering of the SketchUp models makes a difference in the eyes of customers. It looks great, superb.
Many problems may occur such as getting the work done on time without eating up the development window or spending a small fortune on hardware that you will only use occasionally.

However, sometime rendicity releases immense processing power rupture open for the companies that get to know the spikes in order to obtain High Performance Computing (HPC) capability.

Getting HPC is not very easy. Most of the companies do not have the in-house processing aptitude. They are depending on demand drive faster turnaround, no production processing queues and increasing top line revenues.

It is to mention that the rancidity team has a major experience in innovative computing research and major experience in animation industry.

The SketchUp users virtually tied together for unlimited rendering when additional capacity expenditure baring needless technicalities.

What is rendicity? What does it do?

It is very simple. The first step is to create content. The seasoned 3D artists along with architects and engineers makes the models with the computer supported design tools. These tools create description of scenes, which identifies the characters, and objects are visible, camera position, lighting, and other visual elements. One of these tools, SketchUp, is a 3D modeling programme used by architects, interior designers, civil and mechanical engineers, filmmakers and videogame designers. A freeware version, SketchUpMake, and a paid version with additional functionality, SketchUpPro, are available.

SketchUp Cloud Rendering

The rendicity is actually the tool that helps the designers to create photorealistic image from the models of SketchUp.

The photo realistic rendering perfectly present the material properties, such as reflection and light properties such as colour or soft shadows. This can make the difference to the realism of image or frame though the properties and behavior are tremendously tough and intricate.

We can describe it. The light can reflect in mirror, but spread from painted exterior. The perfect rendering takes a great deal of computer power.

Depending on the complexity of the scene, it can literally take days to render each frame on an in-house render farm.

If you are trying to render on your local machine, this processing load can make other work difficult or impossible.

Rendicity has developed software that helps to exponentially speed up this process and lets you keep on working.

What is cloud rendering?

Cloud rendering is outsourcing the rendering process to an internet service that accepts 3D scene descriptions and returns finished images. There are a number of ways that such a service can be provided. One way is an opaque high-level service that simply accepts the scene account and returns the frame with no control over the underlying rendering process. This approach has the advantage of effortlessness but at the cost of control.

The SketchUp artist does not have control over how long the rendering will take and many resources will be assigned to it. In addition, services such as these typically share a pool of rendering machines will the studios using it. Sharing resources with others can create you nervous in case your digital possessions, such as 3D models, pour out to other studios of the world at large.

Another approach is to create private pools of machines (orrender“farms”) for studios, addressing concerns about security and providing the studios with control over the resource usage. An important factor to consider is whether render farms should be regarded as semi permanent infrastructure, that persist for months at a time, or disposable items that can be created and destroyed within a short time frame (an hour or less). A related issue is the billing model: should the studio pay for the service using pre-pay, pay-as-you-go model or receive a monthly bill after the fact?

Rendicity offers private render farms. They are created automatically, on demand, and can be disposed of at will. The Rendicity uses a pre-pay model, as it is the best fit for the transient and disposable nature of Rendicity render farms.

You begin using the Rendicity service by installing the software and buying rendering credit (using a credit card). You then create render farms as needed to render scenes and dispose of the farms (and the associated cost) when finished. When your rendering credit is exhausted you simply top up again.

SketchUp Cloud Rendering

SketchUp has a built–in OpenGL renderer that let you see your model in 3D with shadows and illumination from the sun. OpenGL is a multi-platform application-programming interface, or API, for rendering 2D and 3D vector graphics.

While SketchUp let you place colours and textures on objects, photorealistic rendering add-ons let you make the most of these textures and reflective features and helps, they ‘pop’ off the page, which adds realism and impact. Nothing improves a rendered image more than attention to detail, and, for example, adding the correct type and intensity of reflection, to not only the main features in an image but also the smaller elements; helps push the result towards photorealism.

Features: The key consideration when rendering in SketchUp is “How long will it take?” Many users need their work rendered quickly, and that requirement brings up the crucial relationship between time and the number of machines required for a particular rendering job.

Rendicity can provide machines with upto 32 core processors and 244 gigs of RAM to tackle the toughest of tasks and for those with less demanding require Machines with three GPUs are very affordable.

It’s worth reiterating the benefits of Rendicity’s approach to cloud based rendering for SketchUp users. The first is privacy, you don’t have to give a third party your assets.You have control and you don’t have the risks associated with handing off your work.The second is scalability; Rendicity can provide access to literally thousands of machines instantly.

You make the decision between speed and cost. It is essentially the best of both public and private rendering solutions: You have the control and security of an in house rendering solution with all the benefits of instant, and essentially unlimited, scalability. Finally, there is the unparalleled ease of use. Only the manager needs training on accessing the cloud and making financial decisions, leaving the artist or design free to do what they do best.

~~~~~~~~~~~~~~~~~~~~~
Published By
Rajib Dey
~~~~~~~~~~~~~~~~~~~~~
Render particles through the point system with Phoenix FD

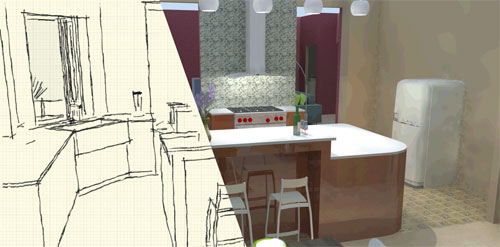
Michael McCarthy has presented an in-depth tutorial for rendering professionals that explains how to apply Phoenix FD to render particles through the point system.


~~~~~~~~~~~~~~~~~~~~~
Published By
Rajib Dey
~~~~~~~~~~~~~~~~~~~~~

Friday, October 17, 2014

How to render a Tuborg beer bottle with Keyshot 5

Peter Vertex presents a nice tutorial that shows the rendering capabilities of Keyshot 5. The rendering is applied on a Tuborg beer bottle.


~~~~~~~~~~~~~~~~~~~~~
Published By
Rajib Dey
~~~~~~~~~~~~~~~~~~~~~

Thursday, October 16, 2014

How to use sketchup mirror plugins to copy or replicate objects as mirror view

Sketchup Mirror plugin is a useful tool for AutoCAD users. This sketchup plugin facilitates the users to go for selecting axis’ to precisely mirror the object following the process they prefer. This plugin aids in mirroring objects easier inside SketchUp. The users can mirror geometry of any object at plane, line or point.


Watch the following useful video presented by Mufasu CAD that explains how to utilize sketchup mirror plugins to copy as well as replicate objects similar to mirror view.


~~~~~~~~~~~~~~~~~~~~~~
Published By
Rajib Dey
~~~~~~~~~~~~~~~~~~~~~~

Wednesday, October 15, 2014

How to extrude a 3D object along a straight path with the ‘follow me tool’ inside sketchup

Justin Geis, the founder of www.thesketchupessentials.com, presents a nice tutorial on Follow Me tool inside sketchup.

BThe sketchup follow me tool is an excellent tool for generating extruded shapes as compared to other toolset in sketchup.

With this video tutorial Justin briefly focuses on the fundamentals of applying follow me tool as well as how to extrude a 3D object along a straight path. The 3d modelers can find this tutorial useful for creating the models of wood base, pipes, cabinets, and various other objects.

In order to access the follow me tool, go to ‘view’ menu and select the ‘Toolbars’ option. Then opt for the ‘large toolset’ option and hit the close button. Now a toolbar will be visible at the left side of the screen with several options. After scrolling there will be an option visible with a brown half circle having a curving red arrow inside it. This is called follow me tool.


~~~~~~~~~~~~~~~~~~~~~
Published By
Rajib Dey
~~~~~~~~~~~~~~~~~~~~~

Tuesday, October 14, 2014

Learn to export sketchup model directly in C4D and Element 3D

Nick Southcote comes up with an informative tutorial that provides detailed processes for directly exporting a sketchup model in Cinema 4D as well as into Element 3D. When the C4D file will be saved, it can be imported directly into After Effects with the Element 3D plug-in.

Besides, this tutorial also focuses on some of the workarounds for accessing the best possible model in C4D (Cinema 4D).


~~~~~~~~~~~~~~~~~~~~~
Published By
Rajib Dey
~~~~~~~~~~~~~~~~~~~~~

Enjoy superior rendering with FluidRay RT integration plugin for SketchUp

FluidRay RT integration plugin for SketchUp has just been launched. This latest 3d modeling application is compatible with SketchUp 2013/2014 Windows version. Now one can render with FluidRay RT directly from inside sketchup.

FluidRay RT integration plugin for SketchUp will facilitate the users to import scenes, objects and materials directly from leading 3d modeling softwares like Alias Wavefront (.obj), SketchUp (*.skp)†, Rhino OpenNurbs (*.3dm), Collada (*.dae), FBX (*.fbx) , 3DS (*.3ds, *.ase), DirectX (.X), Stanford PLY (*.ply).

FluidRay RT contains the following exclusive features:-
  • Produce real-time & perfect Global Illumination substantially.
  • Perform high speed rendering with Intel Embree ray-tracing kernels.
  • Provide superior rendering quality devoid of tweaking impenetrable rendering parameters.
  • Various impartial real-time algorithms to deal with all potential lighting configurations: Bidirectional Path Tracing, Direct Lighting, Path Tracing.
  • Metropolis Sampling.
  • Synchronized Ambient Occlusion.
  • Comes up with whole system RAM without any GPU memory restriction. Having ability to render scenes through unlimited triangles and multiple GB of textures.
The users can download a 15-days free trial version containing all the aspects of the paid version as well as no limited resolution or watermarks.


~~~~~~~~~~~~~~~~~~~~~
Published By
Rajib Dey
~~~~~~~~~~~~~~~~~~~~~

Monday, October 13, 2014

Create simple design of a 3d chair and table with sketchup

Mufasu CAD presents a useful video tutorial for beginner’s sketchup users. Learn how to create the design of a 3d chair as well as table with the help of sketchup.


~~~~~~~~~~~~~~~~~~~~~~
Published By
Rajib Dey
~~~~~~~~~~~~~~~~~~~~~~

Friday, October 10, 2014

Use 3ds Max, V-Ray, and the VrayFastSSS material to present a stunning architectural visualization

Zillus presents an exclusive tutorial that focuses on how to apply 3ds Max, V-Ray, and the VrayFastSSS material to produce a stylish Vray marble material.


~~~~~~~~~~~~~~~~~~~~~
Published By
Rajib Dey
~~~~~~~~~~~~~~~~~~~~~

Thursday, October 9, 2014

Twilight render version 2.0 for sketchup

Twilight render is a photo-rendering plug in of Trimble SketchUp. Twilight puts power directly into Sketchup, making the model lively. It is now in news that Twilight render version 2.0 for SketchUp is all ready to release.

The benefits
  • No more need to export your models into awkward, midway formats.
  • No indistinct geometry or lost texture.
  • All the rendering would be completed directly inside the SketchUp using multiple biased and unbiased render methods for unparalleled control.
  • There will not be any fussing with complicated render settings or senseless numbers.
  • You can decide from a number of intuitive and powerful "Easy" render settings right at your fingertips.
The expectation is high for the Twilight render version 2.0 for SketchUp. It has been redesigned from the ground up, faster, friendlier, and more feature-full than ever. Experts are expecting that Version 2 to be a huge asset for every workflow from hobbyist to professional.
The maker of this software has reserved all the features from Version 1 and supplementary new ways to render, new materials, and new tools.

The makers of this software are hopeful to continue to provide SketchUp with an excellent product and an escalating toolset. Purchasing a permit for Version 2 will enable one to free upgrade to all the new Version 2 features in each release.
Twilight render version 2.0 for sketchup
Faster rendering: The rendering will be completed 50 per cent faster. With the most up-to-date Kerkythea rendering back-end, your renders will complete much faster. Post processing can be performed with hardware acceleration (for supporting hardware) bringing advanced post processing effects almost right away.

Cleaner redesign interface: It has a redesign interface which takes up less space. Editors were separated by job to let you concentrate on hand, Render, Animation, Batch Processing, and more. Popup controls give you single click access to all tool features, then disappear to leave the workspace clean.

Exploration render Real-Time: Our new Exploration Renderer routinely modernize your render viewpoint to match your SketchUp camera. The light, material, and environment editors are all ready with previews to show you your changes in a range of scenes.

The Twilight render version 2.0 fetch you commanding new Post-Processing tools so you can achieve more inside SketchUp and have better manage over your last product. Our post-production operations are performed straight on the high-dynamic range data so a designer get better results and more detail than from an outside picture editing programme.

~~~~~~~~~~~~~~~~~~~~~~
Published By
Rajib Dey
~~~~~~~~~~~~~~~~~~~~~~