Monday, July 29, 2019

Thumb Cinema for sketchup – Newest sketchup extension

Aerilius has developed Thumb Cinema, a useful sketchup plugin that supports sketchup 2019. It allows the users to apply the mouse wheel for scrolling through scenes of the model with the flick of a finger to instantly navigate to a particular scene or view an animation in action with fine-grained control of interim steps among succeeding scenes.
Application:
• The tool can be activated from the toolbar or menu Window → Thumb Cinema
• Scroll up/down over the 3D viewport to toggle scenes forward/backward. As an alternative, press ←/→ on the keyboard.
• Press ⇧ Shift to switch rapidly (9× speed).
• Type a number and press Enter to settle the number of interim steps among two scenes (1 for each scene being only a single step, default is 9).
Requirements:
SketchUp 2019.2 — The mouse wheel is a new feature only accessible since the second SketchUp feature release of 2019. If one possesses a current subscription, just download and install the upgrade.
To download the extension Thumb Cinema, click on the following link extensions.sketchup.com
Thumb Cinema for sketchup – Newest sketchup extension

~~~~~~~~~~~~~~~~~~~~~~~~~~~~
Published By
Rajib Dey
www.sketchup4architect.com
~~~~~~~~~~~~~~~~~~~~~~~~~~~~

Wednesday, July 24, 2019

How to make naturalistic pool water design in v-ray for sketchup

In this exclusive tutorial, you will get step-by-step guidelines to make a naturalistic pool water with v-ray for sketchup. Here, the design is made for a rectangular pool with white tiles.
Various water materials are provided in the pool. To avail water material, go to v-ray material library and click on the liquid category and choose the materials for water.
V-ray caustics effect is another useful function to make physically perfect water bodies in swimming pools. Caustics belong to the wavy light patterns which are developed under clear water while sunlight refracts through any uneven water surface.
Another useful option is to perform clay render in Vray SketchUp. For this purpose, go to the global switches in the Vray options and mark override materials.
To learn the complete process for making naturalistic pool water, go through the following video tutorial.
To download the model of pool, click on the following link gumroad.com/l/AI19
How to make naturalistic pool water design in v-ray for sketchup

~~~~~~~~~~~~~~~~~~~~~~~~~~~~
Published By
Rajib Dey
www.sketchup4architect.com
~~~~~~~~~~~~~~~~~~~~~~~~~~~~

Friday, July 19, 2019

How perform exterior rendering for a concrete box house with v-ray for sketchup

This is a useful tutorial for the architects where they will learn how to perform exterior rendering with v-ray for sketchup for a modern concrete box house.
Given below, some useful tips for rendering with v-ray for sketchup :-
1. Model what you observe.
2. Choose the time of day.
3. Render in eye level view.
4. Render in 2-point perspective.
5. Perform fast test renders.
6. Recognize your resources.
7. Apply sketchup materials inifially.
8. Utilize VFB channels.
9. Utilize settings presets.
10. Apply an HDRI image for your lighting.
To learn complete rendering process, watch the following video tutorial.
The model can be downloaded from Gumroad, by clicking on the following link gumroad.com
How perform exterior rendering for a concrete box house with v-ray for sketchup

~~~~~~~~~~~~~~~~~~~~~~~~~~~~
Published By
Rajib Dey
www.sketchup4architect.com
~~~~~~~~~~~~~~~~~~~~~~~~~~~~

Tuesday, July 16, 2019

Attribute Inspector – The newest sketchup extension in the extension warehouse

Aerilius has developed the exclusive sketchup extension called Attribute Inspector. It belongs to a viewer and editor for entity and model attributes.

Attributes in SketchUp means supplementary pieces of information that is preserved with any entity, like groups, components, scenes.

As for instance one can preserve a part number, unit price, weight or notes with an entity and read or adjust that information later. All attributes are contained in SketchUp's report feature.

The purpose of this inspector is to maintain the user interface nominal and fully organized similar to SketchUp's inspector dialogs, it allows you to choose one or more entities and demonstrates their attributes. By editing the text fields, The changes are instantly reflected to the entities.

Application: (Menu) Window → Attribute Inspector

The dialog presents the attribute dictionaries of the currently selected drawing element. Apply the selection tool of SketchUp to choose another elements.

Press the +, ‒ buttons on the left side for addition or elimination of an attribute dictionary, and press +, ‒ on the right side for addition or elimination an attribute.

To choose other types of entities, select the type from the dropdown and perform:

• drawing elements: With SketchUp's selection tool it is possible to choose one or more drawing elements in the model (edges, faces, groups)
• definitions: With SketchUp's selection tool, it is possible to choose components/groups/images
• materials: By applying the materials browser and it is possible to choose a material. Attribute Editor will demonstrate the current material (could be not functional on OS X due to API bug).
• layers: With the layer manager and verify the radio button of the layer.
• scenes: With the scenes manager, it is possible to double-click the scene (to make it the current scene).
This sketchup extension is available in extension warehouse extensions.sketchup.com
Attribute Inspector – The newest sketchup extension in the extension warehouse

~~~~~~~~~~~~~~~~~~~~~~~~~~~~
Published By
Rajib Dey
www.sketchup4architect.com
~~~~~~~~~~~~~~~~~~~~~~~~~~~~

Saturday, July 13, 2019

Some basic native tools in sketchup and their functionalities

Sketchup contains its own native tools which can be used to navigate, generate, and edit a 3D model. Besides, it also contains supplementary plugins and extensions. These plugins can perform a specific task that native tools lack.

Given below, the detail lists of some vital native SketchUp tools :-

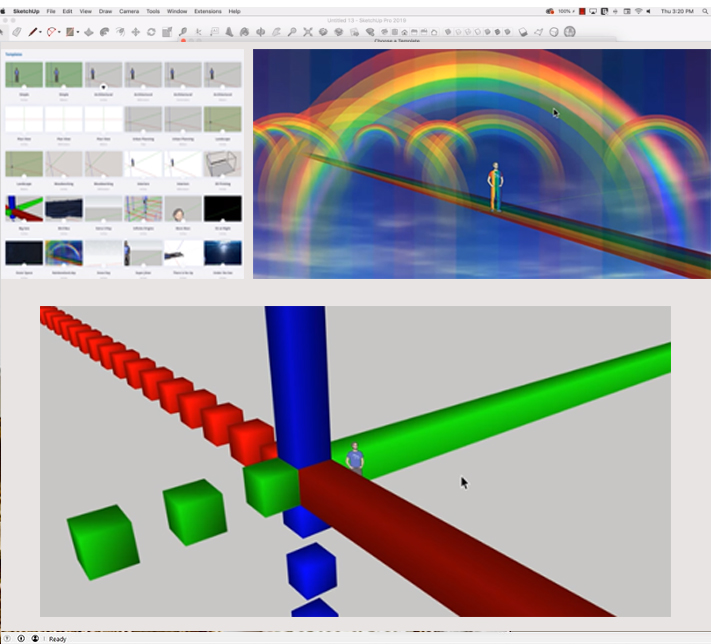
Navigation Tools: With the Navigation Tools, the users can move all around the SketchUp viewport. These tools can be managed by the mouse buttons or applying the shortcut keys.
The navigation tools are sub-categorized as follow :-
  • Zoom: It facilitates the users to be nearer or away from the object to be modeled with the scroll wheel of the mouse by moving it forward or backward. It is effective while viewing a minor detail or a general view in the 3D model. The quick shortcut key is “Z”.
    • Orbit: It allows orbiting the camera view by pressing and retaining the scroll wheel of the mouse. It is effective for analyzing the models from several angles. The quick shortcut key is “O”.
    • Pan: With the panning tool, it is possible to move devoid of losing the earlier perspective. It only arranges a vertical and horizontal movement and it is useful while framing a scene. To avail this tool, just hold the scroll wheel and press Shift simultaneously. For quick accessibility, press “H”.
Drafting Tools: Drafting Tools can be applied to generate something from the beginning. Drafting tools are sub-categorized as follow :-

• Line Tool: While design something in SketchUp, this tool is inevitable. It facilitates the users to produce any 2D surface by relating line segments. The lines are drawn in the X, Y and Z axis by the left click of the mouse. The quick shortcut key is “L“.
• Arc Tool: This tool not only draws a section from one point to another but also assign a third point to identify the arc curvature. The quick shortcut key is “A“.
• Eraser Tool: The main purpose of it is to rub out the unnecessary line segments. To apply it, just click with the left button of the mouse over any line. The quick shortcut key is “E“.

Editing Tools: SketchUp contains the following editing tools:

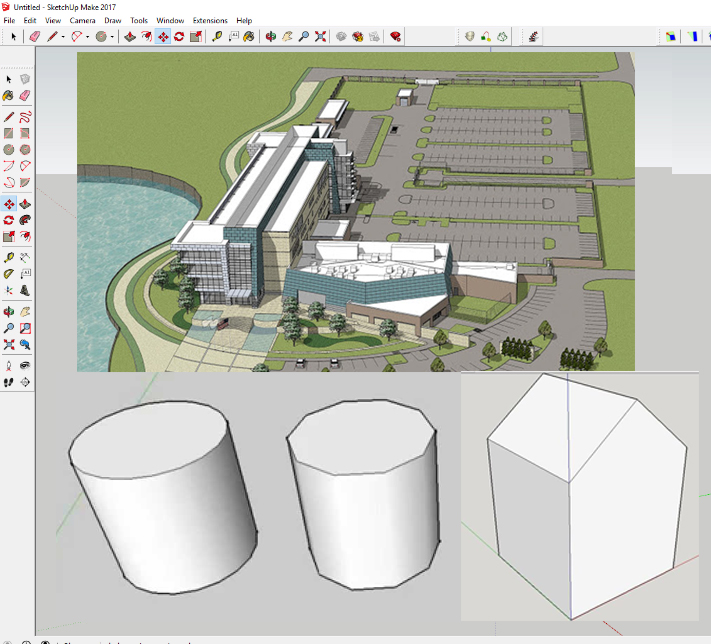
• Push Pull: It extrudes a 2D surface to transform it into a 3D shape. Just press “P” button to access it and place the cursor over the face according to your choice and then clicking the left button of the mouse for extruding.
• Scale: With this tool, it is possible to create any object selected bigger or smaller by applying a bounding box with some grips. Choose one grip and shift the cursor to scale your object. To make the scaling identical, choose the grips in the corners. The quick shortcut key is “S”.
• Move: Just press the “M” key and choose the object to be moved. The place you click in the object is considered as moving point. This prime objective of the tool is to adapt things in your model.
• Rotate: Just press the “Q” key and then clicking in the object to be rotated. The point you click on your object will be considered as the pivot point.
• Offset: It is used to create an equidistant line of any face. Just press “F” button and place your cursor on the line or surface to be offset. Then shift the cursor outside or inside as per your requirement, and finally provide a selected distance with the numeric pad.
• Follow Me: It extrudes a surface along any specified Path. Just choose the path to be worked with, then from the Edit toolbar, choose the “Follow me” tool. The surface to be extruded should be perpendicular to the selected guideline. By double-clicking to the surface, the extruded shape will be completed that follows the path direction.

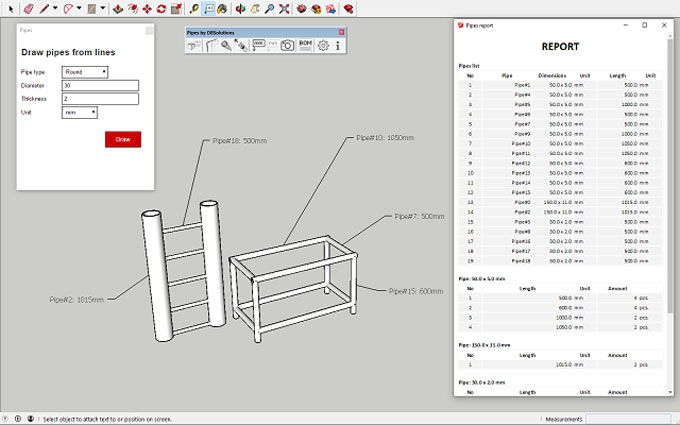
Extensions: SketchUp also contains some native extensions which can be activated from the Toolbars available in the View menu.

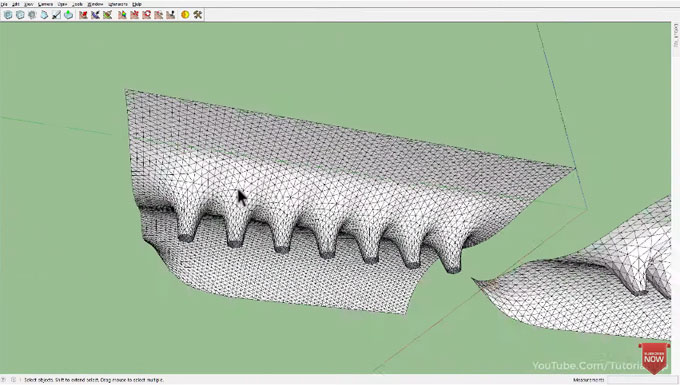
• Sandbox Tools: This set of tools is suitable for terrain modeling from the beginning or from specified lines, like topographic curves for instance. It can produce a triangulated mesh that can be edited later as per requirements of your project.
• Solid Tools: It is only applicable with solids. They can be groups or components. It applies Boolean operations to integrate, subtract, split, intersect or trim one shape from another. It facilitates the users to generate more complex and cleaner models. It is available in the View menu in the toolbars section.


Some basic native tools in sketchup and their functionalities

~~~~~~~~~~~~~~~~~~~~~~~~~~~~
Published By
Rajib Dey
www.sketchup4architect.com
~~~~~~~~~~~~~~~~~~~~~~~~~~~~

Friday, July 12, 2019

Creating Polygons in SketchUp in 5 seconds

SketchUp is full of various 3D models, tools and extensions which is a little tough to handle for beginners, creating a Polygon in SketchUp with some easy tools is good start for beginners.

Creating different figures in SketchUp is an easy work which can be done with the help of some tools found in this software. In every article we discuss about some complex thing which can’t be done without applying lots of extensions and tools but these are strictly for professionals who have been using SketchUp for over years. Beginners or novice users are not fully aware about all these extensions, that’s why we have come up with a simple item this time which can be useful for them

About SketchUp: SketchUp or Google SketchUp is mainly a 3D modeling computer program that is used for a broad range of drawing applications used by architects, interior designer, landscape architects, civil and mechanical engineers, film and video game designers also. SketchUp can be getting as a freeware version named SketchUp Make and a paid version with many more extra benefits called SketchUp Pro. SketchUp is software from Trimble Company and there is an online library of free model congregations and 3D Warehouse to which users can add other models; besides that, the program has drawing layout functionality with variable ‘styles’, supports third-party ‘plug-in’ programs hosted on the Extension Warehouse to supply other abilities and enables placement of its models in Google Earth. As SketchUp users are most of architects, designers, builders, makers and engineers etc. who works hard to give a nice shape to our physical world, they need great tools to do the work.

In this article, we will see the steps of creating a polygon using some simple tools in SketchUp but before that we need to know a little bit about polygon.

The Polygons are mainly two-dimensional closed figure which are made up of some straight lines and here each line segments intersects exactly at the endpoints.

Creating equilateral polygons in SketchUp is just a matter of seconds as it is not necessary to draw each side manually. Here are the steps:

  • At first users need to select the Shape tool from the toolbar or can press C for the shortcut.
  • At the bottom right corner there is a status bar where they need to specify the number of sides after selecting the shape tool. Here users can type anew number and SketchUp will make a new equilateral shape with that number of sides.
  • After specifying the number of sides, SketchUp will ask for the radius of polygon and it will be an inscribed polygon.


Creating Polygons in SketchUp in 5 seconds

~~~~~~~~~~~~~~~~~~~~~~~~~~~~
Published By
Rajib Dey
www.sketchup4architect.com
~~~~~~~~~~~~~~~~~~~~~~~~~~~~

Pipes Tubes Profiles 1.2.0 for Sketchup

Pipes Tubes Profiles 1.2.0 is the newest sketchup extension that is available in extension warehouse. It is compatible with sketchup 2017, sketchup 2018 and sketchup 2019.
This sketchup extension can be used to draw pipes, tubes or profiles as well as create documentation, BOM and cut lits.
This extension facilitates the users to perform the following works rapidly and efficiently :
- draw pipes
- modify their length
- create documentation
- use nesting (cut optimisation list) function
- generate Bill Of Material
Click on the following link to download the trial version of the plugin extensions.sketchup.com
v1.2.0
- new function - nesting (cut optimisation)
Go through the following video tutorial.
Pipes Tubes Profiles 1.2.0 for Sketchup

~~~~~~~~~~~~~~~~~~~~~~~~~~~~
Published By
Rajib Dey
www.sketchup4architect.com
~~~~~~~~~~~~~~~~~~~~~~~~~~~~

Thursday, July 11, 2019

Advanced templates in SketchUp Pro

With the new upgrade version SketchUp Pro has introduced twelve new templates for SketchUp Extension Warehouse to make modeling in SketchUp more fun than before.

According to the developers, SketchUp Free is the simplest, consistent 3D modeling till date that will help the user to access, learn and share the models with others easily. It has been more than a year at SKetchUp Headquarters with huge amounts of coffee consumed and after a long wait, SketchUp HQ finally released SketchUp Pro’s new version SketchUp Pro 2019.

The whole SketchUp team has been discussing to bring SketchUp lovers the newest development in the life of their products; they proudly announced a brand new way to purchase all the SketchUp products which is the SketchUp Subscription. They have offered the best value so that users and SketchUp lovers can easily choose the perfect combination of SketchUp for every project, workflow or creative concept.

This is a real opportunity to challenge the team itself to earn users’ business every single day by continuously improving the tools which are needed and loved whole year. The new ways to buy SketchUp is on their website; still the team has been working to bring subscriptions for years as according them it is the best way to deliver more value to the users in a single package. Their shift in new business will make it easier for new users to buy SketchUp and for current users; even more SketchUp products can be easily available. Besides that, this shift in business will help to keep them accountable to run business by releasing new features as often as possible; this is a challenge for them which they have taken proudly and moved process from an annual update cycle to a continuous cycle.

SketchUp users have introduced with the new features of SketchUp Pro 2019 and with this the SketchUp team has added 12 new templates to make modeling in SketchUp more fun. Here are the names of the templates mentioned below:

  • Extra X-Ray Template
  • Super jitter Template
  • Big Axis Template
  • Outer Space Template
  • Under The Sea
  • Snow Day Template
  • More Marc
  • Bird Box Challenge Template
  • Rainbowland Template
  • There Is No Up Template
  • Infinite Origins Template
  • Night Time Template

Some of them include the mode “Dark mode” for the night time designs; “Rainbowland” is a little happier and more colorful while “Big Axis” helps to get back in the axis again. These new templates can be accessed by pulling them up in the template directory and scrolling towards the bottom.


Advanced templates in SketchUp Pro

~~~~~~~~~~~~~~~~~~~~~~~~~~~~
Published By
Rajib Dey
www.sketchup4architect.com
~~~~~~~~~~~~~~~~~~~~~~~~~~~~


Quick tricks for artisan and SketchyFFD sketchup plugins

In this exclusive sketchup tutorial, you will get some useful tips on Artisan and Sketchy FFD sketchup plugins to save significant time for modeling.
Artisan: Artisan refers to a SketchUp extension that comprises of robust organic modeling tools (subdivision, sculpting, soft selection etc). It is specifically designed for artists, designers and landscape architects.
Artisan can be applied for generating Terrain and landscapes, Furniture, Characters, Abstract sculptures and decorative objects, Fabric, curtains, and pillows, Rocks, Trees, and Plants.
This plugin is compatible with SketchUp 2016, SketchUp 2017, SketchUp 2018, SketchUp 2019.
Click on the following link to download the trial version of the plugin artisan4sketchup.com
SketchyFFD: It is a free form deformation tool of geometry. This sketchup plugin includes a control cage to an object to facilitate the mesh to be operated through control points. It is compatible with sketchup 2019.
Go through the following video tutorial to learn some useful tricks for the above two sketchup plugins.
Click the following link to download the plugin TutorialsUp
Quick tricks for artisan and SketchyFFD sketchup plugins

~~~~~~~~~~~~~~~~~~~~~~~~~~~~
Published By
Rajib Dey
www.sketchup4architect.com
~~~~~~~~~~~~~~~~~~~~~~~~~~~~

Wednesday, July 10, 2019

"About Maciej Fijalowski of VR Sketch"

Maciej Fijalkowski is the one member among the founders of the VR Sketch in SketchUp, he and his team is working on developing VR with SketchUp to make it more accessible.

Maciej Fijalkowski is the surfer, programmer and climbing gym designer about the current state of VR industry and the one behind the VR Sketch extension. He is basically from Łódź, Poland but now living at Cape Town Area, South Africa. He went to Warsaw for study; he always wanted to go and study abroad but couldn’t afford so he started to explore more as a traveler. He also worked at the University of Warsaw at the Center for Mathematical and Computational Modeling; while working there and being a student he got into Google Summer of Code and became interested in Pypy.

Later his company has introduced a new concept into the Sketch Up word with VR Sketch which enables the creation, manipulation and presentation of models in a fully immersive virtual reality environment.

A little about VR Sketch: It is an extension for SketchUp which gives anyone the ability to create, edit and view their models in Virtual Reality. It also gives designers the ability to communicate space that clearly allows them well informed decisions to make with instant feedback. VR Sketch is a small but a dynamic company which plans to revolutionize the thinking of people about the way of design and faster design. The landscape of hardware abilities will only improve and everyone can see more and more design work done in VR. Sketch will keep iterating quickly to deliver cutting edge solutions for more years.

Inspiration behind VR Sketch: As per his words, during the process of designing and creating a new rock climbing gym, he purchased a VR headset as a help in visualizing projects. Though SktechUp is a very easy to learn but it can be difficult while mapping of 2D screens to 3D space. So they thought to make something which will help to solve this problem and thus they started the company in April 2018. Maciej is now living in Cape Town with his co-founder, Duncan Fraser who is an architect and travels often.

Projects: The team has handled many things together in past but from a long time they only focused on a project called Pypy which is an open source software for a faster way to run Python code. VR Sketch is their first venture into architecture and design which has introduced to the through SketchUp 3D Basecamp with greater diversity in those attending versus the Python conferences. VR Sketch needs less of any skills which a trained architect must have and helps architects to work more easily on the 3D models.

VR Sketch works with all the high-end hardware like HTC Vive, Oculus Rift those with touch controllers and some mixed reality headsets. They have been working on more major headsets which will be function by Oculus Quest. The team has focused on doing things well for the higher-end devices and consider the availability of any design tool to be a main consideration.

Industry trends to follow for future app development: According to them, much of 3D design will move into the VR space and everyone will see huge iterations in hardware design. Headsets will be lighter and more affordable and controllers will be less clumsy. Software side will also be upgraded with major changes; this huge evolution and interconnection between hardware and software in the VR industry will create many more opportunities for them. Now they are working on a cloud-enabled collaboration which help users in working on a model with distant team members simultaneously and keep a full version control.

Dream Project: He is really interested in urban design and with an unlimited budget, he would be involved in developing a “Chartered City” as theorized by Paul Romer, where it is possible to play with new ideas every time.

Source: wwww.blog.sketchup.com

About Maciej Fijalowski of VR Sketch

~~~~~~~~~~~~~~~~~~~~~~~~~~~~
Published By
Rajib Dey
www.sketchup4architect.com
~~~~~~~~~~~~~~~~~~~~~~~~~~~~


GOING FROM SKETCHUP TO UNITY USING PBR MATERIALS

SketchUp users are pro in creating different textures and models using various textures from the Extension Warehouse; similarly they can go from SketchUp to Unity with PBR materials.

This article will clearly describes about PBR materials and the way of going back on the PBR to Unity 5.6 pipeline workflow for SketchUp through some easy steps.

About SketchUp: SketchUp or Google SketchUp is mainly a 3D modeling computer program that is used for a broad range of drawing applications used by architects, interior designer, landscape architects, civil and mechanical engineers, film and video game designers also. SketchUp can be getting as a freeware version named SketchUp Make and a paid version with many more extra benefits called SketchUp Pro. SketchUp is software from Trimble Company and there is an online library of free model congregations and 3D Warehouse to which users can add other models; besides that, the program has drawing layout functionality with variable ‘styles’, supports third-party ‘plug-in’ programs hosted on the Extension Warehouse to supply other abilities and enables placement of its models in Google Earth.

PBR: PBR or Physically Based Rendering is a method of shading and rendering that provides a more perfect representation of how light interacts with the surfaces. PBR is also referred to as Physically Based Shading depending on the aspect of pipeline being discussed; PBR is usually specific to shading concepts and specific to rendering and lighting. Though, both these terms describe the process of representing assets from a physically accurate standpoint.

SketchUV: It is an UV mapping tool which is used to draw spherical, cylindrical, planer, tube, box, quad shapes and can do save, load, export and import. SketchUV is designed to be easier to use and UV mapping in general takes some time to get use to. The features are noted here:
  • It can draw planar, cylindrical and spherical UV projections at any orientation
  • It can be used in Box mapping
  • Tube mapping- it can be a great tool for objects created using follow-me tool
  • It can do Quad face mapping
  • It can also move, rotate and scale UVs
  • It can draw Triangulate geometry and remove distorted textures
  • It also save UVs and Load UVs where change materials and maintain UVs
  • It can export and import UVs using third party UV mapping software

Steps to go from SketchUp to Unity using PBR material:

  • Before beginning the process users need to install SketchUV extension for SketchUp from Extension Warehouse.
  • Then took the PBR textures and apply it on the model.
  • At last use the Pixplant for seamless texture and render map creation as this is powerful and easy to use.
  • For detailed process go towwww.sketchucation.com

Going from SketchUp to Unity using PBR materials

~~~~~~~~~~~~~~~~~~~~~~~~~~~~
Published By
Rajib Dey
www.sketchup4architect.com
~~~~~~~~~~~~~~~~~~~~~~~~~~~~

Tuesday, July 9, 2019

Demonstration of Axes Tools sketchup plugin

In this sketchup tutorial video, you will learn how to use Axes Tools sketchup plugin to reset groups or component axis to their bounding box centre or corners.

This sketchup plugin is developed by Thomas Thomassen. It is compatible with SketchUp 6, SketchUp 7, SketchUp 8, SketchUp 2013, SketchUp 2014, SketchUp 2015, SketchUp 2016, SketchUp 2017, SketchUp 2018, SketchUp 2019.

This sketchup plugin is effective for annoying DWG imports where the insertion point of the blocks are really very far, leading to jitter of the components.

Menus & Toolbars
• Plugins » Axes Tools


Requirements
• TT_Lib2 — 2.7.0


For online demonstration, go through the following video tutorial.

To download the plugin, click on the following link sketchucation.com

Demonstration of Axes Tools sketchup plugin

~~~~~~~~~~~~~~~~~~~~~~~~~~~~
Published By
Rajib Dey
www.sketchup4architect.com
~~~~~~~~~~~~~~~~~~~~~~~~~~~~

Monday, July 8, 2019

Tape Measure Tool in SketchUp

SketchUp’s Tape Measure Tool works as a Protector Tool and comes with the Measurements box that helps users to resize the whole model with a single measurement.

Tape Measure Tool is the Protractor Tool in SketchUp, and the Measurements box enable users to model precisely; this tool will help user to resize the whole model based on a single measurement. This article is a full guideline about Tape Measure tool and its working methods.

Getting started with the Tape Measure Tool: SketchUp’s Tape Measure Tool can be found in the Tools menu or via the Getting Started menu, Construction or Large Toolset toolbar. There is also a shortcut key which is T; after activating the cursor in the workspace it will be changed to a Tape Measure icon that has 2 models of measuring. With this tool, users can measure a distance and set precise guidelines or guide points. While the Protractor tool enables users to measure angles and set a precise angled guide line.

Using Measure mode: It is a wonderful way to report measurements from a point to many points; to change to a new measuring point just press ESC key and pick a new point to measure from. This mode also acts like a scale in the model and this method is a global resize which means not only the model is resized before but can be done with an object locally.

Guiding Create mode in SketchUp: In this mode, the Tape Measure Tool allows the users to plot guide lines and points in SketchUp to accurate draw in the workspace. This mode has also different methods of drawing guides and it totally depends on the clicked place and subject. 1) Infinite Guide lines in SketchUp is created when users glide on an edge in SketchUp and click it but while creating the infinite guides using the array commands isn’t possible. 2) To create guide lines that terminate with a construction point, users need to first select an endpoint then select the desired direction and length of the measurement.

Deleting Guide lines in SketchUp: The Select tool or the Erase tool can help to target and remove areas but the Delete Guides option in the Edit menu which will delete all lines and points within the current context of the model. So if the user is within a group or component and choose this option then it will remove all guides within that context but not outside.

Managing and deleting Guide lines in SketchUp using extensions: The right way to manage guide lines and guide points in SketchUp by using an extension which is known as TIG’s Construction Line Delete via Context extension that extends SketchUp by adding further options while Right clicking in an existing Guide Line. To install this extension, users need to go to the ExtensionStore in SketchUp, then need to search feature and type guide and choose the extension and install it. Now in SketchUp, users have access to more deletion and layer management options for Guide Lines and Points via the context menu; this option also has placing Guide Lines and Guide Points on dedicated layers, deleting Guide Line and Guide Points from the active selection or applying it to both Guide Lines and Guide Points.


Tape Measure Tool in SketchUp

~~~~~~~~~~~~~~~~~~~~~~~~~~~~
Published By
Rajib Dey
www.sketchup4architect.com
~~~~~~~~~~~~~~~~~~~~~~~~~~~~


Friday, July 5, 2019

"CLEANUP3 TOOL FROM SKETCHUP EXTENSION WAREHOUSE"

SketchUp is an essential tool in 3D printing and SketchUp Extension warehouse is full of tools that are essential in the 3D printing and creating 3D printed models, such as CleanUp3.

About CleanUp3:

CleanUp3 is an essential tool for 3D printing which is created by Thomas Thomassen, who is a Modelmaker with a large desire for physical, digital and traditional design in most genres of the trade. He has focused on webdesign/programming and 3d visualizations and he has specialized in 3D modeling, SketchUp, webdesign, graphic design and web programming. This tool checks and simplifies the geometry of every SketchUp model and it combines multiple faces, eliminates extraneous data and erases any lines that don’t make a face.

CleanUp3 options:

Two of the most useful CleanUp3 options are Erase Duplicate Faces and Repair Split Edges, which can be enabled in the CleanUp3 menu. Usually Duplicate faces and split edges are errors that necessarily appear in the SketchUp 3D model while working in SketchUp and they drive 3D printer nuts. But both these two errors are difficult to recognize and repair manually. Besides that, it is also a great tool at simplifying STL files or 3D-printable files that need to import into SketchUp.

Features of CleanUp3

  • It fixes duplicate component definition names in model scope
  • Also clears unused items
  • It can erase hidden geometry
  • Also erases duplicate files
  • Erases lovely edges except edges on cut plane
  • Can remove edge material
  • Repairs split edges
  • Creates smooth and soft edges
  • Then put edges and faces to Layer0
  • Can merge identical materials
  • Also merge connected co-planer faces

Menus & Toolbars: Plugins>CleanUp

About SketchUp:

SketchUp or Google SketchUp is mainly a3D modeling computer program that is used for a broad range of drawing applications used by architects, interior designer, landscape architects, civil and mechanical engineers, film and video game designers also. SketchUp can be getting as a freeware version named SketchUp Make and a paid version with many more extra benefits called SketchUp Pro. SketchUp is software from Trimble Company and there is an online library of free model congregations and 3D Warehouse to which users can add other models; besides that, the program has drawing layout functionality with variable ‘styles’, supports third-party ‘plug-in’ programs hosted on the Extension Warehouse to supply other abilities and enables placement of its models in Google Earth.

About Extension Warehouse:


It is an online resource with various plug-ins developed made especially for SketchUp and these extensions help to add some special tools and features to SketchUp. These extensions can be found for any particular application like drawing or 3D printing and some industry specified tools for architecture, interior design, construction and many more. So basically in this Extension Warehouse people can do the following things:

  • Users can search extensions by name or as per the functionality.
  • They can also install various extensions with a single click of a button.
  • Or users can also control all the extensions from easy-to-use location in the My Extension page.

CleanUP3 tool from SketchUp Extension Warehouse

~~~~~~~~~~~~~~~~~~~~~~~~~~~~
Published By
Rajib Dey
www.sketchup4architect.com
~~~~~~~~~~~~~~~~~~~~~~~~~~~~

Thursday, July 4, 2019

"SketchUp Viewer will help to experience all the realities"

Mixed reality technology is a game changer to visualize designs and design options; SketchUp Viewer has introduced Windows Mixed Reality to review and approve designs.

The work process has changed a lot from past days, now the work is not bond in the desk or office anymore; actually it happens on the move. Now-a-days work has become more technology based and less place-based. The SketchUp Viewer family of products has dedicated from a long time to lubricating the wheels for their customers who want access to some simple and effective project collaboration tools on the world’s leading mobile and XR platforms. The SketchUp team has proudly announced the release of new version of SketchUp Viewer for Virtual Reality which is the latest addition to the Viewer family. SketchUp Viewer for VR is consistent with Oculus Rift, HTC Vive and Vive Pro headsets also; moreover that, SketchUp Viewer also supports the plethora of Windows Mixed Reality VR headsets with the latest release of SketchUp Viewer for Windows Mixed Reality.

About VR or Virtual Reality:

Virtual Reality or VR is a new way of using computer technology in creating a simulated environment and its most recent added component is the head-mounted display or HMD. Human beings are visual creatures and display technology is often the single biggest difference between immersive VR systems and traditional user interfaces. Virtual Reality copies a realistic environment that allows builders to contact with a particular structure using a series of scanned images. It is an important form of automation as it uses programmed 3D scans that are very perfect and not prone to human error. It can simulate as many senses as possible like vision, hearing, touch even smell but the only limits to near-real VR experiences are the availability of content and low-cost computing power.

SketchUp Viewer for Windows Mixed Reality:

It has made possible to engage colleagues and clients in experimental design review which is a powerful and new way to measure, coordinate and communicate in mixed reality. With the use of any Windows Mixed Reality headset like VR or HoloLens, any team and teammates can virtually inhabit a design, helping to facilitate clear and efficient communication about complex spatial issues. Besides that there will be also the ability to interact with the designs as virtual or holographic scale models, supplementing or alleviating the need to build physical models of the projects. The application also has many of the viewing, navigation and information tools that SketchUp users are habitat in using; users can easily fly around the project models by choosing from the list of the scenes created in SketchUp or can toggle layer visibility on-and-off to control model visibility or can use the Tape Measure tool and Entity Info tool to get quick view about the model. SketchUp Viewer is free to install and needs that users sign in a Trimble Account; just an active SketchUp Pro or SketchUp Studio subscription is needed to access all application features.

SketchUYp team also updated the AR/VR Extension for SketchUp Pro for easily publishing SketchUp Projects to any AR/VR device. Here is a little description of all SketchUp viewer apps:

  • SketchUp Viewer for Mobile: It gives the power to view designs on any iOS and Android device; also supports AR model viewing on ARKit and ARCore enabled devices.
  • SketchUp Viewer for VR: It brings the projects to life in VR; this app supports Oculus Rift, HTC Vive and Vivo Pro headsets. Users can download a Windows Installer from the My Apps page at sketchup.com.
  • SketchUp Viewer for Windows Mixed Reality: It is designed to support the ever-expanding list of mixed reality headsets offered by Microsoft and its partners. It can be installed from the mIcrosoft Store and is available for users with an active SketchUp Pro or SketchUp Studio subscription.


SketchUp Viewer will help to experience all the realities

~~~~~~~~~~~~~~~~~~~~~~~~~~~~
Published By
Rajib Dey
www.sketchup4architect.com
~~~~~~~~~~~~~~~~~~~~~~~~~~~~

How to model a rooftop patio in sketchup

Justin Geis, the renowned sketchup tutor, presents another useful video tutorial for sketchup users. In this vide, he teaches you how to model a rooftop patio area in sketchup.

While creating the model, various tools like group tool, push pool tool as well as instant fence and railing plugin from Valley Architects are used.

Instant Fence And Railing

This sketchup plugin offers the following exclusive features :-

1. It is compatible with Mac or Windows
2. It comprises of fences, balcony railings, handrails, banisters..
3. Pickets, rails and fencing are provided on center or situated at a specified side
4. Textures will adapt with fence and railing parts
5. Various options exist for posts, pickets, and handrail profiles, along with user defined shapes.


6. Options are available for handrail returns, extensions, volutes and brackets.
7. Various options exist for panel clips or stops.
8. Metric or Feet / Inches
9. Option to follow terrain elevation.
10. More than 300 preset styles are arranged into libraries. The custom styles can be created and saved with images and icons
11. Interactive Menu: icons+images+text
12. All fences or railings are modeled as 3d, 2d face me or 2d hide lines
13. Automatic quantity take-offs and keeps take-off history log.
14. Single entry macro height modification.


To learn the complete process for modeling the patio area in sketchup, go through the following video tutorial.

Read more

How to model a rooftop patio in sketchup

~~~~~~~~~~~~~~~~~~~~~~~~~~~~
Published By
Rajib Dey
www.sketchup4architect.com
~~~~~~~~~~~~~~~~~~~~~~~~~~~~