Showing posts with label sketchp. Show all posts

Wednesday, May 14, 2014

Background Modification in Sketchup

Background Modification in Sketchup 

Here are the tips on how to change the background in SketchUp (not for render).
Usually when we want to present our SketchUp drawing to our client, it’s only a sky, isn't it? SO, with this way, we can change / customize our background so at least it will make our scene more real although it’s only a sketch without rendered.

If you want to render the scene (vray or podium or anything else render engine), then you should use HDRI or customize on Photoshop.

So, here is the step by step: 

1. Show the Styles window by accessing menu Window -> Style.

2. In window Style, choose tab "Edit", then choose "Watermark" from the menu

3. Click "(+)" icon then select a bitmap whatever you want to show for your background image, usually its a sky image or something else. The bigger the image size will make more smooth.

4. then, you will get a dialog question window, choose "Background". Then, "Watermark1" on the option can changed/renamed to whatever u want.

5. The next dialog, let the settings to the default, just click "Next".

6. Next dialog, choose "Positioned in the screen", then move the slider in the "Scale" to the right, This means our bitmap will strecthed fully. Thats why i suggest you use bigger image size so you will get smoother result.

7. Then, on the bullet icon, this means how the image repetition start. In this case, i select the bottom center. But you can select/try your own based on your image. Then, click "Finish"

Done.. ! ^_^ .. the parameter i mention above is not absolute, you can take your time to experience .. i hope this is useful for you ..
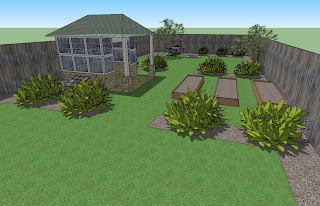
Background Modification in Sketchup  

Background Modification in Sketchup   

~~~~~~~~~~~~~~~~~~~~~
Published By
Arka Roy
www.sketchup-ur-space.com
~~~~~~~~~~~~~~~~~~~~~

Monday, May 5, 2014

SketchUp Free and Pro version (2013 & 2014) Released

SketchUp Free and Pro version (2013 and 2014) is a collection of Video Graphics authored by Jean-Luc Clauss. This training video is highly useful as it helps in mastering drawing and communication with SketchUp 3D 2013 and 2014.


It is essentially very useful for users of the free and pro version. The collection presents Earth and its environment that includes screen interface, toolbars, settings, etc. It also aids in learning how to shape concepts starting with simple 2D drawings before moving quickly to 3D. Users can also see how to make and change modeling. The modules reveal the art of establishing an orderly and hierarchical modeling with precise routes. The modules are devoted to the optimization model and users can also see techniques to monitor and control at any time each step of the work.

SketchUp Free and Pro version (2013 and 2014) also discusses visualization techniques like how to select a point of view or a mode of representation and save, dress the 3D texts and quotations model several methods for a successful record, with the Styles dialog boxes and Match Photo. Users can also know how to export their reports. Several sequences detail the techniques professional layouts listed and wide through the LayOut extra software included in the Pro version of SketchUp.

The main steps of this training ends with a practical: the modeling of a house will serve as a common thread, the first sketches of modeling the final presentation. Using Style Builder, included in the Pro version, will be explained by an application step by step, showing how to create his own style of drawing freehand and how to apply the model drawn in SketchUp.


The collection concludes by presenting the user in a specific module, the latest of the 2014 version of SketchUp. All the examples in this training and all source files are available for download so that the user can perform all the manipulations presented in this video. Modules Video includes:
  • Introduction to SketchUp
  • Models
  • The work environment SketchUp 2013
  • 2D Drawing
  • Exploration, selection and masking entities
  • Drawing in 3D
  • Travel and modifications 2D and 3D
  • Ranking groups and components
  • Control and optimization modeling
  • Display Model
  • Dress Model
  • Model Rendering
  • Export Model
  • SketchUp Optimization
  • Drawing lines and shapes in Layout
  • Inserting and Managing Files in Layout
  • Management and pages Layers
  • Publishing and available features in Layout
  • Wrapping paper in Layout
  • Layout of the document in Layout
  • Style Builder
  • New Earth 2014.
Published by Eni Eds SketchUp Free and Pro version was released on April 2014.

SketchUp Free and Pro version (2013 & 2014) Released   

~~~~~~~~~~~~~~~~~~~~~~
Published by 
Arka Roy
www.sketchup-ur-space.com
~~~~~~~~~~~~~~~~~~~~~~


Monday, February 13, 2012

A Paper House Kits – using by Google SketchUp

Google SketchUp 3D graphic software is one of the popular tools which you can get free and easily draw 3D models of anything by helping of Google SketchUp. Paper House Kits is just part of starting.

At the beginning, just download the free Google SketchUp three-dimension graphic software. It is very easy to downloading the software. At first open Google page in browser & key the word “sketchup”. Then agree to a licensing agreement and the software will be downloaded for using. Installation was as fast as possible.

For the designer who has not used 3D software in earlier, it may be little bit difficult to use it. There is 3D lady standing at the intersection of 3 different lines in opening the SketchUp application. There are three lines of three different colors red, green and blue for representing length, width and height or depth. The red & green lines are perpendicular to each other to form X-Y axis of height & width. The blue line which is perpendicular to the other two lines (red & green) makes Google SketchUp more powerful. This blue line creates the design from being a flat 2D into a powerful 3D model.

To create a house at first, need to drag the pencil tool down the red line (for length) until create a wall length which to be needed and draw a shorter line (for width) from the end of the wall line along the green axis. After that, return back to the starting point at which the lady was standing and create one more line along the green axis which will be perpendicular to the end of the longer wall. The SketchUp graphic application shows a dotted reference line automatically to inform when the 2 green axis lines have the same length. Then just connect the ends of both green axis lines to create the fourth wall.

There is a “push-pull” tool in SketchUp software which can use on any plane surface to convert a model from rectangle into a square box. It is very simple to use. Just click the tool on the flat surface and “lift” the plane by mouse. The simple flat 2D rectangle is now turning to a four-walled 3D House. To find the midpoint of the top line of all walls, just moving the pencil tool along the edge of those lines and automatically it shows the mid point with a light blue icon. Placing the pencil tool at the mid point drawing up the blue axis perhaps one-fourth height of the wall below gives the pitch of a roof. To create the entire roof need to repeat the same process at the other ends of the house.

Now back to the origin point. The house on the left side has the end walls gabled to create pitched roof. This result would be a relatively easy to build house in the world of paper kits or the real world. Placing a gable in each wall, creates more complex roofline that looks like a California tract house or Japanese structure.

Virtually there is no difference between the two roofs and complex designed in the world of paper house kits. The single roof is create with a single fold-line down the center and the second roof is little bit larger than the first and is drawn with four fold lines: centerlines in both directions and connecting the two sets of corners.

Wednesday, July 6, 2011

SketchUp in Kid’s Camp


Edward Elementary School has taken a revolutionary step to introduce SketchUp to the kids. It is a Tech Camp of a week organized by the school’s parent teacher organization.


Ainsley is a 7 year old student among the 30 participants of the camp. She is very excited to participate in this camp. Her feet don’t even touch the floor when she sit in the chair of her computer lab. The drawing she made in SketchUp may be slinky toy or a macaroni noodles. But the truth is she can handle a program which is essentially a basic computer aided design tool.

"I thought this camp would be fun to go to because it would be learning about the computer," Ainsley said, "and for typing practice. I only know the home-row keys." Ainsley likes Google SketchUp, but she also is a fan of Microworlds.

"I made a butterfly," she said, "and you can make costumes for it, and program how it’s going to fly. You can choose your own backgrounds, like a farm or a flower garden. I chose flower garden."

The camp serves a dual purpose: to introduce children to software programs such as Scratch, Google SketchUp and Garage Band, and to raise money for books for the school’s media center.

"This all came together very quickly," said Jenne Paskach, a PTO volunteer whose middle-school-aged children Dagney and Nathan are helping as student teachers. "While this is only a PTO fundraising project for this school at this point, we’d love to see if it would be successful enough that perhaps the district might consider a citywide project."


Teresa Green, media specialist for Edwards Elementary, is volunteering her time, as are others, to come in and teach the kids about the programs, many of which are free or already available through the school district’s computers. The camp is sponsored by Heartland Area Education Agency and Frontline BioEnergy. Green said the programs introduce the kids to design concepts that allow them to make their own cartoons, 3-D designs, music and more.

While Green and Paskach dole out snacks to the techie campers, Steve Linduska, an education technologist from Heartland AEA, is talking about Ainsley’s Slinky-macaroni image. He explains how her 3-D diagram could apply to the students’ real world, as a new piece of playground equipment instead of one of the old ones the school is currently hoping to replace.

"This looks exactly like something on a playground that a kid could climb or walk through," Linduska said.

With a few clicks of his own computer, he shows the kids how to download shared design files of diverse things like bananas and mountains for use in their own projects.

"You’ve got 20 minutes … go invent something!" Linduska said, as the campers returned to their screens.

Green estimates the fees generated from the camp will buy about $1,000 worth of books for the school’s media center, which has been hit by budget constraints.

If there’s an irony in a computer camp funding book purchases, Green doesn’t see it.

"I don’t think the two are separate entities," she said, "because they are both powerful tools that we use to get information. We are teaching kids to use all these resources to find out about their world."

Tuesday, July 5, 2011

An Online Store House of SketchUp

Google 3D Warehouse is a storehouse of 3D models of SketchUp. In this online repository you can upload, search, view, share and download different SketchUp models. Recently Google has introduced some of the new sharing feature of 3D Warehouse.

This Google 3D Warehouse is an online repository of 3D models. Anyone can search for and download the models, but when you want to upload and publish the model, you’ll need to sign in using your Google account. Publishing your models to the Google 3D Warehouse is a great way to showcase your work. If you model 3D buildings and would like to share them with the world, you can do so through the “Best of the 3D Warehouse” layer in Google Earth. Sharing gives you control over who can view, download, and even edit your models.

It's now possible to make a model private, but you have to invite people as either viewers or collaborators on the model. Collaboration does not happen real-time. As a collaborator, you would download the model, make your edits, and then re-upload it. The model owner would then accept or deny the changes. A history of changes is also maintained and previous versions of the model are made available for download.

Features of 3D Warehouse –

• Locate Your Building In Google Earth Correctly Using Google Earth And Google SketchUp.
• Model Your Building With Google SketchUp.
• Publish Your Model To The Google 3D Warehouse.
• It May Be Accepted Into The “Best Of The 3D Warehouse” Layer In Google Earth.
• This Selection Process Takes Time. Please Allow Up To 30 Days For This Process.
• Selected Models Are Identified With A Blue Badge Symbol In The 3D Warehouse.

Monday, July 4, 2011

RS Components announced pcb converter for Sketchup

RS Components will introduce a new pcb converter for SketchUp tool which enables designers to import intermediate data format (idf) files into SketchUp.

According to RS, the new module adds a 3d CAD back end capability to pcb design tools and takes SketchUp into the electronic product design domain, transferring files from any CAD environment providing idf output into COLLADA format.

PCB Converter for SketchUp can be downloaded free from the DesignSpark SparkStore, from the RS website, or from the plug-ins area on the Google SketchUp website.

Google SketchUp is a free 3d design tool, and is rapidly gaining a following with electronics design engineers. This is not only due to its capabilities as a CAD package, but also the fact that many of these capabilities are available in the free version. RS' pcb converter allows users for the first time to import idf files, a file specification designed specifically for the exchange of printed circuit assembly data between mechanical design and pcb layout.

Electronics engineers can export pcb designs into Google SketchUp to assess compatibility with the mechanical constraints of enclosures and mounts. This allows them to make design decisions immediately and avoids the need for redesign requests and design reviews. Users can then incorporate 3d models of popular electromechanical components to complete the design. CAD models of products in the RS product range can be downloaded from its website in SketchUp compliant format (*.skp) and used in the tool.

Stephen Dapkus, from the Google SketchUp team, said: "PCB converter for SketchUp offers electronics design engineers a new pathway to move seamlessly from eCAD to 3d MCAD design. Google is … proud to see Google SketchUp being used by RS as a key component in the delivery of free access design tools, integrating the design journey for engineers."

Friday, July 1, 2011

Tgi3D SU Amorph, a sketchup plugin for creating sophisticated 3D model


Tgi3D SU Amorph, a sketchup plugin compatible with SketchUp v7.1 or higher, generates pragmatic 3D models from photographs by expanding the matched-photo interface of sketchup.

The sketchup users can create and edit free form curves and surfaces with this plugin. The plugin comes up with some advanced features like View locking, Automatic surface generation, Smart surface editing, Smart curve editing, Smart surface smoothing, Surface upsampling, Extrusion cross section editing, Smart shape idealization, Smart selection, Smart texturing, Surface downsampling.

This new edition contains a new downsampling feature that will minimize the polygon count of a model at the time of preserving the model fidelity in a controllable fashion.

The new version includes some features which are lacking in old version :-
New "Downsample" command to reduce the resolution of a mesh
New "Collapse" command to collapse the selected region to a point
Cross Section Tool now supports measured motions
(Upsampling & Downsampling) conserve the texture mapping throught upsample and the new downsample
(Texturing) conserve SketchUp ascribed material transparency in texture creation

Download the following link to learn more
http://www.tgi3d.com/PDF/Tgi3D_SU_Plugin_Help.pdf

Download Trial Version
http://www.tgi3d.com/index.php?Page=Download

Posted by Rajib
Business Development
Visit us at www.sketchup4architect.com
Join our sketchup forum

Monday, February 21, 2011

SketchUp A New Aspect to the World of Art

If you posses a soul of the artist, now you can have a new assistance to fulfill your soul desire. You can create a artwork that obeys the laws of perspective with the help of none other than Google SketchUp. It is almost invaluable for illustration.

It’s a 3D modeling program which is extremely intuitive. It’s based on the idea of actually making things by drawing lines, so people who are comfortable with pencil and paper won’t find a sharp learning curve. Like any good graphics program, although it is easy to use, there is also a great deal of depth. You can do extremely complex things with SketchUp.

You can quickly and easily build something straight out of your imagination but you can also create 3D buildings or objects from 2D photos.

Once you’ve built your model you can use it for anything you like. Take a shot of it from any angle, change the field of view, etc. You can add textures and colours as well as pre-made elements like windows or trees.

You can print it out and use the squaring up method to transfer it to a drawing surface and incorporate it into your drawing or painting. Or make a loose sketch from the image on the screen. For digital work, of course you can export images and import them into Photoshop. You can even create your own perspective grids.

The thing that’s really great about SketchUp is that it’s FREE. Yes, free. There’s a professional version which does come with a price tag but it is astounding what you can do with the free version.