Artlantis facilitates the SketchUp Pro users to add 3D photo naturalistic rendering to their projects With Artlantis, the sketchup pro users get the ability to develop and apply pragmatism to their SketchUp Pro models involving 3D objects and textures. The users can texture their models through greater resolution shaders to have a very rational effect and then arrange their scene with various light sources according to their choices.
The sketchup and Artlantis will work in tandem in a mutual way to accomplish even the most challenging projects and transform your presentation to the next level.
Artlantis can derive the following from any SketchUp Pro model:
- The geometry
- Mapped textures and colorsto define separate finishings
- The sun with the coordinates already been installed in SketchUp Pro
- Camera positions -- namely, each Page is transferred to an autonomous Perspective view.
The export process will produce a Artlantis .atl file as well as some .jpg files if there exist any textures characterized in the model.
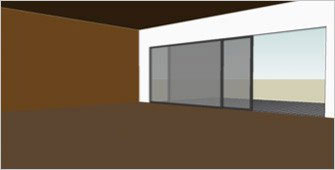
Step 1 : Modeling in SketchUp Pro: Initially, initiate to model any project with SketchUp Pro. Just model the structure and only a few details and apply Artlantis to establish the whole scene.
N.B.: Be careful in producing the model; get rid of reversed faces! Amid positive and negative sides of surfaces Artlantis will explicate the positive one only for all the time. Once the face is reserved, any discrimination or mapped texture will be dispersed.
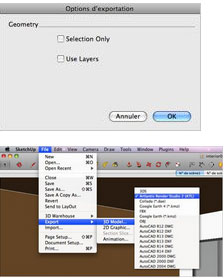
Step 2 : Export SketchUp Pro to Artlantis: By the use of plug-in Artlantis export, it is possible to generate an Artlantis file (.atl). Select File / Export / 3D model and then choose Artlantis Render Studio (ATL) from the format's list.
Expose the Option dialog box and there will be two seperate ways to export a model to Artlantis.
- Selection Only
- Use Layers
N.B. : Always chalk up the layer where the contents of a group placed to get rid of the issue at the time of exporting as the group may be situated in Layer A and its contents in Layer B and here the color of Layer B will be assigned to the whole group.
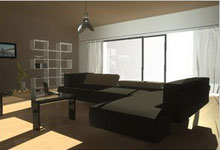
Step 3 : Set your scene with Artlantis: Open the .atl file generated through Sketch'Up Pro in Artlantis. Insert texture, lights and objects into the scene to make it completely real looking.
Step 4 : Update the file in SketchUp Pro: In case the users want to modify the model, the Artlantis data will be preserved.
To do this, initially edits the model in SketchUp Pro. After making the necessary modification, just generate a new Artlantis file. The method is identical with Step 2.
Reiterate the operation, but ensure to alter the file name so that the first Artlantis file should not be overwritten.
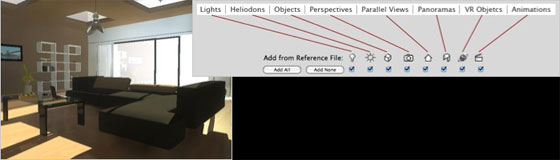
Step 5 : Update the file in Artlantis: After that, just open the new .Atl file in Artlantis and then opt for File/Use reference file.
A new dialogue will be visible. Now choose the location of your old .atl file already been created and pick it. There will be several options; the users can transmit from the first Artlantis file into the second one. Initially, recover all shaders of the first scene in a new one.
Choose this option.
Then the users can have the option to retrieve all the information from the first file. Here choose all options for recover. Then press on OK. The new file will be updated with the data from the first version.

We want to feature this page: sketchup4architect.com/sketchup-plugins
~~~~~~~~~~~~~~~~~~~~~
Published By
Rajib Dey
~~~~~~~~~~~~~~~~~~~~~
No comments:
Post a Comment