Sunday, January 31, 2016

KeyShot v6.1 is just launched with improved workflow & 3d rendering capabilities

Luxion, the trusted solution provider in highly developed rendering and lighting technology as well as creator of KeyShot, the realistic ray-tracing and global-illumination program for 3D rendering and animation, just launched KeyShot 6.1. With this new release, the workflow & 3d rendering process is significantly enhanced.

KeyShot 6 contains some advanced features for lighting mode that offer new scopes and rapid rendering in generating product, automotive and interior architecture visuals.

For Pro users, there are lots of exciting features like advanced material making with the new Material Graph and a easier workflow with geometry editing and multi-layer PSD output. It now becomes possible for Pro users to generate advanced DOF, Panorama and Camera Path animations other than standard parts and camera animations, and observe the results in real-time, once these are produced.

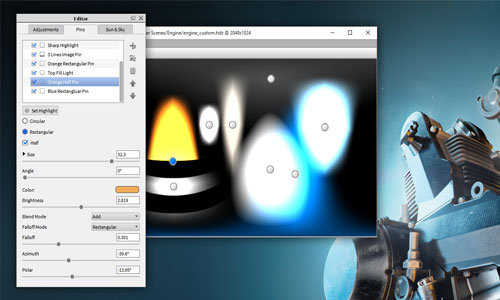
KeyShot 6.1 integrates these capabilities with enhancements to the patented KeyShot HDRI Editor, advancements to Toon and Anisotropic materials, and reorganized 3D software integration for KeyShot 6.

KeyShot HDRI Editor

KeyShot 6.1, facilitates the user to produce half-pins – half rectangular or half circular pins. Both new and existing pins may be transformed into half pins, by picking the Half option in the pin properties of the HDRI editor. Together with this functionality, the HDRI Editor user interface is upgraded for a smoother workflow and users can experience crucial enhancements in speed concerning navigation and development of HDR images.

Additional Updates

Other significant advancements contain the inclusion of IES light, point light and area light thumbnails in the KeyShot Library to demonstrate brightness and color of lighting presets in a superior manner. With the Toon Material Type, it becomes easier to efficiently make control over outline and part contours for better production of visuals with technical documentation. With the Anisotropic Material Type, modification can be made to the Roughness parameter in both X and Y position. For KeyShot Animation, the users can also apply motion blur for cameras in both the real-time and offline rendering modes.

The users can access a 14-day trial version as a free down-load at keyshot.com/try/. Contactsales@luxion.com for the full experience with all features enabled and no watermark.

In order to download and install KeyShot 6.1 update, the current users can subscribe athttps://www.keyshot.com/downloads/. To upgrade to KeyShot 6, the users have to buy online athttps://www.keyshot.com/upgrade/ or through a qualified KeyShot reseller. To get further updates on pricing, please contact your local reseller or sales@luxion.com. For more information on KeyShot products, please visit keyshot.com and follow Luxion on Facebook or Twitter.
KeyShot v6.1

We want to feature this page: sketchup4architect.com/sketchup-plugins

~~~~~~~~~~~~~~~~~~~~~~
Published By
Rajib Dey
~~~~~~~~~~~~~~~~~~~~~~
Friday, January 29, 2016

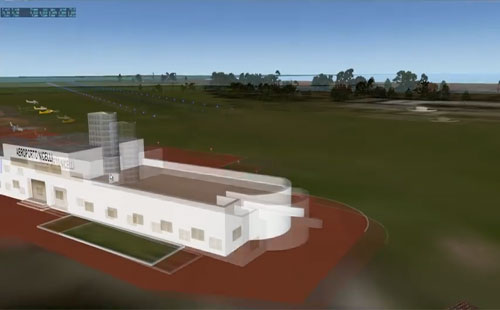
Learn to generate a custom building in sketchup & export to X-Plane 10

Vittorio Greco, the youtuber, presents this useful sketchup tutorial to teach you how to create custom buildings in sketchup and export them in X-Plane 10 without any difficulty.

X-Plane 10 is the most powerful aviation software having good flight simulation feature. X-Plane contains the most realistic flight model. X-Plane 10 offers the complete 3-D scenery.


building in sketchup & export to X-Plane 10

We want to feature this page: sketchup4architect.com/sketchup-plugins

~~~~~~~~~~~~~~~~~~~~~~~~~
Published By
Rajib Dey
~~~~~~~~~~~~~~~~~~~~~~~~~


Thursday, January 28, 2016

SketchUp to Sketchfab.com Uploader – An Exclusive SketchUp Extension

Alex Schreyer, the senior lecturer at the at the University of Massachusetts, develops SketchUp to Sketchfab.com Uploader. This sketchup extension supports SketchUp 8, SketchUp 2013, SketchUp 2014, SketchUp 2015, SketchUp 2016 as well as Mac OS X, Windows.

This plugin will streamline the process for distributing interactive 3D content from sketchup to sketchfab. Sketchfab belongs to a simplified website where one can upload 3d models and demonstrate them through WebGL.

As the primary upload file format is COLLADA, so it becomes easier for SketchUp users to upload their work there (the DAE and KMZ export format is indigenously supported in both the free and Pro version of SketchUp).

Once the plugin is set up, there will be a menu item “Upload to Sketchfab” to the File menu in SketchUp. The sketchup users have to register on the sketchfab website prior to upload their models. After that they will be provided with a “secret API key” that connects their uploaded models to their account. The API key will be available on the personal dashboard of the users once the registration will be completed.

After uploading any model, one can edit parameters and materials, capture a thumbnail or fine-tune the default view on the Sketchfab website.

Usage
Go to File > Upload to Sketchfab to transfer your model to the cloud. Ensure you have obtained your API token from the Sketchfab website.

To get more information, visit www.alexschreyer.net

This sketchup extension is also available on GitHub.


~~~~~~~~~~~~~~~~~~~~~~~~
Published By
Rajib Dey
~~~~~~~~~~~~~~~~~~~~~~~~

Wednesday, January 27, 2016

Enhance your sketchup skills and become an advanced sketchup users

ISDM is offering offering an exclusive sketchup course for advanced sketchup users to explore and communicate design ideas to the clients and community.

This sketchup course is designed on developing a 3d model of a Kentucky park that is the basis for gathering knowledge on each tool inside Sketchup. The course will continue for 10 hours and cover the following topics :-


Introduction

• Developing a project • Installing a project preferences • Geographically discover your project • Generating a template •Modeling • Construction • Navigation • Organization

Modeling

• Applying lines, circles, polygons, arcs and surfaces to form 3D shapes • Familiar with edges and faces and get rid of general mistakes • Scale and precision • Push -Pull, move and follow-Me tool • Constraining object movement

Navigation

• Zoom • Pan • Views – Standard and their applications • Camera tools – field of view, creating cameras, position camera • Making/saving and editing scenes Developing your project • Advanced modeling • Adding materials • Rendering • Making animations • Using Google 3D Warehouse • Using Google Earth

Texturing

• Using materials • Producing new materials • Fixing material mapping on faces • Mapping materials to curved surfaces • Editing material Rendering • Using Styles • Editing styles • Generating styles • Exporting 2D graphics, Advanced Modeling • Modeling organic objects • Intersecting models • Using Sections • Using the Sandbox tools • 3D Text • Plug-in tools • Using Google Warehouse • Using Google Earth • Smoothing of faces using both soften smooth edges and the eraser tool • Photo match models • Using AutoCAD files • Exporting models to Photoshop CS4, Animations, • Making animations from scenes, • Scenes – Transitions and delays • Export settings – frame sizes, • Frame rates


~~~~~~~~~~~~~~~~~~~~~~~~
Published By
Rajib Dey
~~~~~~~~~~~~~~~~~~~~~~~~

Tuesday, January 26, 2016

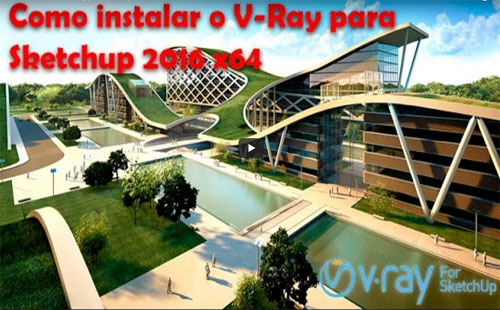
How to set up V-ray 2.0 in Sketchup 2016

This exclusive sketchup vray tutorial is presented by youtuber Maquete Eletronica. One will be familiar with step-by-step tutorial guide to set up V-ray 2.0 within sketchup 2016.

V-Ray 2.0 for SketchUp is upgraded and completely supports SketchUp 2016. Lots of enhancements are included which range from superior animation and batch rendering as well as support for Skatter and ArchVision RPCs. All the V-ray 2.0 for sketchup users can download it at free of cost.


The existing users of V-ray 2.0 can upgrade to v-ray 3.0 if purchase is made after 1st November. This free update contains a single workstation license & one render node.


How to set up V-ray 2.0 in sketchup 2016

We want to feature this page: sketchup4architect.com/sketchup-plugins

~~~~~~~~~~~~~~~~~~~~~~~~
Published By
Rajib Dey
~~~~~~~~~~~~~~~~~~~~~~~~

Sunday, January 24, 2016

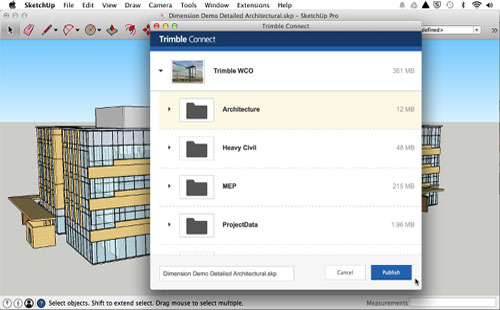
Trimble Connect now supports sketchup 2016

The Trimble Connect, a cloud-based platform for designers, builders, owners and operators to combine, distribute and view project information, has been upgraded with a improved modern user-interface, new public API (application programming interface) support as well as new support for SketchUp version 2016, and a Trimble Connect Revit Add-in that was in beta stage.

With compatibility Revit 2016, Trimble Connect sustains shared coordinates with Revit models.


Other crucial features: Other enhancements range from LandXML v1.2 file formats and that the public API is now well matched with search. Now the Users will be able to locate files by picking root folder. Besides, the users can generate todo out of a selection of snapshots and not have it to be included as a todo on the 3D page.


There exists an API to present Read-Only/No Access Folder information. To upload .rvt files devoid of the plugin directly should demonstrate exact processing status. There are also various new fixes of bugs.


To get more information on Trimble Connect visit: SightSpace.Pro


Trimble Connect now supports sketchup 2016

We want to feature this page: sketchup4architect.com/sketchup-plugins

~~~~~~~~~~~~~~~~~~~~~~~~
Published By
Rajib Dey
~~~~~~~~~~~~~~~~~~~~~~~~

Thursday, January 21, 2016

Top 10 Sketchup plugins for Sketchup artists to produce complicated models quickly

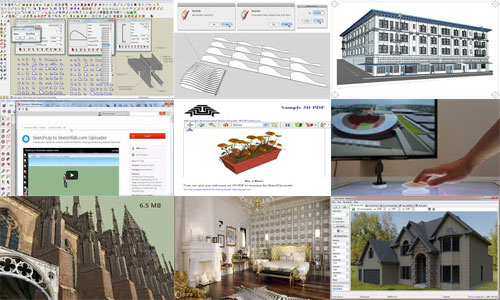
Given below the detailed lists of sketchup plugin which are very useful for generating complicated models :-

Modelling Profile Builder: This plugin can be used to generate models of intelligent building materials instantly and perfectly. The sketchup users can used this plugin at free of cost. This sketchup plugin offers the same functionalities as ‘’Follow Me” tool. The plugin supports SU8 and higher versions as well as Windows and Mac Platform.

Modeling Slice: It is a free sketchup plugin. The sketchup users can use it to slice their model up efficiently and transform it to a laser cutter. The plugin facilitates the users to present their model by cut through.

Modeling Sketchup BIM: The sketchup users can apply this handy plugin to generate the models for building smoothly in quickest possible way. Thus the process for developing any building is accelerated significantly.

Interactive Import/Export SketchFab uploader: This sketchup plugin allows the users to upload their models to Sketchfab, an online web supported tool to collaborate with 3D models. The models will be demonstrated throughWebGL.

Interactive Import/Export RPS 3D PDF: This sketchup plugin can be utilized to select and convert any sketchup model into the interactive 3D PDF Files. The plugin can export directly within sketchup to PDF.

Interactive Edddison: This sketchup plugin is used to display any sketchup model interactively. With it, the designers can make their models realistic. The users can make an interactive app just by following three simple steps.

Materials Texture Resizer: This sketchup plugin can easily rescale high resolution detailed textures in a model or selection. The plugin is useful while sending any big file containing huge textures or applying photos directly from the camera as well as batch-downsampling them to a perfect resolution.

Rendering VRay: V-Ray for sketchup offers rapid rendering, superior lighting tools generating and visualizing complicated scenes. Visualization workflow is enhanced with V-Ray RT, image based lighting quality becomes superior with V-ray Dome Light. V-ray Proxy can deal with complicated scenes efficiently with high detailed models.

Rendering Raylectron: Give photorealistic look to your sketchup model by adding texture, light and render to the models through this sketchup plugin. The plugin contains lots of exciting features like environment maps, grass, fur generation, instancing, normal & bump maps, fog, physical sky etc.

UI LunchUP: This is a free sketchup plugin that supports v.8 M3, v.8 M2. This plugin comes with a quick launcher to explore and accomplish features of SketchUp, comprising (and most significantly) plugins that are already set up.

Top 10 sketchup plugins for sketchup artists

Source: www.3dtotal.com

~~~~~~~~~~~~~~~~~~~~~~~
Published By
Rajib Dey
~~~~~~~~~~~~~~~~~~~~~~~

Wednesday, January 20, 2016

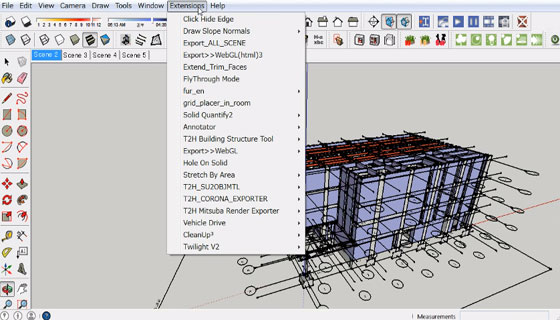
Demo of sketchup exporter to WebGL – An useful script for sketchup users

AKITENKOSHI is the creator of Sketchup Exporter to WebGL, a useful script for skethup that is developed on SU2WEBGL. Watch the following sketchup video to get a demonstration of the script.

As per suggestion of John Bacus, Product Management Director, SketchUp at Trimble Navigation, the most ideal process to obtain a WebGL rendered JSON stream from SketchUp is to upload any model to 3D Warehouse- that will perfectly render this type of stream automatically cost-efficiently. Once the model is prepared, it can be embeded in any web page through an uncomplicated code snippet.


sketchup exporter to WebGL

~~~~~~~~~~~~~~~~~~~~~~~~
Published By
Rajib Dey
~~~~~~~~~~~~~~~~~~~~~~~~

Monday, January 18, 2016

CL3VER Releases CL3VER 3.3

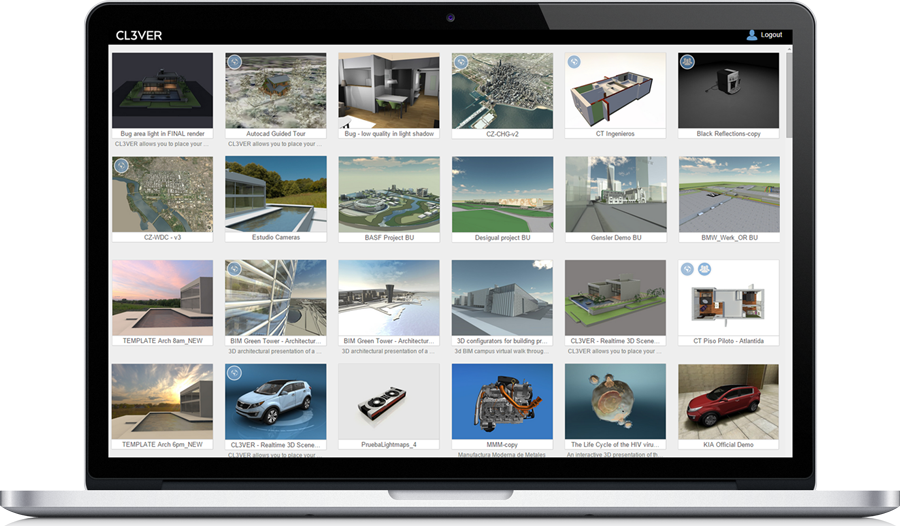
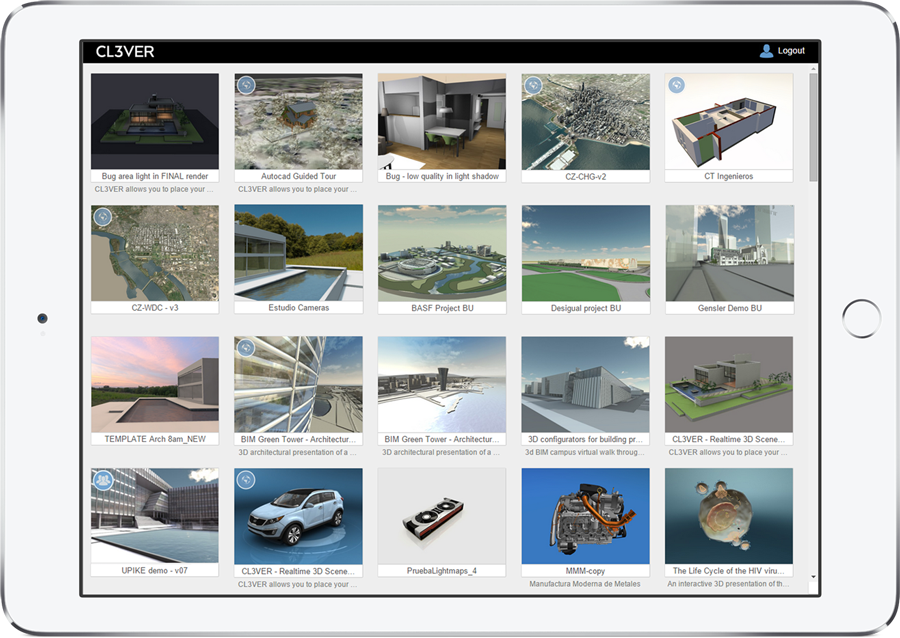
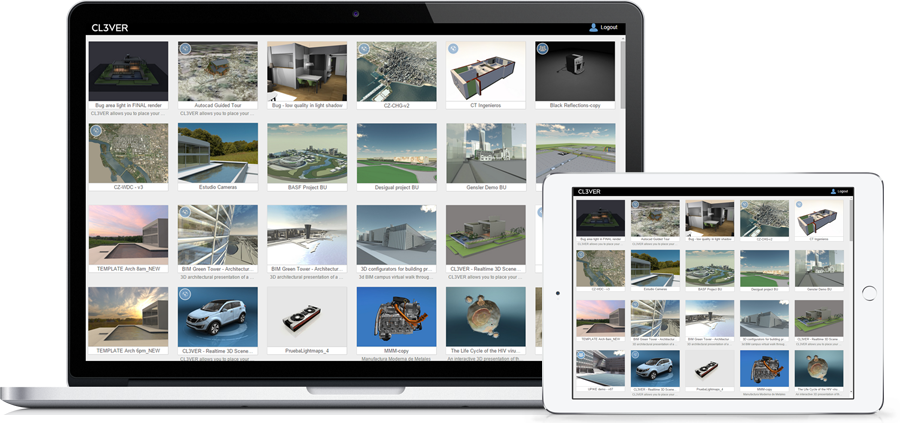
Palo Alto 13 January 2016 - CL3VER announces that the 3.3 platform release is now available for all users. Major updates included in this release include significant quality enhancements when viewing CL3VER projects on mobile devices. In addition CL3VER 3.3 also provides the ability to play CL3VER presentations without the need for an internet connection. This improves the portability of interactive 3D presentations on any device.

New CL3VER App for PC, Mac and iOS...and Free!

Architectural and Engineering projects are often presented in situations where there is little or no internet connectivity, like meeting rooms, at events or on construction sites. To solve this problem CL3VER 3.3 comes with a brand new “CL3VER App” for Windows, OS X and iOS. The App allows a user to store presentations on any device which then allows them to be viewed without the need of a internet connection.

The App is free and shares the same user interface across PC, Mac and iOS providing users with a seamless experience . Downloading presentations is easy, once the App is installed on a device a CL3VER user is able to access all the projects they have created via their login. By simply clicking on a project the download starts and the presentation is stored on the device so it can then be opened anytime and anywhere without Internet connection.


CL3VER releases CL3VER 3.3

Top Visual Quality on Retina mobile devices
The CL3VER viewer has been optimized to work natively via mobile on any browser on iOS devices with retina display (iPad Air or superior) or Android devices using a Mobile browser that supports WebGL.

This means that CL3VER users can provide spectacular 3D presentations on both Web and Mobile maintaining the same visual standards directly from the browsers.

Additional resources and links
About CL3VER: CL3VER provides a cloud based platform for interactive 3D presentations for the web and mobile devices. CL3VER presentations help professionals in the AEC and manufacturing industries to engage customers and stakeholders with the power of 3D and the usability of the web.

CL3VER releases CL3VER 3.3

The company is headquartered in Barcelona, Spain with offices in Palo Alto, California. For more information, visit www.CL3VER.com.

Media contact
Luca Vidotto
luca@cl3ver.com
Europe: +34 93 328 41 67
US: +1 (302) 353-4580

CL3VER releases CL3VER 3.3

~~~~~~~~~~~~~~~~~~~~~~~~
Published By
Rajib Dey
~~~~~~~~~~~~~~~~~~~~~~~~


How to create a Oak table for the living room by applying Sketchup Pro

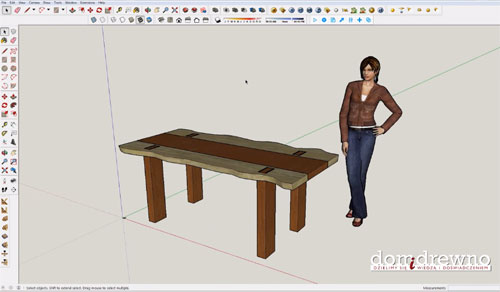
The youtuber, Jarek Ostaszewski, offers a detailed sketchup tutorial useful for woodworking professionals. This sketchup tutorial will teach you how to generate the model of a Oak Table suitable in your drawing room with sketchup pro.


Some helpful tips :-

* Just produce two groups , eg . A group of " table leg " and the group " wedge "
* Opt for the tool " Subtract "
* Click on the group to be subtracted " wedge "
* Click on the group from which the users prefer to subtract " table leg "


Oak table for the living room by applying sketchup pro

We want to feature this page: sketchup4architect.com/sketchup-plugins

~~~~~~~~~~~~~~~~~~~~~~~~
Published By
Rajib Dey
~~~~~~~~~~~~~~~~~~~~~~~~

Thursday, January 14, 2016

How to produce a Basic Component in Sketchup


While converting any geometry into a component, your drawing is presented with all the basic component behaviors and capabilities as mentioned below:
  • Your component is further usable.
  • The component geometry is segregated by any geometry to which it’s presently associated. (This is similar to groups.)
  • When you edit your component, the component instance or the definition is also edited.
  • It is possible to connect your component to a particular plane (by setting its gluing plane) or cut a hole in a face (by setting its cutting plane).
  • Metadata like IFC classification types can be linked with the component. Classifying Objects offers the main classification systems and these can be applied to SketchUp components.
Tip: Prior to produce your component, ensure it’s coordinated with the drawing axes and attached to other geometry with process undertaken to utilize the component. This trick is useful when the component contains a gluing plane or a cutting plane.

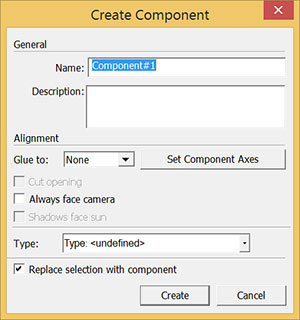
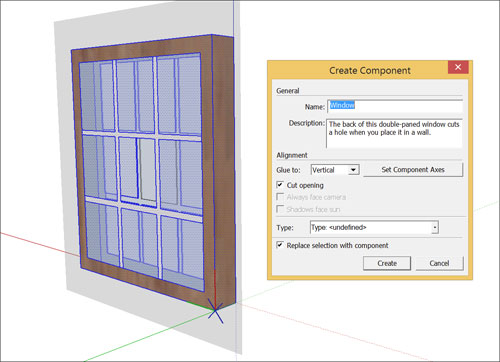
While generating a component, it can be formed right in your model or in a individual SketchUp file. Here, just go through the Make Component dialog box. The following figure demonstrates the dialog box for your existing operating system.

In order to form a component, the following guidelines should be abided by :-

How to produce a Basic Component in Sketchup
  • Opt for the geometry to be added in your component. In order to have some tricks, go through Selecting geometry.
  • Select Edit > Make Component out of the menu bar, or cntrl-click the selection and select Make Component. The Create Component dialog box will be visible.
  • In the Name box, assign a useful & specific name for your component so that the component can be easily detected in the Outliner with your other geometry. To get some useful tips on naming groups or components, go through Working with Hierarchies in the Outliner.
  • In the Description box, include a short description of your component.
  • (Optional) To arrange a gluing plane, pick one of the following options from the Glue To drop-down list: Any, Horizontal, Vertical, Sloped. While choosing a gluing plane, the Cut Opening checkbox is turned on, whereas the Always Face Camera and Shadows Face Sun options are deactivated. If you arrange a gluing plane, choose Step 6. If you are reluctant to arrange a gluing plane or a cutting plane, skip to Step 7.
  • (Optional) To allow your component to cut an opening in a face, choose the Cut Opening checkbox. Skip to Step 9.
  • (Optional) To convert your component to a 2D form, choose the Always Face Camera option, which improves performance by banishing the requirement to render the component as a 3D model. SketchUp contains several 2D people components exemplifying 2D forms that always face the camera. If this option is deselected, skip to Step 9. If this option is chosen, the Shadows Face Sun option is turned on; go to Step 8
  • (Optional) Turn on Shadows Face Sun checkbox to provide shadows from the component’s existing position as though the component were confronting the sun. The shadow shape remains unaltered because of the component rotates to face the camera.
    Tip: The Shadows Face Sun option is best suited with components that contain short bases (like trees). This option should not be applied with components that contain wide bases (like people in midstride).
  • (Optional) Select the Set Component Axes button to switch the component’s axis origin or the cutting plane. Once you click the button, the cursor facilitates to arrange a new axis origin in the similar way you apply the Axes tool. Once a new component axis origin is arranged, the Create Component dialog box is activated again.
Tip: the component’s axis origin should be modified for the following reasons:o The component’s axis origin finds out what angle of the component is loaded onto the Move tool cursor while adding a component instance in a model.
o The red/green plane’s orientation also describes the cutting plane. If a vertical cutting plane is needed, like the back of a window, to cut a face, then the red/green plane should be moved to the back of the window.
o While applying the Shadows Face Sun option, place the component’s axis origin at the bottom center of the component for getting superior results.
  • (Optional) Choose an option out of the Type drop-down list while applying classification data. For getting more details, go through Classifying Objects.
  • The Replace Selection with Component checkbox should be left with selected if it is required to convert the geometry selected in Step 1 into a component. Uncheck this box to leave the geometry unaltered but make a component definition based on it. The component definition is accessible in your In Model collection.
  • Apply the Create button to finish your component.
How to produce a Basic Component in Sketchup


~~~~~~~~~~~~~~~~~~~~~~~
Published By
Rajib Dey
~~~~~~~~~~~~~~~~~~~~~~~

Wednesday, January 13, 2016

Sketchup Tips to set up HDRI and Light in Exterior with V-ray For Sketchup 2016

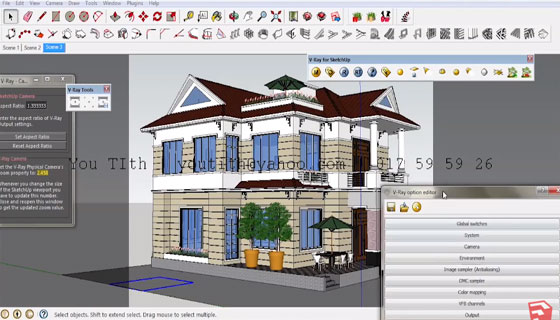
This exclusive sketchup video tutorial is presented by You Tith, the teacher at Norton University.

In this sketchup v-ray tutorial, You Tith briefly describes the processes for arranging HDRI and Light in outside portion of a building with the use of V-Ray for Sketchup 2016.

Go through the online demonstration


Sketchup Vray Exterior Lighting Tutorial

We want to feature this page: sketchup4architect.com/sketchup-plugins

~~~~~~~~~~~~~~~~~~~~~~~~
Published By
Rajib Dey
~~~~~~~~~~~~~~~~~~~~~~~~

Tuesday, January 12, 2016

How to design a grey kitchen with sketchup vray

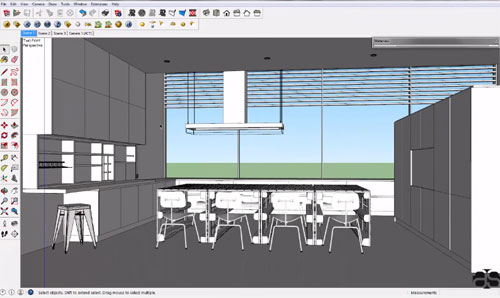
This exclusive sketchup vray tutorial is presented by the youtuber fahrudin yunianto. By watching this tutorial, you can learn the processes of creating the design of a grey kitchen by applying various sketchup materials.

Sketchup is a useful tool to simplify the interior design of a kitchen. Sketchup is used to model the basic shell of the space.


How to design a grey kitchen with sketchup vray

We want to feature this page: sketchup4architect.com/sketchup-plugins

~~~~~~~~~~~~~~~~~~~~~~~~~
Published By
Rajib Dey
~~~~~~~~~~~~~~~~~~~~~~~~~

Thursday, January 7, 2016

V-Ray for MODO QuickStart - Materials

This is an exclusive presentation from Chaos Group that covers v-ray materials and how these offer huge benefits over modo materials. This is the part 1 series that is based on the V-Ray Material with the GGX BRDF Type, V-Ray’s Blend Material, and V-Ray’s Fast SSS2 material.

The video highlights the headphone scene that is the part of previous tutorial. The tutorial is finished with prototyping 3 different materials.


In order to watch the tutorials, V-ray for Nuke plugin should be already installed in your system.


~~~~~~~~~~~~~~~~~~~~~~~~
Published By
Rajib Dey
~~~~~~~~~~~~~~~~~~~~~~~~

Monday, January 4, 2016

Cornucopia3D organized Star The Force Awakens Wars Contest 2015

Cornucopia3D is organizing the The The Force Awakens image contest for all the Star Wars fans. This 3d competition had started from Monday 30th of November and will continue upto Sunday 3rd of January (midnight, GMT). The Star Wars fan will get a chance to apply their 3d expertise for generating an image and winning exciting prizes.

For the first time, Paul Huston, Senior Digital Matte Artist at Industrial Light & Magic, having working experience with 7 Star Wars Movies, will perform as the judge in this 3d competition.

There will be some exciting prizes (thousands of dollars) from Cornucopia3D and e-on software for first 3 winners. Given below details of prizes:

1st place:
First Runner Up:
Second Runner Up:


Rules and Regulations of the contest:
  • Images should represet something matching the theme of the contest, The Force Awakens.
  • Postwork is permissible; however, but it must be clearly mentioned that what postwork is undertaken.
  • Images must be unique and not been published online anyplace previously.
  • Images should not be uploaded or demonstrated somewhere else online as far as contest is finished and declaration are made for winners.
  • All the Images should have been uploaded to the The Force Awakens contest gallery.
  • Be cautions prior to upload any image as the image will be disqualified if uploaded to an inappropriate gallery.
  • Cornucopia3D staff will not be eligible to upload or otherwise edit images for you.
  • 1 (one) image per member is allowable in the competition; but one can post alike themed images to the other galleries!
For any further query concerning the competition, send mail to contests@cornucopia3d.com.

Cornucopia3D  organized Star The Force Awakens Wars Contest 2015
Image Courtesy: cornucopia3d.com

~~~~~~~~~~~~~~~~~~~~~~~~
Published By
Rajib Dey
~~~~~~~~~~~~~~~~~~~~~~~~