Friday, June 29, 2018

How to do follow me with multiple shapes in sketchup

In this sketchup video tutorial, Mr. Aaron shows a useful tip to perform a follow me with numerous shapes. This sketchup video is a part of sketchup skill builder series. You will learn how to obtain numerous shapes to follow a single path with simple mouse click.


Aaron uses sketchup weld extension for this purpose.
Smustard Team has developed weld extension for sketchup. This sketchup extension is compatible with SketchUp 6, SketchUp 7, SketchUp 8, SketchUp 2013, SketchUp 2014, SketchUp 2015 as well as Mac OS X and windows platform.
The sketchup users can apply this plugin to choose numerous connected edges, curves, and/or arcs (“connected” means containing common endpoints), then utilize the weld tool to combine them into a single “polyline”. The plugin can do a "follow me" of a circle along a straight line, ruptures the circle into several line segments.
To learn the tip with follow me tool, go through the following video tutorial.
Video Source SketchUp

~~~~~~~~~~~~~~~~~~~~~~~~~~~
Published By
Rajib Dey
www.sketchup4architect.com
~~~~~~~~~~~~~~~~~~~~~~~~~~~
Tuesday, June 26, 2018

How to use FlexTools sketchup extension to create dynamic components within sketchup

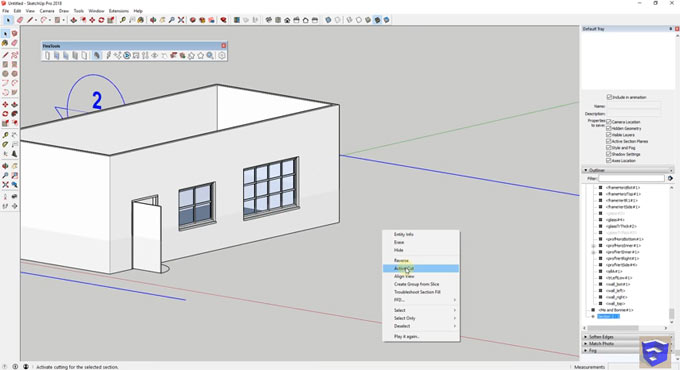
In this sketchup video tutorial, Justin Geis demonstrates the functionality of a useful sketchup plugin called FlexTools that can be used for generating dynamic components inside sketchup.

One can produce various smart objects like doors, windows etc. The plugin allows the users to arrange the doors, windows, louvers and other objects inside openings in your sketchup models instantly and smoothly.

This sketchup plugin is developed by FlexTools CC. It is a paid extension and cost is US$33 for one component and US$114 for all components.

One can download the plugin from thesketchupessentials.com/flextools.

Flex tools is a series of opening creation tools developed on the basis of sketchup dynamic components engine. It comprises of the responsive objects scale and modifies to openings automatically.

The components can be resized devoid of any distortion. Here, only the sections of components which are expected to resize like the door or the glass in the windows, will be only resized whereas the frames and other objects remain unchanged in sizes.

To get more detail, go through the following video tutorial.

How to use FlexTools sketchup extension to create dynamic components within sketchup

~~~~~~~~~~~~~~~~~~~~~~~~~~~
Published By
Rajib Dey
www.sketchup4architect.com
~~~~~~~~~~~~~~~~~~~~~~~~~~~
Monday, June 25, 2018

How to resolve v-ray glass transparency issue in v-ray 3.6 for sketchup

This is another useful presentation from Justin Geis for sketchup and v-ray users. Often a common issue occurs while working with vray 3.6 for sketchup. The issue is about the rendering of your glass lacks transparency due to improper set up of model.

In this video, one will get some useful tips to set up your glass properly in order that the rendering always becomes transparent for your glass.

While starting rendering inside v-ray, if you employ the glass materials, it is possible to see through the glass and therefore the glass is demonstrated as non transparent.

To learn how to make the glass transparent, go through the following video tutorial.

Video Source The Rendering Essentials

~~~~~~~~~~~~~~~~~~~~~~~~~~~
Published By
Rajib Dey
www.sketchup4architect.com
~~~~~~~~~~~~~~~~~~~~~~~~~~~
Friday, June 22, 2018

Live demonstration of Thea Render 2.0 for sketchup

Thea Render 2.0 is just launched with some exciting features. Given below, the details of these new and advanced features :-

a. It creates physically perfect light simulation.
b. It applies the laws of physics and optics to produce elegant & realistic images.
c. It offers simple and rapid scene setting.

d. With spectral simulation feature, the light penetrates through the prism and it divides in several frequencies and colors like real world.
e. It illustrates how precise and complete the light calculation over the entire spectrum of visible light.
f. Unbiased rendering along with biased engine.
g. Numerous CPU and GPU support.

h. Nvidia CUDA cards on MAC and WIN
i. AMD OpenCL cards on WIN (v2)


To watch the live presentation of Thea Render 2.0, go through the following exclusive video tutorial.

Video Source Novedge

~~~~~~~~~~~~~~~~~~~~~~~~~~~
Published By
Rajib Dey
www.sketchup4architect.com
~~~~~~~~~~~~~~~~~~~~~~~~~~~
Wednesday, June 20, 2018

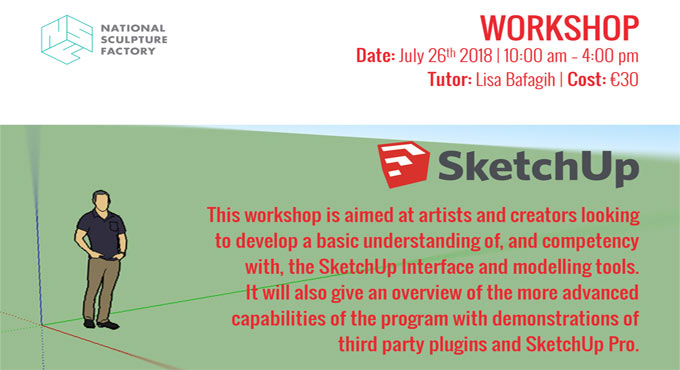
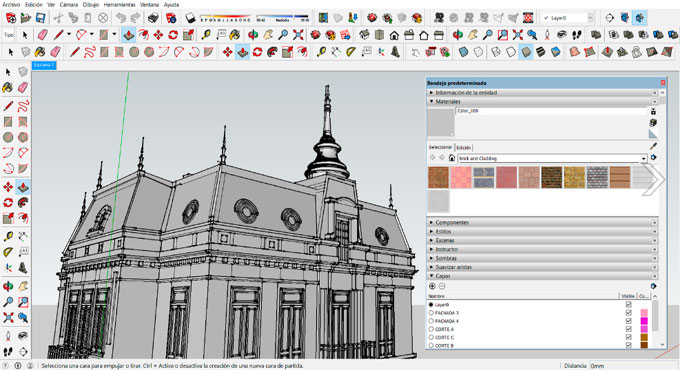
An exclusive sketchup workshop with Lisa Bafagih, an educator at St John’s College Cork

Lisa Bafagih, a renowned architect and educator at St John’s College Cork, is conducting a workshop for sketchup users. The workshop will be held on Thurs 26th July from 10:00am – 4:00pm at National Sculpture Factory, Albert Road, Cork.

This workshop is specifically designed for the artists and creators who want to improve their basic knowledge and skill with the SketchUp Interface and modelling tools.

The workshop will also focus on the more advanced capabilities of the program with illustrations onthird party plugins and SketchUp Pro.

Topics covered:
a. Presentation with the SketchUp interface and navigation tools.
b. Best practice while applying SketchUp’s modelling and modification tools.
c. Elementary modelling techniques with 2D and 3D modelling tools.
d. Model organization along with groups and components.
e. Application of the SketchUp Warehouse.
f. Utilization of the materials editor to produce custom-made materials
g. Section planes, cameras and 2D export formats.
Presentations:
a. Scenes, animation export.
b. SketchUp Pro, CAD import.
c. Sketchup Pro, export to Layout, scale.
d. Twilight Plug -in, rendering.
This workshop is intended for all levels of expertise but primary computer skills are necessary. This workshop is part of an Art & Technology Workshop Series at the NSF for 2018 which will consist of workshops in Rhino – a 3D modelling programme; Blender & 3D Printing and introductory course to VR – Virtual Reality, its platforms, gear and the Unity Gaming Engine.
To get more details, go through the following website nationalsculpturefactory.com
An exclusive sketchup workshop with Lisa Bafagih, an educator at St John̢۪s College Cork

~~~~~~~~~~~~~~~~~~~~~~~~~~~
Published By
Rajib Dey
www.sketchup4architect.com
~~~~~~~~~~~~~~~~~~~~~~~~~~~
Tuesday, June 19, 2018

V-Ray 3.6 for SketchUp now supports sketchup 2018

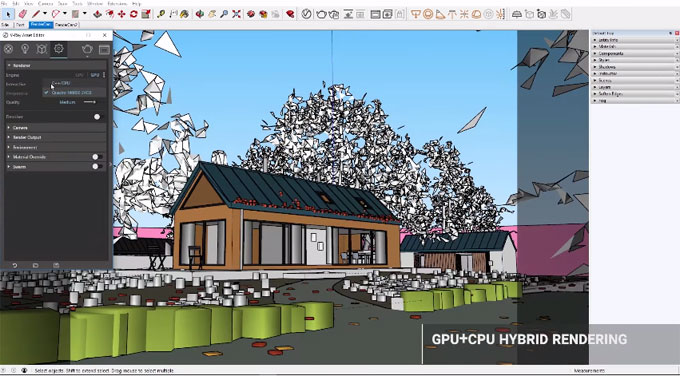
In this sketchup v-ray video tutorial, demonstration is given on new V-Ray 3.6 for SketchUp. V-Ray 3.6 for SketchUp comprises of some advanced features like fast-paced GPU rendering, smart hybrid rendering, a efficient UI, viewport rendering, VRscans support, and lots other. V-Ray 3.6 for SketchUp now supports sketchup 2018.

Given below, some exclusive features of this latest version :-

VIEWPORT RENDERING: New viewport rendering facilitates the users to simply choose and render several regions simultaneously, and instantly intermingle among V-Ray render and SketchUp model with +/- hotkeys to manage opacity.

STRONG GPU RENDERING: Rapid, more strong GPU rendering with additional support for aerial perspective, displacement, subsurface scattering, matte/shadows, and more.

HYBRID GPU+CPU RENDERING: With V-Ray GPU running on NVIDIA CUDA, the users can reap the complete benefit of all existing hardware along with CPUs and GPUs.

ADAPTIVE LIGHTS: For scenes which contain adequate lights, the new Adaptive Lights mode can allow minimizing render times by up to 700%.

SMART UI: The complete V-Ray for SketchUp interface now becomes cleaner and easier, with superior support for 4K monitors.

FILE MANAGER: Organize all of your scene files under one position. Arrange file paths, form scene archives, and monitor assets like textures, IES files, and proxy objects.

V-RAY COLOR PICKER: With the addition of new color picker, it makes it possible to choose color values in Screen sRGB (0–255) or Rendering (0.0–1.0) color space.

V-RAY SCENE IMPORT: Import and render V-Ray scenes (.vrscene) from other applications like 3ds Max, Rhino, and Revit

To view online demonstration of V-Ray 3.6 for SketchUp, watch the following video tutorial from Chaos Group.

Download Sketchup Pro 2018

V-Ray 3.6 for SketchUp now supports sketchup 2018

~~~~~~~~~~~~~~~~~~~~~~~~~~~
Published By
Rajib Dey
www.sketchup4architect.com
~~~~~~~~~~~~~~~~~~~~~~~~~~~

Saturday, June 16, 2018

s4u Paint – The newest sketchup plugin by Huynh Duong Phuong Vi

Huynh Duong Phuong Vi is the developer of the newest sketchup plugin called s4u Paint. This plugin is compatible with SketchUp 2017, SketchUp 2018.

It is a paid plugin. This plugin is best suited for different industries like Architecture, Construction, Education, Engineering, Film & Stage, Gaming, Heavy Civil, Interior Design, Kitchen & Bath, Landscape Architecture, Urban Planning, Woodworking, Other.


This plugin offers multiple functionalities :-
a. Paint material to face in group and component.
b. Paint Material to Group,Component.
c. Erase material in objects.
d. Substitute material.
e. Reverse Selected Face.
f. Get Area of Material in Selection.
To avail the plugin from extension warehouse, go to extensions and click on Suforyou and then click on Paint or Toolbar s4u-Paint.
For online demonstration, go through the following video tutorial.
Video Source Suforyou Vn
~~~~~~~~~~~~~~~~~~~~~~~~~~~
Published By
Rajib Dey
www.sketchup4architect.com
~~~~~~~~~~~~~~~~~~~~~~~~~~~

Friday, June 15, 2018

How to speed up your modeling in sketchup with v-ray proxies

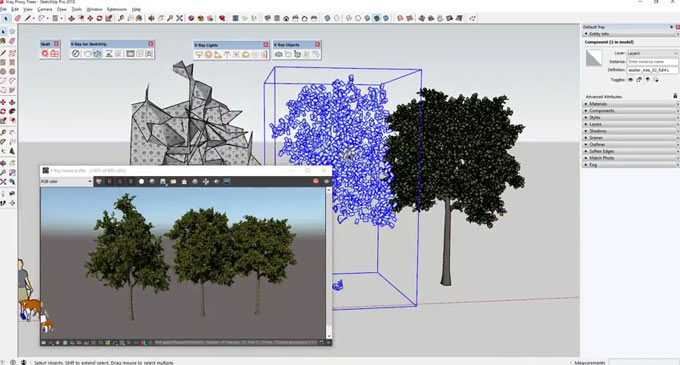
In this sketchup v-ray video tutorial, you will learn how to use v-ray proxies in skethup models to produce superior quality renderings with high polygon models.

Rendering in sketchup becomes complicated since sketchup can’t deal with high polygon models. So, if there are more faces and geometries in the model, the modeling process become slower since sketchup does not handle all the geometries efficiently.

With high polygon, high detail model inside your sketchup model, it becomes difficult to produce realistic rendering. But v-ray contains a tool known as proxies that facilitates to export the objects out of your model and substitute them with a low polygon preview model.


When rendering starts, v-ray will reference those files called meshes externally devoid of showing them in your model.
To learn the detail process, go through the following video tutorial.
How to speed up your modeling in sketchup with v-ray proxies
~~~~~~~~~~~~~~~~~~~~~~~~~~~~~~~
Published By
Rajib Dey
www.sketchup4architect.com
~~~~~~~~~~~~~~~~~~~~~~~~~~~~~~~

Wednesday, June 13, 2018

Raylectron Render - The newest sketchup plugin

SoftByte Labs, Inc develops Raylectron Render, a user-friendly and photorealistic rendering and animation plugin for sketchup to transform any 3d models into a photo-realistic image.

The plugin is compatible with SketchUp 8, SketchUp 2013, SketchUp 2014, SketchUp 2015, SketchUp 2016, SketchUp 2017 and SketchUp 2018 as well as windows platform.

Raylectron facilitates the professional artists, hobbyist or anyone who produce 3D designs and wishes to convert their models into photorealism presentations, and/or to observe their models in 3D stereo just as they were real.

Raylectron includes all the settings to modify the output, as a result, no other software is necessary for executing the task.

With the help of material, it is possible to provide diverse effects for materials. It ranges from reflection (like mirror), refraction (like glass), transparency, glossiness, shininess, bump maps, normal maps and background images. Generate your individual grass & fur. Shadows are not fraudulent or simulated like "Soft shadows". Caustics are also real, not fraudulent or simulated.

Make your own animation that offers you a hands-free tour of a model.

Raylectron employs all the CPU cores and threads (user selectable) to render at a rapid speed and new GPU version available.

For more clarification, watch the following video tutorial.

To know it’s features and download the plugin from extension warehouse, go through the following link extensions.sketchup.com

~~~~~~~~~~~~~~~~~~~~~~~~~~~
Published By
Rajib Dey
www.sketchup4architect.com
~~~~~~~~~~~~~~~~~~~~~~~~~~~

Tuesday, June 12, 2018

Some useful sketchup tips to improve your modelling skill with sketchup

Given below, some handy tips for sketchup users to improve their modeling skills significantly.
01. Apply the 3D Warehouse gallery: examine and cleanse models prior to importing them.
There is a universe of downloadable 3D models made by other users that can fast-track the construction of your own models. To avoid adding additional information such as lines, layers, and materials, which will only increase file sizes, purge the model's components before saving them.
02. Place the model properly in space.
Geo-referencing a project facilitates you to consider it with regards to location, an intuitive quality for any successful architectural scheme. It is required to place a 3D model, avail it from the window> model information> geolocation> add location / define location customarily.
It is also very important to consider the time zone of each location.
03. Employ plugins and explore the new things in Extension Warehouse.
SketchUp users create different types of plugins which provide solution to the problems in each version as well as utilize the capability of accessible tools, and integrate new 3D modeling equipment.
Extensions are available from Solar North, which offer tools to fix the orientation for the angle of sunlight and shadows, to Sketchy FFD, a mesh operated with a series of control points in its vertices and edges to manipulate the dimensions of the chosen object.
04. Arrange and save your toolbar settings.
It is very crucial to customize the work surroundings as per your requirements and preferences. Make sure that your ideal settings are saved for future application, just manage sufficient time to arrange a toolbar. It will be possible to accomplish tasks in organized way and invest more time in concepts, design, and detailing.
05. Utilize groups and components to streamline editing and developing a model.
The most powerful feature of sketchup is to arrange models into groups of objects, lines or figures. The process is very quick and easy (secondary button> create group) and facilitate you to modify a specific section of your model (by double-clicking on it), keeping the other figures near the object unchanged. It is suggested to double-click on the newly generated surface, thus choose both faces and edges, and make a group prior to utilize the push / pull tool or any other modification.
To get more useful sketchup tips, go through the following link archdaily.com
Some useful sketchup tips to improve your modelling skill with sketchup

~~~~~~~~~~~~~~~~~~~~~~~~~~~
Published By
Rajib Dey
www.sketchup4architect.com
~~~~~~~~~~~~~~~~~~~~~~~~~~~

Thursday, June 7, 2018

How to resolve the issue while modeling in groups & components in sketchup

In this sketchup video tutorial, you will get some nice tricks which will be very helpful while modeling inside of groups and components.

Groups and components play an important role to make the model clean and valid. But sometime, problem arises when the geometry is invisible at the time of editing when the remaining part of the model gets in your way. By applying these tricks, it is possible to get a clear view while editing components. It becomes easier to edit inside of a group or components.

To start with, go to window tab and from the drop down menu click on modeling info option and then click on components tab. Here, couple sliders are available. Under editing display, there are two sliders namely Fade Similar Components and Fade Rest of Model. Under Component Axes, there is one check box called show component axes. Make necessary changes in the sliders to resolve the issue.

There is another option. Go to view menu and from drop down lists click on component edit and select either hide rest model or hide similar components.

To learn the tips in detail, go through the following video tutorial.

Video Source Sketchup


~~~~~~~~~~~~~~~~~~~~~~~~~~~
Published By
Rajib Dey
www.sketchup4architect.com
~~~~~~~~~~~~~~~~~~~~~~~~~~~

Wednesday, June 6, 2018

How sketchup was used to complete the Philadelphia Flower Show project

In this exclusive sketchup video tutorial, Dawn Brown, the renowned 3d modelling expert, shares his professional experience that he applied while going to complete a complex project called the Philadelphia Flower Show with sketchup.
Mr. Brown shows some useful tips and tricks which were used to complete the project successfully with sketchup for making architectural design, landscape design, exhibit design, set design as well as produce construction documents.
To complete the project sketchup layout and an exclusive sketchup plugin called light up are used.
Light up is best suited for superior product visualisations, architectural designs or immersive 3D experiences.
LightUp refers to the only SketchUp renderer that employs object-based rendering to produce surprisingly perfect and stunning results right away within the SketchUp window.
The professionals can apply this plugin to quickly enlighten their models and present their work in the best possible light.
To learn the complete design process, go through the following sketchup tutorial video presented by Dawn Brown.
Video Source Sketchup

~~~~~~~~~~~~~~~~~~~~~~~~~~
Published By
Rajib Dey
www.sketchup4architect.com
~~~~~~~~~~~~~~~~~~~~~~~~~~

Tuesday, June 5, 2018

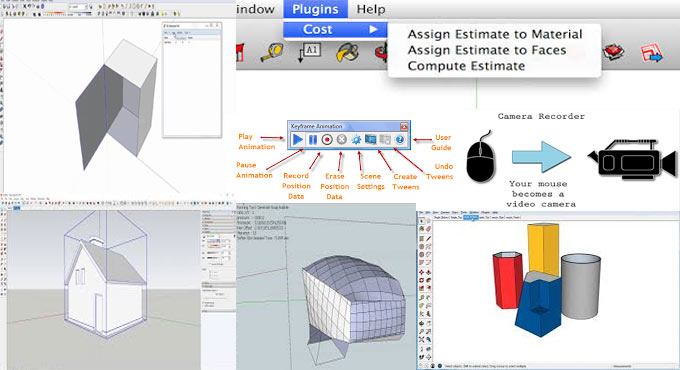
Some best sketchup animation plugin

Given below the details of sketchup animations plugins and their features :-

SU Animate
1. Camera, Object, Layer, Spiral, Shadow animations
2. There are key frames and path methods to produce animations inside SketchUp
3. Non photo-realistic
4. Compatible with Windows and Mac, SketchUp 8, 2013, 2014 and 2015. Make or Pro
5. EditInPlace and Grid are contained with each license of SU Animate


Animate Sections
1. The animated sections are applied to your group/s automatically
2. Sections will animate ascendant
3. It is possible to section cut in any direction
Eneroth Camera Memory
1. Saves the camera position with some simple clicks of the mouse
2. Functions among models
3. Best suited for version comparison for example
Example Ruby Scripts
1. An idea of ruby scripts that illustrate what can be performed with the Ruby API
2. Provides guidelines to ambitious Ruby script authors.
Simple and Intuitive 3D Rendering
1. Robust 3D rendering plugin for SketchUp
2. Convert your SketchUp model into a photorealistic render or animation
3. Interior designer or 3D rendering expert
Animatex
1. It facilitates the users to animate several textured faces
2. Animatex layers which contain their own x,y,z parameters to fix speed
3. Choose faces with textures
Soap Skin and Bubble
1. It facilitates the users to use a skin over edges to generate complicated curved surfaces
2. Create nominal surfaces from edges
AMS Window Settings
1. It facilitates the users to switch SU full screen, show/hide menu bar, toolbar containers, status bar, scenes bar
2. This tool is suitable for those with small monitors
3. Obtain the maximum out of their rendering
CLF Camera Recorder
1. Records the navigating of a model and transforms each frame into a scene
2. Exports it out as a series of images to be converted into a movie with quicktime
3. Compatible with jpg and png file types
V-Ray Tools²
1. Safe Frame and 2D Export
2. Work out the distance from the camera to any point the model
3. Tries to reproduce the existing scene into a new one
4. Load V-Ray for SketchUp on demand
5. Apply Selected Material as User Override
Article Source: bestplugins.com
Some best sketchup animation plugin


~~~~~~~~~~~~~~~~~~~~~~~~~~
Published By
Rajib Dey
www.sketchup4architect.com
~~~~~~~~~~~~~~~~~~~~~~~~~~

Saturday, June 2, 2018

Some useful tips to draw lines on sloped terrain

In this useful sketchup video tutorial, one will learn how to apply sketchup for adding lines to a 3d sloped terrain.


Go to view in geometry and there will be a bundle of triangulated faces which form the mesh. While going to draw on terrain or any curved object, ensure that hidden is turned on in order that it is possible to join lines at a face.
Every face should be flat, so any two edges which are drawn on that line will facilitate to form that shape.
To watch the complete tutorial, go through the following video.
Video Source Designer Hacks

~~~~~~~~~~~~~~~~~~~~~~~~~~
Published By
Rajib Dey
www.sketchup4architect.com
~~~~~~~~~~~~~~~~~~~~~~~~~~