Friday, September 28, 2018

Eneroth Visual Merge – The newest sketchup extension in extension warehouse

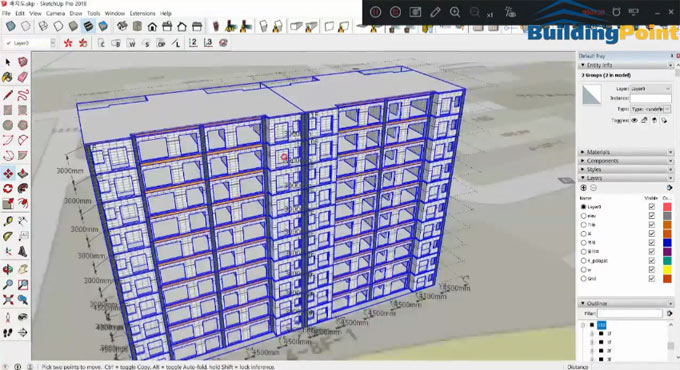
The sketchup users can utilize this newest extension to conceal the seam among groups/components where they meet. Now, the users don’t have to face problem for unpleasant edges among slab and a wall.
The purpose of this plugin is to visually merges groups/components by concealing the edges and faces where they meet devoid of modifying their shape.
Not alike a solid operation these modifications are only cosmetic on the surface and doesn't change the shape of the objects by any means. The meaning of the original geometry (e.g. what is a slab and what is a wall) is maintained and the visual merge is reset with just two clicks of the mouse.
Also quite dissimilar solid operations of all groups and components are supported, whether they are solid or not.
The plugin is accessible in extension warehouse (extensions.sketchup.com).
To learn the detail process for Eneroth Visual Merge: Simple House, go through the following video tutorial.
Video Source Eneroth3

~~~~~~~~~~~~~~~~~~~~~~~~~~
Published By
Rajib Dey
www.sketchup4architect.com
~~~~~~~~~~~~~~~~~~~~~~~~~~
Wednesday, September 26, 2018

How to draw exterior walls in sketchup

This instructional video is presented by the renowned sketchup teacher, Mr Aaron, for worldwide sketchup users.

The video demonstrates some effective processes for drawing exterior walls in sketchup on the basis of an imported image file related to architectural drawings.


This video is the part two of the sketchup skill builder series and architectural modeling. The drawing of the exterior wall is started on the basis of a reference image.
To learn the detail process for drawing exterior walls, go through the following video tutorial.
Video Source SketchUp
~~~~~~~~~~~~~~~~~~~~~~~~~~
Published By
Rajib Dey
www.sketchup4architect.com
~~~~~~~~~~~~~~~~~~~~~~~~~~

Friday, September 21, 2018

Triangle Tool – The newest sketchup extension

Triangle tool is the newest sketchup extension that is compatible with sketchup 2017 and sketchup 2018.

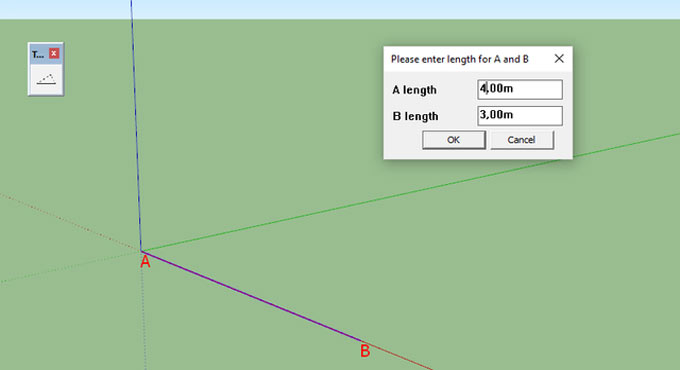
Triangle tool can be utilized to generate triangles with the help of subsisting edge and the lengths of the two persisting sides. Just select the tool from the newly showing “triangle” toolbar. The tool will automatically pick up edges while hovering.

After clicking on it, it will request for the length at point A and the length at point B. Just provide it and select for the exact orientation for the triangle.

This plugin is best suited for architecture, construction, engineering, gaming, heavy civil and interior design.

The plugin is available in extension warehouse.

Click on the following link extensions.sketchup.com

Triangle Tool รข€“ The newest sketchup extension

~~~~~~~~~~~~~~~~~~~~~~~~~~
Published By
Rajib Dey
www.sketchup4architect.com
~~~~~~~~~~~~~~~~~~~~~~~~~~

Wednesday, September 19, 2018

nz_Globule – The newest sketchup extension in extension warehouse

Natale Zappia has developed nz_Globule for sketchup. This newest sketchup plugin is compatible with SketchUp 2016, SketchUp 2017, SketchUp 2018. It is a paid plugin and costs $12.50.

The plugin is used to subdivide a cubic form as well as it facilitates the users to generate, tease and edit into organic forms.

The plugin will subdivide a cube into and editable organic form.and rectify your creation with 8|14|26 'Control-Points' that facilitates to tease and manipulate the form into the required shape.

nz_Globule provides you neat and effective vertices and edges that allow you to make your creation manually provided that you do not break out your group and can always retrieve it's original form. While regenerating the form, it is also possible to modify the subdivision iterations and/or shell texture options.

To buy the plugin, click on the following link extensions.sketchup.com

To learn more, go through the following video tutorial.
Video Source Natale Zappia

~~~~~~~~~~~~~~~~~~~~~~~~~~
Published By
Rajib Dey
www.sketchup4architect.com
~~~~~~~~~~~~~~~~~~~~~~~~~~

Saturday, September 15, 2018

Demo of component finder, a new sketchup extension

This exclusive sketchup video tutorial provides the demonstration of a new sketchup extension called Component Finder. This extension can simplify the process to view and import components inside sketchup.

The tutorial video focuses on the following topics :- How to set up Component Finder, Navigate 3D Models, Add a component, Save a component, Rename a component, Update a component.

The extension contains the following exclusive features :-

Quickly filter through your local Sketchup components library, and find the components you need. Just a click away, all within Sketchup.

Enhanced Browsing: Now, it is possible to view all the components in a folder, it's sub-folders as well as in their sub-folders all in one view.

View your components in each tab in best possible manner

Flat View: Avail the components in the present folder and in all of it's sub-folders, and their sub-folders... (5 levels deep).

Nav View: The recognizable browsing view of folders and components. It is ideal for navigating and focusing on a specific folder.

Powerful Search: Type in with your search term, and ComponentFinder will filter through all of your tabs and the components in them unless you get your desired result.

Zoom In / Out: View bigger or smaller component thumbnails.

Save Components: After arranging some components into a model, if any modifications take place, one can save them right back into any open tab.

To get more information, go through the following link flextools.cc/componentfinder

Open multiple tabs at once: Choose numerous folders from your local library and include them simultaneously as separate tabs in ComponentFinder.

FlexTools Integration: ComponentFinder operates on top of the FlexTools platform. Same toolbar. Same settings location. Automatic updates when available.

Watch the following video for live demonstration.

Video Source Architecture Inspirations

~~~~~~~~~~~~~~~~~~~~~~~~~~
Published By
Rajib Dey
www.sketchup4architect.com
~~~~~~~~~~~~~~~~~~~~~~~~~~

Tuesday, September 11, 2018

FrameModeler for sketchup version 1.1.0

FrameModeler is the newest sketchup extension available in extension warehouse. This extension supports sketchup 2018.

It is a user-friendly tool for the architects.

Guide for set up:

a. Download extension from extension warehouse
b. Operate as admin sketchup.exe
c. Once the extension is set up perfectly, the text will be visible as "FrameModeler Install finish. Now restart sketchup.exe to run FrameModeler.
d. Restart sketchup.exe then you will get the extension menu on the toolbar.


FrameModeler (1.1.0) contains the following exclusive features :-

1. Updated New UI
2. Compatible with English tooltips and parameter
3. Demonstrates an error on the screen once the Trim function is accomplished.

4. Beam, Wall, Slab negative height value can be obtained.
5. Added CAD select mode
6. Continuous placement changed to "Ctrl" toggle key in "shift" release.


The extension is available in extension warehouse extensions.sketchup.com

To learn more, go through the following video tutorial.

FrameModeler for sketchup version 1.1.0

~~~~~~~~~~~~~~~~~~~~~~~~~~
Published By
Rajib Dey
www.sketchup4architect.com
~~~~~~~~~~~~~~~~~~~~~~~~~~

Friday, September 7, 2018

Some unknown facts about follow me tool

In this exclusive sketchup video tutorial, Justin Geis, the renowned sketchup trainer, briefly explains some useful features and functions as well as applications of sketchup follow me tool.

The SketchUp Follow Me tool is the base of 3D geometry: Follow Me directs a face along a path to generate a 3D shape. However, it comprises of a bunch of applications and facilitates to draw complicated 3D models with some simple mouse clicks.

Follow Me is very effective for modeling finishing details that pursue a perimeter or edge, like crown molding or gutters. It also simplifies the task for modeling lathed objects, like a spindle, and curved vessels, like a bowl or a vase.

One can find the follow me tool in sketchup as follow :-

Tools menu
Edit toolbar
Large Tool Set toolbar
Tool palette (macOS)


The follow me tool can be applied to extrude something like a pipe along the path. Just choose a path and apply the follow me tool to extrude something to the length of that path.

The follow me tool can be very effective when the paths contain numerous various lines on it.

The best way to utilize the follow me tool is to choose your path, then activate the tool and click on your object. It also functions along paths which go in a complete circle.

To learn more functionalities of follow me tool, go through the following video tutorial.


Video Source TheSketchUpEssentials

~~~~~~~~~~~~~~~~~~~~~~~~~~
Published By
Rajib Dey
www.sketchup4architect.com
~~~~~~~~~~~~~~~~~~~~~~~~~~

Wednesday, September 5, 2018

Eneroth Tool Memory version 1.1.2

The sketchup users can apply this plugin to cycle the tools opened lately in SketchUp. It can significantly accelerate the speed up and simplifies the modeling process.

The plugin is specifically designed for skilled professional user to improve their work and very effective for tools not used frequently to get a shortcut for, but very repeated as soon as you utilize them.

The plugin is compatible with SketchUp 2016, SketchUp 2017, SketchUp 2018. It is a paid plugin.

It should be remembered that the tool stored only will include actual tools. Other commands, e.g. Save or Zoom Extents, are not memorized.

Setup: As soon as it is set up, the plugin requires some manual setup for functioning properly. The process is not automatic but few minutes are required.

1. Open the Shortcut settings (Window > Preferences > Shortcuts)

2. Set up a shortcut, e.g. Ctrl+Space, pointing to Extensions > Eneroth Tool Memory > Cycle Tools. While applying another shortcut, please note that the shortcut should comprise of minimum one modifier key (Ctrl, Alt etc) and another key. If you select a modifier key except Ctrl (Command on Mac), go to Extensions > Eneroth Tool Memory > Set Modifier Key and choose that key.

3. (Optional) Set up a corresponding shortcut also including Shift, e.g. Ctrl+Shift+Space, to Extensions > Eneroth Tool Memory > Cycle Tools Backwards.

Exclude Tools: In version 1.1.0, the user will be able to indicate tools to exclude. It is effective if you don't require the tool stack to become filled with tools you already have shortcuts for, or to eliminate Ruby tools which are not supported.

For this purpose, just generate a text file in the plugin's directory. Write the tool names in the same way as they are demonstrated in the tool stack, segregated with line breaks. Restart SketchUp for the list to get loaded.

The plugin is available in the extension warehouse extensions.sketchup.com

Video Source Christina Eneroth
~~~~~~~~~~~~~~~~~~~~~~~~~~
Published By
Rajib Dey
www.sketchup4architect.com
~~~~~~~~~~~~~~~~~~~~~~~~~~

Tuesday, September 4, 2018

How to speed up your modeling in sketchup with v-ray proxies

In this sketchup v-ray video tutorial, you will learn how to use v-ray proxies in skethup models to produce superior quality renderings with high polygon models.

Rendering in sketchup becomes complicated since sketchup can’t deal with high polygon models. So, if there are more faces and geometries in the model, the modeling process become slower since sketchup does not handle all the geometries efficiently.

With high polygon, high detail model inside your sketchup model, it becomes difficult to produce realistic rendering. But v-ray contains a tool known as proxies that facilitates to export the objects out of your model and substitute them with a low polygon preview model.

When rendering starts, v-ray will reference those files called meshes externally devoid of showing them in your model.

To learn the detail process, go through the following video tutorial.

Video Source The Rendering Essentials

~~~~~~~~~~~~~~~~~~~~~~~~~~
Published By
Rajib Dey
www.sketchup4architect.com
~~~~~~~~~~~~~~~~~~~~~~~~~~