Showing posts with label #Diagnoal Tile. Show all posts

Thursday, August 27, 2020

Communication in Sketchup through Studio Nine

 SketchUp's capacity is its adaptability and speed in communicating thoughts. Deftness and adaptability are only two of the capacities SketchUp has conveyed to a noticeable architectural and interior design practice.

Studio Nine Architects, in the South Australian capital Adelaide, first received SketchUp into its work process in 2014. Past this, the firm was very conventional with CAD and hand-drawing idea design work processes, until Associate Emma Wight joined the firm that year, carrying her SketchUp experience and aptitudes with her.

At that point, the firm had around 20 staff. Studio Nine today utilizes around 40 staff with a 50/50 split among architectural and interior design. Presently, for all intents and purposes the entirety of the design staff are utilizing SketchUp as a component of their work process.

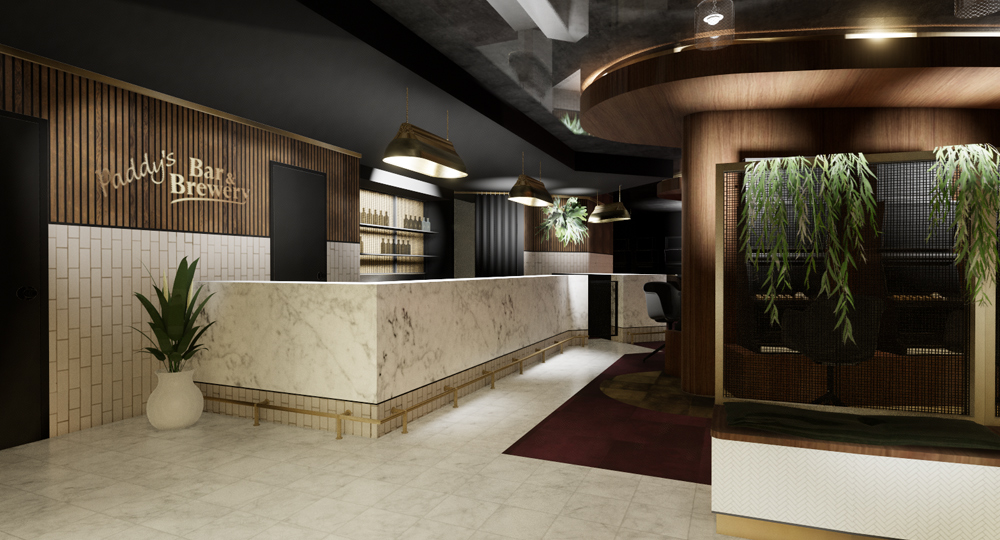
One of the significant points of interest SketchUp has brought was its adaptability and speed in communicating thoughts to customers. We can immediately yield a design in 3D for a customer so they can obviously observe where the design idea is going, Emma said.

From where a structure sits on its site to interior levels, we can successfully convey our vision to a customer. They can get a handle on the designs all the more viably to encourage their dynamic when it is directly before them in a 3D model that we can 'stroll' around with them to encounter the entire undertaking it is a device to impart the scale and structure actually successfully.

Emma said SketchUp likewise permitted alterations to be made all the more effectively and quickly. While hand-drawn plans and PC produced documentation through Revit and CAD have an enormous job, it is to a greater extent a fixed arrangement, she said. In SketchUp we can change designs rapidly and productively to suit a customer's needs.

Senior Associate Nigel Howden said SketchUp had additionally demonstrated importance in the endorsement procedure through the Office for Design and Architecture South Australia (ODASA) and the Government Architect. We use SketchUp as a major aspect of this endorsement procedure at an early stage in the undertaking's life to show key partners the design thought, plainly imparted in diagrammatic structure, he said.

Communication in Sketchup through Studio Nine

~~~~~~~~~~~~~~~~~~~~~~~~~~~~
Published By
Rajib Dey
www.sketchup4architect.com
~~~~~~~~~~~~~~~~~~~~~~~~~~~~

Thursday, August 13, 2020

Download LibFredo6 v7.2g for SketchUp

 LibFredo6 v7.2g is just launched. The existing users of SketchUp 6, SketchUp 7, SketchUp 8, SketchUp 2013, SketchUp 2014, SketchUp 2015, SketchUp 2016, SketchUp 2017 can easily upgrade to this newest version.

LibFredo6 is not an individual plugin rather it contains a wide array of the following plugins :-

FredoScale
Tools on Surface
RoundCorner
Curviloft
HoverSelect

GhostComp
SUClock
FredoTools
Curvizard
TopoShaper
JointPushPull Interactive
VisuHole
Animator

It is required to set up it and abide by the versions necessary for the Plugins, more higher version will produce superior results.

Download LibFredo6 v7.2g for SketchUp

~~~~~~~~~~~~~~~~~~~~~~~~~~~~
Published By
Rajib Dey
www.sketchup4architect.com
~~~~~~~~~~~~~~~~~~~~~~~~~~~~

Thursday, May 30, 2019

Diagonal Tile Planning in SketchUp

Matt Donley, the owner of MasterSketchUp.com has discussed some important things about tiles and their designing in SketchUp; he discussed fully about Diagonal Tile Planning in SketchUp.
If anyone wants to install floor tile, he/she needs to carefully plan the layout so that he/she knows where all of their cut pieces are going to fix. So it is not that one just randomly starts at on wall, only to find that it is needed to install a particular silver of tile after done with the other side. Here SketchUp is a great tool to visualize and plan complicated floor tile, to ensure cut pieces are sized well; besides that, users can get an accurate material count with accountability for tiles that will be used from cutoffs of others.
Matt Donley, the owner of MasterSketchUp.com has discussed some important things about tiles and their designing in SKetchUp; this article is fully dedicated on that. Matt Donley is also the author of SketchUp to LayOut and co-author of SketchUp and LayOut for Architecture. He has been teaching SketchUp since 2012 through his online tutorials and personal training. He comes from the background of carpentry and project engineering that’s why he appreciates how SketchUp can be used at any level of detail and can be a flexible tool to visualize any idea.
They are models that have some specific reason to help users to solve a problem in the mind, these models may not look pretty but they are very valuable. The easiest tile layout is when there is a square room with four walls and users are installing square tiles; then they need to start tiling from one corner of the room and continue it. Most of the time, it is better to measure to the center of each wall and either align the edge of a row of tile with that center-line; all these depends on what kind of cut piece one ends up with the walls, doors and every other things.
  • Irregular Tile Shapes: Square tiles are easier to plan as all of the edges of the tiles align but there are two grout line intervals need to worry about.
  • Irregular Room Shapes: If a room is not a simple 4 wall square then things can become trickier; here walls are not parallel or square, there may also be doorways or other transitions that have to navigate. Even a slight bum out in the wall can create a small change in wall projection which can make it harder to offset the tile joint as a diagonal wall can make extra chances for an unacceptable small cut tile to occur.
  • Diagonal Tile Layout: Donley decided to install the tile diagonally as there will be no worry about any individual tile edge alignment but there will be every single intersection with a wall makes an opportunity for a small cut tile.
  • Measuring the Floor for SketchUp: For a project he measured accurate to within ¼” or so where the baseboard covered ½” of the tile against wall; here he need to account for the squareness of the walls. At first he established a “true” straight reference line, next made a second straight line and work with them.
  • Importing Walls into SketchUp: After measuring walls, users have to open SketchUp and start the work by creating a large rectangle and carried the work far.
  • Spacing Tile in SketchUp: After establishing the walls, the tile can be laid out that might be tempting to simply take any measurement on the box of tiles and add the dimension indicated on the bag of tiles. Next he analyzed tile position; tookoff the material list, accounted for cutoffs, then planned tile installation and at last installed the tile.


~~~~~~~~~~~~~~~~~~~~~~~~~~~~
Published By
Rajib Dey
www.sketchup4architect.com
~~~~~~~~~~~~~~~~~~~~~~~~~~~~