Thursday, November 29, 2018

Eneroth Relative Move – The newest sketchup extension

Eneroth Relative Move is the newest sketchup extension that is available in extension warehouse. This sketchup extension is compatible with sketchup 2016, sketchup 2017 and sketchup 2018.

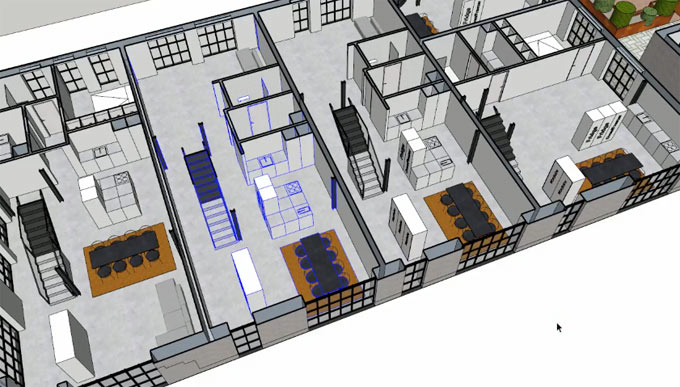
It can be used to move and copy entities in relation to a start and end reference. As for example, it is possible to copy a curtain when retaining its position to the identical window, or copy a chair from one desk to another.

Run the extension from Extension  Eneroth Relative Move or its toolbar.

Either click one entity to move/copy, or choose several with select tool prior to activate Relative Move. Then choose a group/component to be applied as start reference and one to be applied as end reference.

As soon as the entity is arranged, maintain choosing end references to carry on move or copy, or press Esc to reset the tool.

The extension is available in extension warehouse.
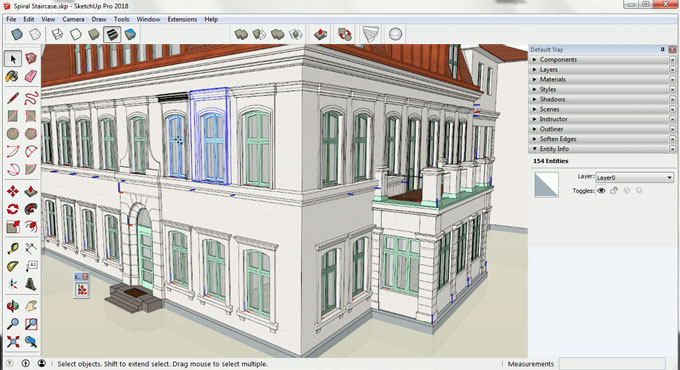
Eneroth Relative Move รข€“ The newest sketchup extension
Video Source Christina Eneroth

~~~~~~~~~~~~~~~~~~~~~~~~~~~
Published By
Rajib Dey
www.sketchup4architect.com
~~~~~~~~~~~~~~~~~~~~~~~~~~~
Tuesday, November 27, 2018

Enhance your mesh modeling skill with SubD version 2.0

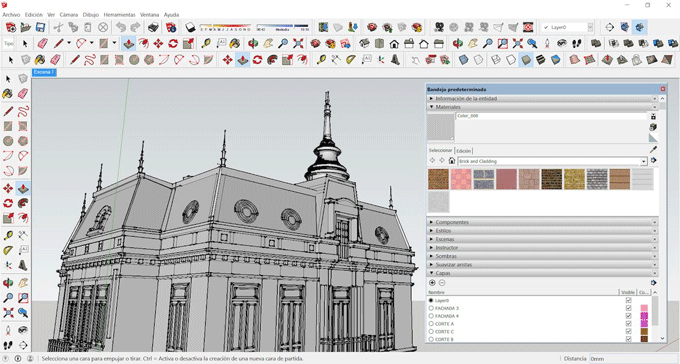
Evil Software Empire has launched SubD 2.0 with some new and advanced features. It now applies industry standard OpenSubdiv to work out subdivisions.

It is compatible with SketchUp 2017 and newer version. In older versions, it is required to facilitate High DPI under preferences.

This newest versions offers the following exclusive features :-

Superior control over your mesh smoothing.
Adjust the UV mapping.
will apply and restore your WrapR UV seams.


Meshes can now include internal faces.
Quad triangulation is now maintained for planar quads.
Modify subdivision of several selected instances.
High DPI support for dialogs, icons, cursors and tools.
performance of crease tool is enhanced significantly.
Obtain diverse different results if there are faces in mesh which are not oriented constantly.


The plugin is compatible with SketchUp 2018.

To get more details, go through the following link evilsoftwareempire.com

Video Source Thomas Thomassen

~~~~~~~~~~~~~~~~~~~~~~~~~~~
Published By
Rajib Dey
www.sketchup4architect.com
~~~~~~~~~~~~~~~~~~~~~~~~~~~
Thursday, November 22, 2018

Some useful tips on sketchup axis

In this exclusive sketchup video tutorial, Justin Geis briefly explains the significance of modeling along the axes in sketchup. The sketchup axes can be used to settle your inferencing, align the scale tool, generate location based models and lots other.

Drawing axes are vital to understanding how Google SketchUp functions. The drawing axes in sketchUp are used to determine where you are (and where you want to go) in 3D space.

Axes help in creating modeling in SketchUp rapid, perfect, and comparatively intuitive.

In sketchup the global axis lines belong to the red, green and blue lines which are usually demonstrated in the drawing window. The point where these lines are intersected is known as the origin. The red line stands for the X-axis, green for the Y-axis and blue for the Z-axis. The Z-axis is the vertical one. Components obtain their own axes. The solid axis lines remain to the positive direction whereas the dotted axis lines remain on the negative side.


To get more clear ideas, go through the following tutorial.
Video Source TheSketchUpEssentials

~~~~~~~~~~~~~~~~~~~~~~~~~~~
Published By
Rajib Dey
www.sketchup4architect.com
~~~~~~~~~~~~~~~~~~~~~~~~~~~
Tuesday, November 20, 2018

How to convert sketchup faces to SVG file for laser cutting

This is a nice presentation from Matthias Wandel for sketchup users. The video sheds light on how to apply the FlightsOfIdeas sketchup plugin to produce SVG files for laser cutting any sketchup model.

This plugin facilitates the sketchup users to choose sketchup faces from their 3D models and export the outlines of these faces to a scalable vector graphics (SVG) file for laser cutting. The plugin simplifies the process for exporting the 3D models to 2D vector graphics.

The plugin allows to apply editors like Inkscape (open source) as well as make 2D layouts for laser cutting, simple CNC milling, scrollsaws etc.

The plugin contains the following drawbacks :-

To set up the plugin, just take out the files from the zip file sketchup-svg-outlines-plugin-0.99.zip and provide them in your plugins directory. On Windows, it is done by opening the zip file (double click), choosing all of the files, and then dragging them to your SketchUp plugins directory.


To get more details about the plugin, go through the following video tutorial.
Video Source Matthias Wandel
~~~~~~~~~~~~~~~~~~~~~~~~~~~
Published By
Rajib Dey
www.sketchup4architect.com
~~~~~~~~~~~~~~~~~~~~~~~~~~~
Monday, November 19, 2018

Enhance your sketchup skills with these useful tips

SketchUp is treated as one of the most powerful 3D modeling programs in the world of design. The 3d modelers and designers prefer sketchup due to its intuitive working tools, open source libraries, and countless plugins.

Given below, some useful tips to improve your sketchup skills :-

1. 3D Warehouse: 3D warehouse in Sketchup creates a platform to facilitate the 3D modeling designs. In 3D warehouse, there are extensive ranges of free 3D models developed by other users. It is possible to select the exact design for your project from 3D warehouse.

The users don’t have to increase the size of their files since there will be no requirements for adding lines, layers and materials. Just download ready-made models from warehouse and apply them in your design. With 3D Warehouse, it is possible to upload your own models in order that other users can download them.

2. Geo-locate: Sketchup facilitates the users to geolocate their models which can be obtained from Window> Model Information>Geolocation>Add location/ Define location manually. It is very crucial since the conceptualization of a project needs the reallocation. Besides, the shadows casted by the project differ while shifting the project from one location to another.

3. Extension Warehouse: It is the best area to locate and set up different types of add-ons for sketchup. The plugin-ins accessible from extension warehouse can resolve issues in the software as well as enhance the speed and performance of existing tools.

These extensions facilitate the users to include special features to SketchUp. With extension warehouse, one can search for industry-specific tools, like extensions for architecture, construction and engineering. Extensions are very effective in accomplishing time-saving tasks. As for instance, a plug-in can be used to examine and repair solids for 3D printing. The extensions can also be utilized for more general purposes like tools designing for an IKEA kitchen.

4. Group It: By applying the group feature, it becomes easier to make alterations to your model in due course of time. Arranging the parts of the model into groups, it is possible to modify one part of your model devoid of providing an effect to the faces and lines connected to it. Click on the surfaces/lines/figures, right-click>make a group. Double-click the group to edit it smoothly.

5. Layers – but not too many: The layers can be used to simplify your task. When other models or CAD files are imported into SketchUp, there exist numerous new layers added from them. While selecting to delete any layers, ensure that they are originated from the CAD file or other models. Conceal the layers which are not applied (Windows>Layers) to conceal the sections of the model not being utilized presently.

6. Reference Points: Reference points are effective at the time of generating or replicating elements. Applying points, objects or reference guides while copying objects will make it accurate and perfect. Just opt for the object, choose a reference point in space and press the Ctrl key.

7. Shortcuts: In sketchup, there are some easy to follow keyboard shortcuts and they are easily adjusted (Windows>Preferences>Shortcuts). Study the several actions and variations (denoted on the lower left of the screen) of the key combinations.

8. Visual Styles: Sketchup contains in-built graphic styles to produce artistic effects or conceal geometries. If you are aware what you want your model to demonstrate, the visual styles are selected to reproduce that.

9. Scene Manager: Scene manager (Windows>Scene) facilitates the users to provide various camera angles or scenes. It results in communicating, understanding and animating the project. It is a very effective tool to manage the height of the camera with regards to the ground.

Besides, when a scene is added to the scene manager, one can get one viewpoint while demonstrating various interior layout options for one specific room. In the same way, it can be applied for exterior facades of a project.

10. Axis and Arrow Keys: While shifting something or drawing a line, the task becomes challenging to perform so in the direction you want. Sketchup offers one unique way of confirming that you lock the axis you prefer to work in. Up arrow is blue axis, the right arrow is red axis and the left arrow is the green axis. By tapping them while performing something, locks it to that axis.

If you tapped the improper arrow, it can be re-tap to free the object or tap the arrow you intend to tap. It is also possible to lock an axis with the Shift key while aligned to an axis.

11. Multiple Copies: Initially, choose the object to be copied. Then, move it with move tool. Tap on the Ctrl button. It notifies the software that you prefer to copy the original. If you indicate a distance, suppose 1000mm, it copies it to that distance.

If multiple copies are needed, equally spaced apart, just provide the number of copies followed by an asterisk. As for instance, typing 10* and pressing enter would provide ten copies each at 1000mm from the previous one.

But, when 10 copies are required among the first and the last, within the 1000mm, type /10 to produce ten copies among the original two.

Source: www.arch2o.com

Enhance your sketchup skills with these useful tips

~~~~~~~~~~~~~~~~~~~~~~~~~~
Published By
Rajib Dey
www.sketchup4architect.com
~~~~~~~~~~~~~~~~~~~~~~~~~~

Friday, November 16, 2018

Put your design to the next level with Lumion 9

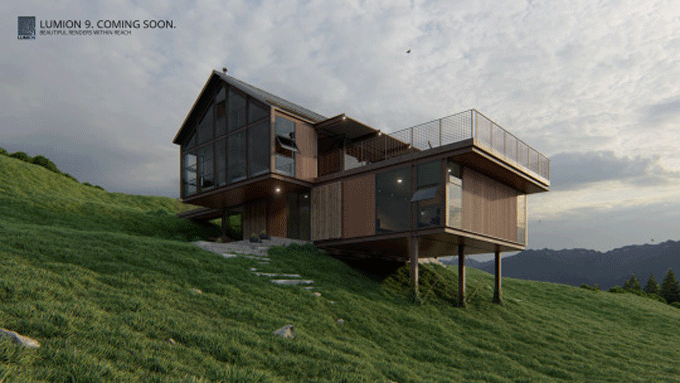
The most updated version of Lumion i.e. version 9 is just launched with some advanced features. This newest version facilitates the users to capture the naturalistic surroundings rapidly.

Now, it is possible to include one-touch real skies to emit a new light on your scene and quickly produce a attractive, unique setting for your designs. The users can create realistic rain with cozy spaces which can be beautified with furry rugs and fluffy blankets. For realistic garden shot, the new adjustable 3D grass materials can be employed to experience freshly cut lawn under your feet.

With new simplified scene-building tool, it becomes easier to generate complicated environments instantly. The workflow is enhanced significantly with Lumion’s amazing rendering speed and exceptional images and videos on all your projects.

Given below, some exciting features of Lumion 9

a. Sky Light 2 and Real Skies (Pro)
b. Adaptable 3D Grasses (Pro)
c. Atmospheric Rain and Snow (Pro)
d. Furry materials (Pro)

e. New materials
f. New objects
g. LiveSync for Rhino
h. Updated OpenStreetMap
i. Lean scene-building workflow
j. Save groups
k. Intuitive object placement
l. Instant object focus
m. Import edges
n. Automatic file recovery


Lumion 9 comprises of HDRI Real Skies. Just choose one and watch as it works simultaneously with the updated Sky Light effect to emit a new light on your design, placing it in an evocative context with a stunning backdrop.

Sky Light 2 and Real Skies
(Real Skies are Pro only)


It is possible to create instant, beautiful skies with 39 types real skies and their pre-configured Sky Light settings in Lumion 9.

If the sky is modified, entire lighting in the design will be rectified with it and you will experience an awe-inspiring render in literally seconds.

Customizable 3D Grass
(Pro only)


Give life to your landscape designs and include different types of realistic grasses to your parks, gardens, lawns and any other surfaces by applying the new Customizable 3D Grass materials in Lumion 9.

Atmospheric Rain and Snow
(Pro only)


Put your designs to the next level with the inclusion of new Atmospheric Rain and Snow. With a simple click of the mouse, produce everything from the light drizzle to a full-blown downpour, the winter flurry to a whiteout blizzard. The Atmospheric Rain and Snow are found under the precipitation effect in Photo and Movie mode.

To get more updates, click on the following link lumion.com

Put your design to the next level with Lumion 9

~~~~~~~~~~~~~~~~~~~~~~~~~~
Published By
Rajib Dey
www.sketchup4architect.com
~~~~~~~~~~~~~~~~~~~~~~~~~~

Wednesday, November 14, 2018

BoxUp XYZ – A new extension in extension warehouse

BoxUp XYZ is the newest sketchup extension that is compatible with sketchup 2017 and sketchup 2018.

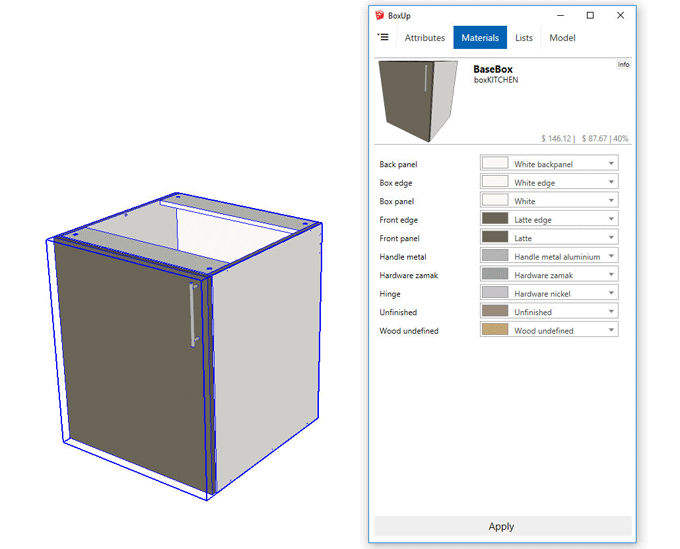
BoxUp expands Sketchup Dynamic Components with Dynamic Materials, Costing, Lists. It is very effective while dealing with sheet/profile based modular systems like; Kitchens, Office furniture, Shelving, Wardrobes, Aluminum profile systems and so on.

Sheet based materials may range from MDF, Plywood, Glass, Acrylics - any sheet based system.

Linear based materials like Aluminium profiles, Edgeband, gaskets - any profile based system.

It is possible to create your own collection of components or collections for a client. BoxUp Pro comprises of a wide range of dynamic components for kitchen design. It can be applied as reference, as a base to make your own, or utilize it as is.

Attribute manager: Establish attributes values for selected components - only changed attributes are revised. Swap components, select from a list of components in the collection to substitute the component(Pro only).

Material manager: The Material Manager applies 'Tags' to connect Sketchup materials and individual faces. Modify materials for selected components with the selected face tag.

Lists: It contains cutting list for sheet materials and linear materials as well as hardware list for components, list for edgebanding, project overview list. All lists are copied/pasted to spreadsheet or text editor(Pro only).

Pricing(Pro only): BoxUp Pro computes the cost and sales prices on the basis of sheet/profile/component costs. Costs are globally sustained. It is also possible to include labor cost to you components.

To get more detail, go through the following link www.boxup.xyz

BoxUp XYZ รข€“ A new extension in extension warehouse
~~~~~~~~~~~~~~~~~~~~~~~~~~
Published By
Rajib Dey
www.sketchup4architect.com
~~~~~~~~~~~~~~~~~~~~~~~~~~

Monday, November 12, 2018

How to produce glass in sketchup models with lattice maker

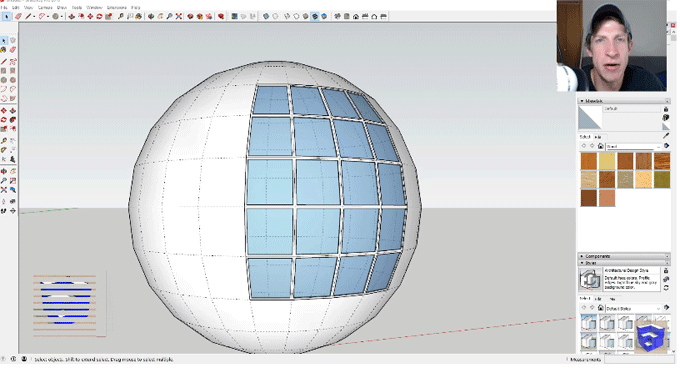
In this exclusive sketchup tutorial, presented by the renowed sketchup tutor, Justin Geis, you will learn how to generate glass in your sketchup model instantly with the use of an exclusive sketchup plugin lattice maker that is developed by TIG.

The plugin allows you to simply set offsets, glass thickness, window thickness & materials to smoothly generate windows in sketchup models.


This sketchup pluign can be applied to form lattice style arrays and frames. The plugin is suitable for generating skylights, sculptures, mosaic glass tiles, greenhouses and much more. This plugin provides huge benefits to the architects and contractors to simplify their works.
With this plugin, it is possible to produce the frames and inset panes for any surface. It has the ability to create just about any shape according to your choice. Before applying the plugin, it is required to choose the faces and then go to the plugin menu and click the “Lattice Maker” plugin.
A dialogue will be shown with options for the width and depth of the frame, the pane inset dimension, the lattice or frame material and the pane material.
The plugin contains the following drawbacks :-
A limited amount of colors can be selected from for the lattice and same with the pane. The thickness of the glass can’t be specified.
Click on the following link to download the plugin. sketchucation.com
For live demonstration of the plugin, go through the following video tutorial.
How to produce glass in sketchup models with lattice maker

~~~~~~~~~~~~~~~~~~~~~~~~~~
Published By
Rajib Dey
www.sketchup4architect.com
~~~~~~~~~~~~~~~~~~~~~~~~~~

Tuesday, November 6, 2018

Lumion LiveSync for SketchUp – The newest sketchup plugin

Act-3D B.V. is the developer of Lumion LiveSync for SketchUp. This newest sketchup plugin supports sketchup 2017 and sketchup 2018.

With this plugin, it is possible to create real-time, photorealistic rendering of your sketchup model.

The users can model their sketchup design in a wonderful and realistic surroundings.

Lumion LiveSync for SketchUp also comprises of:

- Camera synchronization among SketchUp and Lumion
- It has the ability to add and save Lumion’s stunning materials to your LiveSync project
- Real-time materials synchronization and visualization
- Automatic model importing into Lumion (there is no requirment to import a model individually)


To get live demonstration, watch the following video tutorial.

Video Source: Lumion

~~~~~~~~~~~~~~~~~~~~~~~~~~
Published By
Rajib Dey
www.sketchup4architect.com
~~~~~~~~~~~~~~~~~~~~~~~~~~

Saturday, November 3, 2018

Eneroth Relative Camera – The newest plugin in extension warehouse

A new plugin known as Eneroth Relative Camera is added to the extension warehouse. This plugin is developed by the renowned plugin developer Eneroth3.

The plugin is compatible with SketchUp 2016, SketchUp 2017 and SketchUp 2018.

The plugin is suitable for different industries like Architecture, Construction, Education, Engineering, Film & Stage, Gaming, Heavy Civil, Interior Design, Kitchen & Bath, Landscape Architecture, Urban Planning, Woodworking etc.

The plugin is used to remember the position of the camera with regard to a group or component and recall it subsequently relating to a group or component.

It can be applied to arrange various corresponding views associated with different buildings, floors, apartments or cars. Just ensure they contain corresponding axes placement.

The plugin is also applied to shift the camera in conjunction with an object to maintain the view of it when it has been shifted to the model. Initially, remember the camera, then shift the object and then recall the camera.

If it is required to shift different views, e.g. scenes, one will be able to copy the object rather than moving it, and then remember the views, one at a time, with regard to the old object and then recall it relative the new object.

Activate the plugin from Context Menu > Eneroth Relative Camera.

Go through the following sketchup video tutorial to learn how does it function.

Video Source Eneroth3

Eneroth Relative Camera รข€“ The newest plugin in extension warehouse


~~~~~~~~~~~~~~~~~~~~~~~~~~
Published By
Rajib Dey
www.sketchup4architect.com
~~~~~~~~~~~~~~~~~~~~~~~~~~

Thursday, November 1, 2018

nz_Corset – The newest sketchup extension in extension warehouse

Natale Zappia has developed nz_Corset, the newest sketchup extension that supports SketchUp 2016, SketchUp 2017, SketchUp 2018.

The extension can be used to generate corseted forms along with stilettos, vases, dishes, tensile structure and more.

nz_Corset is a development of nz_Surface

With nz_Corset, organic tubular forms are easily created.

This corset comprises of an adaptable waist (about it's axis) and girth.

It produced elaborate corset shapes along with Dishes, Vases and Stiletto shapes.

Bonus Function: OverdriveOverdrive facilitates the users to go beyond the end planes and generate dish - shapes when these shapes need that the end plane are parallel to each other.

You don’t inevitably require millions of faces so three levels of iteration are arranged. When the model is as proportionally perfect and organic, then it is possible to urn the global subdivide to finalise the form. Use nz_Surface to modify the details or cap your end planes.

nz_Surface vertices correlate with those of nz_Corset so it's simpler to marry the form jointly or make good use of the sophisticatedly structured vertices themselve...consequently generating soft edges

nz_Corset can simulated tensile fabrics use 'Natural' or alternatively run 'Manual' mode and customise the structure to suit

Hot Keys
Control:Toggle Textures 'Smooth|Diamond|Crystal|Adaptation|Shell'
Command:Toggle Centroid Placement: Natural(auto)|Manual
Spacebar:Random Variations to surface finished when now using a 'Smooth' texture


Up & Down Keys:Control the four levels of Iteration 1|2|3


Video Source Natale Zappia

~~~~~~~~~~~~~~~~~~~~~~~~~~
Published By
Rajib Dey
www.sketchup4architect.com
~~~~~~~~~~~~~~~~~~~~~~~~~~