Tuesday, October 31, 2017

SketchUp Skill Builder

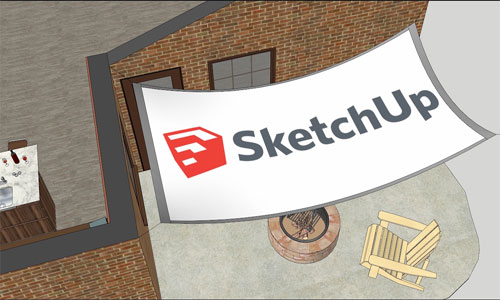
Josh Reilly has become a part of Google SketchUp since 2008 as a SketchUp Trainer and later rejoined with SketchUp Trimble in 2013. He has a good knowledge in SketchUp designing and labeling and also creating new things. He is fond of maps so he thought to make a topic on mapping images to curve the surfaces in SketchUp with the use of Skill Builder.

According to him, textures or materials have a very important part in SketchUp designs as they can perform the important role of combining the geometry with life. A well-technique wine label is the presentation of a well-textured SketchUp model which allows the user to explore the contents. For the advanced users of the application of textures on flat faces, he suggest to watch two short videos which demonstrates the process of painting and projecting textures on more complex and curved surfaces.

In the first video, Reilly has demonstrated a step-by-step breakdown of the workflow. The process is described here:

1. At first, the Select tool is used for using the geometry where a texture needs to apply. To enter Groups or Components double click is necessary.
2. Then go to View > Hidden Geometry to affirm the polygon breakdown of the curved surface.
3. Next go to File > Import…. Option and then browse the image file in the import dialog box.
4. Before clicking on the “Import” option, verify that “Use As Texture” option is selected.
5. To position the image in the selected area click once in the bottom edge of the face.
6. Again click on the top edge of that face for painting the image there.
7. For manipulating the image, right-click on the image and go to Texture > Position.
8. The paint Bucket tool is used to sample that texture by the modify key and then apply that texture to the remainder of the curved surface.
9. Then go back to View > Hidden Geometry for turning that mode off.
10. This handiwork must be admired.


The above process is used in the simple surface; the second video is about managing a little more complex workflow: projecting textures onto complex surfaces… The step-by-step breakdown of the workflow is described below:

1. At first a simple rectangular face, where the image will be imported has to draw which should match the size of the curved surface.
2. Then go to File > Import… and browse the image file in the Import dialog box.
3. Before clicking on “Import” verify that “Use As Texture” is selected.
4. At first click on the anchor point and then click again to finish the image placement.
5. Then Right-click on the image and go to Texture > Position for manipulating the texture to make it fixed in the position on the curved surface.
6. Now Right-click on the imported image and go to Texture > Projected that is important.
7. Now use the option Paint Bucket Tool to sample that recent projected texture and apply it to the curved surface.


There are many more options that can be done on textures in SketchUp by Skill Builder like:

• Applying Colors, Photos, Materials and Textures
• Sticking a picture or Texture to a face
• Adding colors and Textures with Materials


For more information and the videos visit blog.sketchup.com
SketchUp Skill Builder

Read more

~~~~~~~~~~~~~~~~~~~~~~~~~~
Published By
Rajib Dey
www.sketchup4architect.com
~~~~~~~~~~~~~~~~~~~~~~~~~~
How to Use Split and Join Tools in SketchUp

Split and join tools in SketchUp offer you the known applications correctly described by their names themselves. In this 3D application, LayOut Split and Join tools offer the easiest way to design a complex shape by splitting and joining. A few steps are there that help you do the needed cut and join on your design. Generally, split tool is for tearing a design apart while the joining tool joins one or more shapes together.

Steps to follow for splitting a line or a shape:
• Select the Split tool by selecting tools > split.
• Click on the areas of lines or edges you want to split.
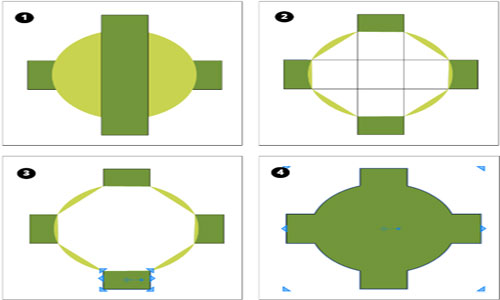
The splitting parts of the design can be dragged or dropped anywhere in the design. The picture below rightly presents how to use split tool for your design.

The best thing is that you can use both Split and Join tools together to design a complex shape. If you want to use the tool in the best way, you have to go to the core and learn the basic part of this application.
Follow the steps if you want to join two or more shapes together:
• Use the Select tool to drag the shapes and drop them so that they overlap each other. As it is shown in the Figure 1 (Callout 1).
• Click the Split tool.
• For Shared Vertex, you need to click on every overlap points. On hovering over the split cursor over these points, a red X and an Intersection ToolTIP will appear.
• Use the erase tool to delete the unnecessary part of your design before giving your model a final touch.
• Click the join tool to glue the split part to make a complete model.
• Click on edge of each piece when the Join tool cursor is active. The color fills in the shape with every click. The fill color will be the color of the shape you click first. See Callout 4.

The Split tool has many applications in our SketchUp design. Bending is another thing that is a popular feature for designers. Bending defines the curves of your design instead of the split points. For designing different complex structures, bending will prove a great tool. LayOut Path Editor is the tool that you need to bend the lines and shapes in SketchUp.

How to Use Split and Join Tools in SketchUp


~~~~~~~~~~~~~~~~~~~~~~~~~~
Published By
Rajib Dey
www.sketchup4architect.com
~~~~~~~~~~~~~~~~~~~~~~~~~~

Monday, October 30, 2017

How to swap low-poly proxy components for highly detailed model through components window

This sketchup video tutorial is a part of sketchup skill builder series. In this sketchu video, one will learn the process to interchange low-poly proxy components for exceedingly detailed model with the use of components window.

If you have models which contain lots of geometries, it will slow down your computer. To resolve the issue, you have to make proxies which are nothing but simple components to represent where the geometry is going to be placed. It can be done with a instant click substituted with more complicated geometry.

While going to create more and more complicated objects SketchUp, you need to save those objects in order to utilize them repeatedly. It is also often required to allocate your objects with other or download other people's objects from the web. All these can be performed with components. It all takes place in the Components window that is available under Window, Components.

It does not represent all the objects in the scene but only those objects which are transformed into components. There are three tabs in this components window. One is the Select tab that facilitates the users to choose components. The next one is Edit that facilitates the users to edit current components. Besides, there is a Statistics tab that empowers the users to observe statistics about the components.


Read more

~~~~~~~~~~~~~~~~~~~~~~~~~~
Published By
Rajib Dey
www.sketchup4architect.com
~~~~~~~~~~~~~~~~~~~~~~~~~~

Friday, October 27, 2017

How to resize components in SketchUp

SketchUp is a wonderful modeler for architects and designers and the new version of SketchUp has also come with new features for us. SketchUp 8 is a 3D modeling program that known as Google SketchUp in earlier. This program is also available in a fully useful free version and also the Pro version is available that has more features. This software helps the users in their business that deals regularly with the perfect modeling objects like in the architectural or design fields. Besides creating the users own components, the software also have pre-built models that can be resized as per the needs. Those newly created components could be resized with the Tape Measure tool and the other pre-built components can be altered with the scale tool.

Resizing pre-built components:

1. At first the SketchUp should be launched and then click on “Choose Template” from the Splash screen. The selected template determines the measuring units for the objects and components.
2. Then click “Start using SketchUp” button after selecting a template which can be the match of the required measuring units.
3. Next click on “Window” option form the Menu Bar and click “Components” for viewing the Components window.
4. Select the components for setting the starting point and then click on it for placing it on the main SketchUp screen.
5. Now click on Tools < Dimensions. After that the cursor will be turned in a purple dot that can be moved over the document that wants to resize.
6. After that click on the section of the components for setting the starting point of the dimension and click to place the endpoint. Sketchup will quickly display the dimensions for the selected distance.

7. Next click Tools>Scale from the Menu bar and click the component wished to resize.
8. At last click and drag one of the scaling grips for resizing the component.


Resizing newly created components:

1. At first launch SketchUp and then click on “Choose Template” from the splash screen. The selected template determines the measuring units for the objects and components.
2. Then click “Start using SketchUp” button after selecting the matching template with the required measuring units.
3. Then click on “File”>Open from the menu bar for selecting the resized components.

4. Now select the Tape measure tool from the toolbar and click anywhere for selecting the starting point of measurement.
5. Then move the cursor and select the ending point of the measurement.
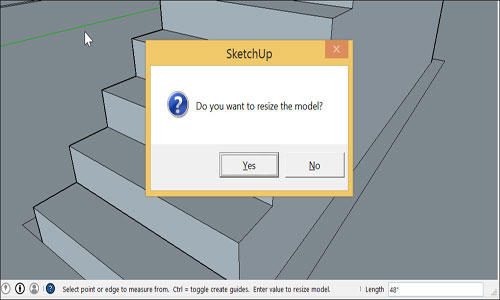
6. Next type a new length for the measurement from the Measurement toolbar and press “Enter”.
7. Then only click “Yes” at the prompted time and the component will automatically take the measurement.


For more information please visit smallbusiness.chron.com

How to resize components in SketchUp

Read more

~~~~~~~~~~~~~~~~~~~~~~~~~~
Published By
Rajib Dey
www.sketchup4architect.com
~~~~~~~~~~~~~~~~~~~~~~~~~~

Flip, Mirror, and Rotate for SketchUp

Flipping and rotating tools make your 3D designing a fun experience as you can easily draw the complex things with these applications. A proper use of these features will allow you to navigate some difficult jobs in 3D modeling software like mirroring an object. The general application of flip tool is that you can backflip geometry to 180 degree angle. The rotate tool helps your model spin and fold to fit into your designing requirements. The content describes the details of using these applications in a way that you have never applied before.


How to flip geometry along an axis:
• Select the geometry with the select tool.
• Context-click your model and choose a flip along
• Select an axis Below picture represents the flip application along blue axis (1) and red axis (2)

How to mirror geometry:
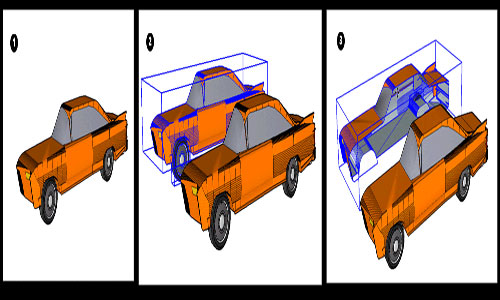
In SketchUp, creating a mirror image is as simple as designing the basic 3D models. All you have to do is using two functions – copy and flip – together. If you want to create a mirror image, only one half of the model is required. Design one half of the model (1) copy it (2) flip it (3). Your main image mirrors the reflection as accurately as you want.

Rotating Geometry at an angle:
Rotate tool is used for rotating an object at different angles. Here a model of a telescope is rotated to observe different parts of the sky.
• Select the geometry you want to rotate. Here telescope is selected, but its base remains unselected.
• Select the rotate tool; the rotate-shaped cursor will appear.
• Move the cursor to your desired plane. To lock the plane, press the Shift key until the angle vertex is set. When the plane stays at perpendicular point to an axis, the cursor changes the color in red, green or blue.

These features have many things to denote in your 3D modeling and the above-mention information reveals a small part of it.
For more details about the tools and features, you need to visit: help.sketchup.com

Flip, Mirror, and Rotate for SketchUp


~~~~~~~~~~~~~~~~~~~~~~~~~~
Published By
Rajib Dey
www.sketchup4architect.com
~~~~~~~~~~~~~~~~~~~~~~~~~~

Thursday, October 26, 2017

Objects from stoveweb.com – The newest sketchup extension

Andrey Z, the renowned engineer, physicist, researcher and programmer; has developed Objects from stoveweb.com.

This newest sketchup extension that supports SketchUp 6, SketchUp 7, SketchUp 8, SketchUp 2013, SketchUp 2014, SketchUp 2015, SketchUp 2016, SketchUp 2017, SketchUp 2018. This sketchup extension is intended for the architects.

The module facilitates you to draw objects out of the csv file, which implies the corner points of objects, the row number and color.

Go through the following link to download a sample csv file.

stoveweb.com/includes/dnkp/files/sqp_orientasia_kirpicha.csv

These types of files can be acquired manually, or can be recreated automatically via a free service

stoveweb.com practically for any objects available in the stove.

Get the extension online from extension warehouse extensions.sketchup.com

Objects from stoveweb.com – The newest sketchup extension

Read more

~~~~~~~~~~~~~~~~~~~~~~~~~~
Published By
Rajib Dey
www.sketchup4architect.com
~~~~~~~~~~~~~~~~~~~~~~~~~~

Wednesday, October 25, 2017

Project Management Modeling at Trilogy Partners

About Trilogy Partners: It is a design-build firm situated in Breckenridge, Colorado and is specialized in arranging residential projects. It is the trusted, accountable, experienced expert which exploits its creative ideas and solutions for helping clients navigate change. The company provides clear direction, developing partnerships, high performing business processes and advanced growth strategies which led towards the continuous profits and growth.

In the interview with the CEO, Michael Rath the comprehensive approach of using a virtual model as the basis for project management for architectural and interior design, engineering, communications and construction management by using SketchUp can be seen.

Difference between Trilogy manages projects and 3D models: The Base 3D model at Trilogy got its uniqueness by the length of the project. At first the project get started with a note taking session and a few concept sketches then a driveway substitute on a printed survey will be done. The building envelope consists with some circles that were representation of the garage and the great room. A virtual environment is a main workspace for everyone who is connected to the project mainly the client. SketchUp allows for the logical evolution of concepts and ideas and project management modeling process or PMM which is the most useful part always preservative and progressive. In the previous software for working between one stages to another the user needed to sketch, print, Copy, move to CAD and at last make a print all of this and make a note to give the client the description.

But now it can be only done in a model, keeping up the work only in the Base Model, like sculpting, shaping and seeing the things that can be fitted in it, the user doesn’t need to move. User can works moving ever forward till the time the team agrees that they have reached their goal to make a perfect design. Some tasks like cabinetry, trim, doors, engineering, tile, fireplaces, built in furnishings, closet development, plumbing, lighting and hardware works can be done outside the base model also in the different SketchUp files. But these all can be finalized in the base model when the model will be ready to receive and work on them.

Distinction between PMM and BIM: This process is not the BIM at Trilogy but it is PMM which means that the whole structure will be made in SketchUp as it is easy, affordable, fast and adaptable process. The model will be filled with all the information which the builder required and by using SketchUp components all the things that would be manufactured can be represented. It will help the user to describe the source, budget, order, ship and installing them perfectly. PMM builds a virtual structure that looks and feels like real deal so that the client and other ones could understand where to build. PMM is a truthful, accessible model bespoken to the most benefited people.

The process of keeping the models organized and easy to operate: The models of Trilogy partners are quite big and rich but SketchUp has the capacity to handle the greater complexity. But Trilogy designers have also been trying to develop the models to make them smaller than before. They have succeeded as they could now calculate the file size before dropping it into the model. They use 3D Warehouse and choose the component models carefully for the clients that would be fitted best in the model. By keeping the file small and textures below 100 Kb the model could be maintained well.

The future level of work in SketchUp: In future they are going to include full engineering details in their virtual products and also working with SketchUp for heightening the BIM aspects of the program for streamline the PMM process.

The role of extension in the Trilogy workflow: Extensions sometime uses in SketchUp for creating slowly and consciously in SketchUp for the most part as the app supplies. A lot of extensions sometime make the work simple but they are not ready for the real world. There are some extensions to help in workflow in the areas of site and terrain set up.

The secret behind X, Y and Z: The work product of SketchUp is very expensive and sometimes 3D modeling looks like a luxury. But a well executed SketchUp strategy gives a fantastic model and lowers the project cost also. As the construction problems in the model and in the construction site can be resolved to save the money. With a good PMM model a supervisor can handle more projects in a lower cost and risk. The well executed SketchUp process ‘Shocker’ can actually lower the costs and built the future on PMM.

For other information follow: blog.sketchup.com

Project Management Modeling at Trilogy Partners


~~~~~~~~~~~~~~~~~~~~~~~~~~
Published By
Rajib Dey
www.sketchup4architect.com
~~~~~~~~~~~~~~~~~~~~~~~~~~

SketchUp vs. Revit – Which is the Better Application?

If you have a passion for designing 3D models, you may have some preferences in choosing the 3D modeling software. SketchUp and Revit are both well-known in their concentrated user networks. To know which one is the best among two, you have to understand the underlying features first. Trimble SketchUp and Autodesk Revit stay at quite a good position when it comes maintaining precision in designing. But they have differences that distinguish them from each other. The content presents these features to you.

SketchUp Good for the Beginners:

Designing in SketchUp is much like drawing where you draw simple lines for your model. Generally in 3D, you are required to build a physical model with an ultimate measurement and size. Contrary to this, SketchUp allows users to concentrate on their project rather than on the designing skills. In SketchUp, outlines and features like push and pool tool help you build walls and floors as you desire. Keeping the features simple for you, it comes up with an easy-to-learn approach with which anyone can learn 3D designing without having prior knowledge. SketchUp also offers 3D warehouse – a library where designs are shared and uploaded to help designers across the world.

The best thing of SketchUp is that you can also learn 3D designing for free. SketchUp Make version with features and tools creates a place where you can sketch your imagination without compromising quality and accuracy.

SketchUp is also used in BIM (Building Information Modeling) to prepare the construction document. It needs a systematic approach from you so that the output will be as much accurate as you want. The poor result of SketchUp means that your model lacks in skills and design disciplines.

Revit for Professional Designers:

Revit works differently from SketchUp. It goes with the traditional designing style where you expect to build a physical structure using tools and applications. To design a wall, you need to choose the type of a wall from the preloaded section rather than making outlines in designing space. Editing is also done by following a few steps. You need to change the properties of the wall to get the desired shape and size you want. Though it is a complex process, Revit design offers a more accurate result than SketchUp does. Rendering your image with photo-like quality can be easily accomplished with Revit.

A few drawbacks are must there when it is compared with SketchUp. You have to purchase the application to get the benefits. Learning the application takes time than SketchUp. Still, Revit stays at a strong place as it comes up more advanced tools and techniques leading you to design in the best way.

Revit works smoother than SketchUp as the application cleans up the unnecessary works. The application seems best in coordination and data extraction. Users also express that Revit application runs faster than SketchUp, no matter how easy to learn the SketchUp tool is.

Though both of them are 3D software applications, the working areas are different and so do the features. If designing is your professional need, you must keep Revit over SketchUp.

Article Source: skwarchitects.com

SketchUp vs. Revit – Which is the Better Application

Read more

~~~~~~~~~~~~~~~~~~~~~~~~~~
Published By
Rajib Dey
www.sketchup4architect.com
~~~~~~~~~~~~~~~~~~~~~~~~~~

Tuesday, October 24, 2017

SketchUp to VR in 10 seconds

This article is about the new SketchUp tool VR that is a very useful helping hand for the science fiction fans and have some really great features. But it works on SketchUp’s latest versions. Here is some information about the working process in VR. Here are also some reviews about the working features of VR; it is a smart simple and useful tool. The getting process, the inside view all are described here for the readers.

VR or Virtual Reality has been a dream of science fiction fans for decades and at last it has appeared. It is mainly a multi-sensory computer simulated visual environment which allows users to immerse themselves and interact with 3D worlds. Innovates from all over industries are now using this technology for telling stories and taking users on a far away adventure. SketchUp is one of the world’s well known popular 3D modeling programs. There is a wide variety of industries here like architecture, interior design, landscape architecture, and film and product design. They all are depended on the program for bringing their ideas to life. For viewing SketchUp models, right hardware and prospect is necessary.

Getting Ready to Go Into VR: At first check that the file can be viewed in Prospect, as VR only works in SketchUP 2014-2017 and also check if there is the accurate geolocation set in the file. Actually Geolocation in SketchUp is for informing the ability for adjusting Sun Settings in VR and perfect asses glare and shadows that casts from the natural light entering in the place. For viewing different scenes in the model or jumping between different rooms always make sure to have a number of clearly named Scenes set up as well. In the next step, configure the workstation for the virtual reality by checking that the headset is either an HTC Vive or Oculus Rift and then open the Prospect in the desktop. After opening the prospect, drag and drop a SketchUp file into the dropzone or find and upload the file by simply clicking the “Browse” option. After the file get selected, click the “Launch” option and for going to VR is ready.


Inside the 3D model: After entering the VR the first thing will appear that the loaded model is in front in the Scale Model Mode. There one can rotate, scale and section their model for better view in the enclosed areas. By pressing the menu button on the controller for toggling on tooltips while in VR the user and clients both get familiarized with the various features. To enter in the models inside at 1:1 scale, select “Navigate” on the menu for teleporting you in. after entering one can explore the model and begin the mesmerizing review.
In- Vr Tools for Immersive Review: There are many tools available for helping to produce actionable next steps and valuable design insights from the users time spent on reviewing the model in-VR.

• Sun Settings: This tool use the actual geolocation that you have set up in the original Sketchup file for displaying the accurate lightning and shadows. By adjusting the time and date it allows user for making informed decisions about windows, lighting and to do shadow studies.
• Viewpoints: They are like the camera views that are located within the model. It is a best way to walk a client or colleague through a project by creating a solid narrative about the space. Prospect uses Scenes from SketchUp for creating Viewpoints. These viewpoints can be navigated between from both scale Model Mode and in the model.
• Layers: It can be advantaged to easily and effectively showcase the various design options, material combinations or can also walk through fully different layouts. The associated layers with groups can be automatically pulled into Prospect from SketchUp. By turning of the visibility the layers will be kept off.

For more information and video visit blog.irisvr.com

SketchUp to VR in 10 seconds


~~~~~~~~~~~~~~~~~~~~~~~~~~
Published By
Rajib Dey
www.sketchup4architect.com
~~~~~~~~~~~~~~~~~~~~~~~~~~


Career Options SketchUp Users Have

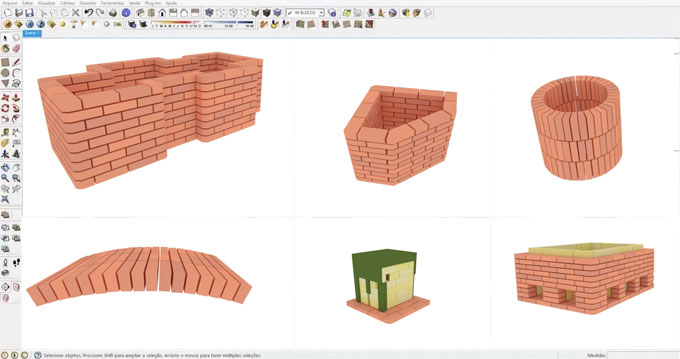
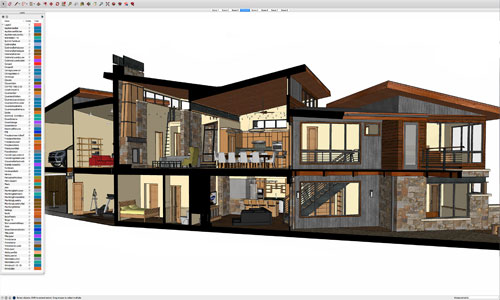
SketchUp is not only a 3D designing tool but also a way leading to many career options. The best thing about the application is that you can learn easily how to design 3D models without having prior knowledge. The job profiles associated with SketchUp include architect and interior design, and a design aid in AEC industry (Architecture, Engineering and Construction).


If you design in SketchUp to meet your passion, then turn your passion into a profession simply. Career options are numerous, and each of which relates you to the interesting world of building structures virtually. There is no certain direction for SketchUp Jobs, though. One can use the application as per their demands.

SketchUp does not follow any stipulated format. This is why jobs are increasing in numbers in the fields. Innovation enriches its application, and designers come up with several new ways that will make you more creative. Knowing career option hones your skill to beat more complex designs.

The content deals with some innovative career paths that remain unknown to the designers till date. The paths are as interesting and creative as their thought. Read on to learn more.

• Architect/ Architectural Visualizer:

Architect is another job option where SketchUp has been used primarily. You can design in the application if you are master over SketchUp. But to get a professional tag, you need to earn knowledge in other related software applications such as Indesign, Photoshop, Illustrator, AutoCAD and Revit.

Though one can be an architect without knowing Revit or BIM applications, AutoCAD and Photoshop are the must-to-have option. The software will help you design more clearly and precisely when you prepare to make 3D models in SketchUp.

As per the experts, SketchUp is a self-study. The more you spend time with the application, the better you will be in designing. You can also earn architect job without having the formal study of architecture. In this case, you will be restricted to a certain position and salary.

• Project manager:

A project manager uses SketchUp as a communication tool to bring out the inside of a work to the clients. SketchUp helps a project manager in many ways such as illustrating a worksheet condition, measuring safety issues, and more. The average use of SketchUp in a project manager’s job profile is 5%.

• Concrete Product Design:

In a concrete product design, SketchUp works as a communication tool that helps clients understand what they get. The 3D design of a project communicates well to the workers also as they visualize the complex works which need to be done applying the right method. The application in a product design includes things more than you count.

Reference site: forums.sketchup.com

Career Options SketchUp Users Have


~~~~~~~~~~~~~~~~~~~~~~~~~~
Published By
Rajib Dey
www.sketchup4architect.com
~~~~~~~~~~~~~~~~~~~~~~~~~~


Monday, October 23, 2017

SketchUp Camera Tool – Change the View of your Design

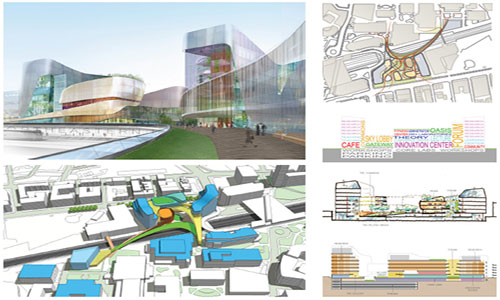
In SketchUp, you have to have a complete idea about the View tool since it gives your design an ultimate angle. A good designer earns an in-depth knowledge of how to use every feature of view to make their design the best. Camera tool generally works in two ways – one that jumps views from one point to another such as back, left, right, and from; another moves camera position from one point to another such as zoom and pan.


The view tool stays in the Camera option from where you can navigate the position of your model visually. Take a note of the content below that provides you with a comprehensive idea of what View tool offers.

• Iso: it is for giving your design a slightly angled front view. It has a specific application in your design with adding perspective and relationship of the project.
• Top: as the name says, it is for the top view of your model. Sometimes, Top view creates a flat look of your model. Use Zoom in and out to recognize the actual distance of your model.
• Front: the front view proves to be the best option when you start designing on SketchUp first.
• Right: the Right tool allows you to jump from back to front, right and left views.
• Back: Back gets less attention as compared to the other sides of your design. But the back view is as essential as the other view of the model.
• Orbit tool: with this tool, you can see the view from any direction of your model. Navigating the application is also easier. To observe the different views of the model, you need to drag your model to the direction you want to see.
• Pan Tool: Pan tool helps you move the model from one point to another. You will proceed along with the gradual move of the design. Using the tool is like grabbing and dragging a model.
• Zoom: the tool used has been used in the same way as it was used. Zoom in for observing the smallest detailing and Zoom out for view the model in a biz size.
• Zoon Extent: this feature generally zooms out your model to the maximum extent.

Viewing your design from right direction is as much essential as a flawless design. The above-said tool will help you choose the right angle and sites you want to observe your design. To know how to use the camera angle more prominently, visit


~~~~~~~~~~~~~~~~~~~~~~~~~~
Published By
Rajib Dey
www.sketchup4architect.com

~~~~~~~~~~~~~~~~~~~~~~~~~~
Place Shapes Toolbar is the newest Sketchup extension

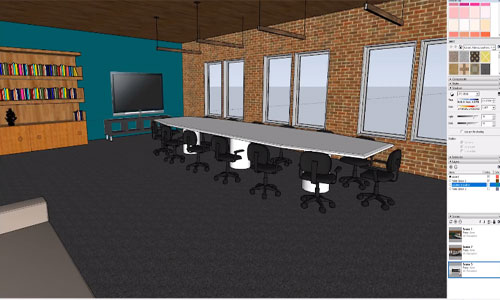
SketchUp is expert in creating variant tools for handling the shapes and designs smoothly for the designers and architects. This time they have launched Place Shapes Toolbar. It can be applied in the different versions of SketchUP. In this article the work of this toolbar is described. The readers can assume this toolbar by reading various descriptions of the tool. It is easy and good for creating designs for both big and small fields. Its use and tips are also given here. Let’s have a check on it. There is also a link is given for videos and tutorials.

Place Shapes Toolbar is a new Sketchup plugin invented by Alex Schreyer. This brand new Sketchup plugin supports different versions of Sketchup like SketchUp 8, SketchUp 2013, SketchUp 2014, SketchUp 2015, SketchUp 2016 and SketchUp 2017.

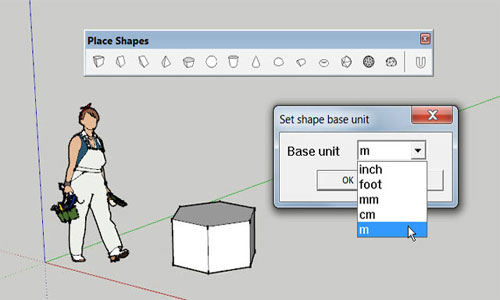
This extension has a toolbar with some menu items that is used for setting simply different common 3D shapes or geometric primitives. SketchUp’s navigate tools allow users for creating any shapes without too much effort. With the use of this toolbar, the users can accomplish fast “solid-based” modeling for dealing with added and subtracted primitives who can produce a precisely watertight object that is ideal for 3D printing. Prior for changing the shapes, anyone can opt for a general unit like foot, inch, mm, cm, m etc.

This toolbar is a good starter shape set for the new users and the kids who want to play in 3D modeling but don’t have any interest to learn.

Usage: At first show to the “Place Shapes” toolbar and click on the shape that has to be placed. Or the other way is to apply the Draw menu’s items. Most of the shapes will adjust themselves in the basis of the underlying geometry. Arranging various shapes is also possible by going to the select tool or pressing the space bar or the ESC key after finishing.

After placing a shape, move and scale tools can be applied for moving and functioning on the shape. In the case of failing work of any shape as per the requirement right click on it and choose ‘unglue’. In the case of placing any shapes, they all stick to the elementary geometry. Exploding a shape to work with its raw geometry is also possible only by applying the right-click menu. While selecting the base unit from the dialog, all the following placements will get that unit. The items that are already arranged don’t need scaling. This is helpful for modeling small stuff like 3D printing or large stuff like buildings.

Tips for working on this tool:

a. At first turn on the X-Ray face style to enable snapping for the hidden points.
b. Go to View>Hidden Lines to allow the hidden lines visible for more precise snapping.
c. These shapes fit well with the SketchUp Pro’s Solid Tools
d. For adding Text to any of the shapes use the 3D TextTool.


For more information and video please follow: extensions.sketchup.com

Place Shapes Toolbar is the newest Sketchup extension


Read more

~~~~~~~~~~~~~~~~~~~~~~~~~~
Published By
Rajib Dey
www.sketchup4architect.com
~~~~~~~~~~~~~~~~~~~~~~~~~~

3D Design Studio and Photorealistic Rendering – The newest sketchup plugin

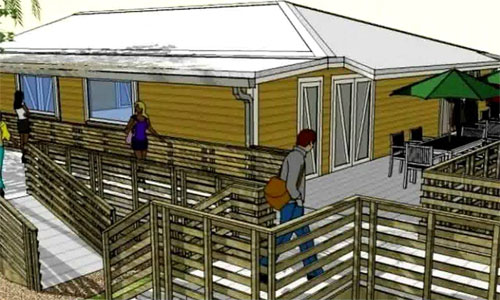
3D Design Studio and Photorealistic Rendering is the newest sketchup plugin that is packed with various types of extras to produce renderings, reports, and instructive client presentations.

It is compatible with SketchUp 8, SketchUp 2013, SketchUp 2014, SketchUp 2015, SketchUp 2016, SketchUp 2017, SketchUp 2018.
This sketchup plugin is utilized to create photorealistic rendering with special modeling tools.
3D Design Studio facilitates the users to select from one or more of the Render Plus Render Products:
IRender nXt – Complete toolset for rendering and animations
Allura GPU - New product supported with NVIDIA Iray+ to discharge the power of your GPU for rendering, or
ArielVision – Robust but user-friendly rendering package for SketchUp.
One can avail a free 30-days trial version from the following link extensions.sketchup.com
The 3D Design Studio comprises of IRender nXt for Photorealistic Renderings, RPS 3D Placement Tools, SpaceDesign for Attributes and Custom Reports, Interactive 3D PDFs, Non-Photorealistic Rendering etc.
This sketchup plugin is available in extension warehouse extensions.sketchup.com
3D Design Studio and Photorealistic Rendering – The newest sketchup plugin

~~~~~~~~~~~~~~~~~~~~~~~~~~
Published By
Rajib Dey
www.sketchup4architect.com
~~~~~~~~~~~~~~~~~~~~~~~~~~
Friday, October 20, 2017

Modeling Terrain and Other Rounded Shapes

Drawing terrain in SketchUp does not require you to be a pro in the 3D designing. You can sketch the model as simply as you draw a line on a paper. But your 3D model needs other things to mirror the objects or scenes as accurately as the real one. The model you are drawing gets a special look when you add grounds and landscape. Along with terrains other forms of designing create a visually satisfied project. But how SketchUp perform all these tasks so efficiently is the question of many modelers. The content brings out the hidden facts of SketchUp tool in designing terrain and other round faces.


The answer actually lies in SketchUp Geometry. All SketchUp users must be familiar with the term – Sandbox tool – the tool needed for designing terrain. With this tool, you are originally using a special type of geometry – TIN that allows you to draw anything as per your wish.
TIN stands for Triangulated Irregular Network which is commonly popular as ‘a group comprised of triangles.’ The below image shows hills carved by TIN.
The content below deals with technicalities of designing TINs and Sandbox tools. The basics of designing that you must learn to Sketch the complex model in 3D.

Get started with TIN: If you are creating TIN first time, then you must try simple designs rather than opt for the complex ones. You need to import contour lines from another application or can import terrain from Google Earth using SketchUp building tools. Your drawing onto the TIN can is used in your design. But the easiest option will definitely be drawing a flat rectangular TIN.
For importing pre-existing terrain, Visit help.sketchup.com and for designing terrain from scratch, click help.sketchup.com

Use Sandbox tool: Sandbox tools stay in a sandbox toolbar or you can follow the steps – Tools > Sandbox
If you are designing a terrain, you can geolocate the model or add a geographic location embedment that places your model into a specific point of the model. Advantages of using geolocated the model are given below:
• You can get a comprehensive idea of sunlight and sun shadows that add a different angle to your model. Light effects always take a picture to a new level and your design will get a sense of reality with this.
• You can view your design in Google Earth.

Geolocated terrain helps your model locate into a specific place on the earth. You can also add different functions and features with the sandbox.
Reference: help.sketchup.com

Modeling Terrain and Other Rounded Shapes


~~~~~~~~~~~~~~~~~~~~~~~~~~
Published By
Rajib Dey
www.sketchup4architect.com
~~~~~~~~~~~~~~~~~~~~~~~~~~


How to Create Component in SketchUp

When an object of your design has several uses in a model, component tool proves to be a great help for you. It saves your time from repeating the same design you need. Creating components enhances the accuracy of a model, and it is a must-to-apply trick for expert modelers. Benefits of using this feature can be felt while designing a model. Below are a few things that you can do with the component tool.

• You can reuse your component whenever you want.
• The geometry of a component stays separate from other components connected with it.
• You can also edit component whenever you feel so.
• You can cut a hole in a face with your component and can also stick it to a specific plan by changing setting of the glue panel.


Creating components can be made in the model itself or a separate SketchUp file. The create component dialog box will help you put the needed specification in your component object.

The steps that you need to follow for creating a component are given below.

1. Select the geometry of the object you want to make a component.
2. Go for the Edit > Make Component. A Create Component Dialog Box will appear.
3. In the Definition tab, give a proper name to your component.
4. Ad a short description of your component to the Description.
5. To use gluing plane, you need to select an option from its Glue To drop down list that contains – Horizontal, Vertical and Sloped. If you are using Glue To option, a few changes you will notice such as Cut Opening Check Box will be active and Always Face camera and Shadow Face Sun will be inactive.

6. (For Cut Opening Option Only) if you want to use the Cut Opening option for your component, select the check box.
7. (For Always Face Camera Only) Always Face Camera helps you turn your 3D model into 2D forms without hitting the rendering option. If you apply this feature to your component, the Shadow Face Sun will also be active.
8. (For Face Sun Only) the feature is used in casting shadows of your components. The shadows will be cast the same way as the component is facing the sun.
9. (For Set Component Axes only) Set Component Axes defines the component’s axis origin. When you press the button, the cursor will tell you to insert a new axis for your component. Once you are done, the Create Component Dialog Box will be re-active again.
10. (For Selecting Type) the Type drop-down menu will help you classify your components.
11. For transforming the geometry you have selected for creating component, let the Replace Selection with Check Box selected.
12. Click the ‘Create’ button for creating the component.


These are the steps that you get while making components from the geometry of the model. Following this method will bring you a component that you can use several times in your design. You can also get video tutorials on the internet that provides a complete guide on how to create a component in SketchUp.

Video tutorial for the component:


Read more


~~~~~~~~~~~~~~~~~~~~~~~~~~
Published By
Rajib Dey
www.sketchup4architect.com
~~~~~~~~~~~~~~~~~~~~~~~~~~

Wednesday, October 18, 2017

SketchUp Plugins for Rendering

SketchUp rendering is the option that allows you to visualize your 3D design in a picture perfect manner. The option enhances the quality of your work and markets your products the way you want. There are many SketchUp plugins for rendering available to give your design a perfect touch. Choosing the best option depends on the type of work you want to get from your 3D model. The content mentions names of plugins as many as it could. You can use one of them as per your requirement and demands.

• AmbientOcclusion Lite: This plugin is helpful to get a fast visualization from your 3D model. It also gives a model a real touch with highlighting space. If you want more than usual features of rendering, you must opt for the AmbientOcclusion Pro that comes up with the depth of fields, colors and texture effects.Visit stg-extensions.sketchup.com

• ArielVision: This rendering option follows the easiest steps to render your SketchUp model. Its easy-to-use interface makes the rendering process simpler with focusing on some essential features of rendering. You can start rendering just by one click.
To download the application, visit extensions.sketchup.com

• Bloom Unit: Bloom Unit uses the cloud computing system to create a photo-realistic view of your images. You no need to be expert in every detail of rendering since it anonymously adds all essential features your model needs.
Do not forget to visit www.bloomunit.com

• Brighter3D: This extension promises to give you a hassle-free ways of rendering on SketchUp. The built-in features automatically look after important things like lighting, noise and material. It also offers you the multi-threading option with which your system will create a realistic image of your design using the CPU power without the need for graphic cards.
Visit www.brighter3d.com

• Corona Renderer: Corona Render solves every problem regarding rendering and transforms your model into a real visual. The extension gets updated offering you new features and functions.
Follow corona-renderer.com to get more information.

• FluidRay: Rendering with FluidRay is faster and better as it prepares a visually stunning picture for your 3D models, architecture and interior design.
Visit www.fluidray.com for more details.

• LightUp: LightUp is an object-based rendering that instantly transforms your model to a visually appealing object on the SketchUp window itself. The extension ensures that you will get no-waiting rendering opposed to the traditional process.
Visit www.light-up.co.uk to know more or download the plug-in.

• LumenRT: It is another rendering extension for SketchUp that helps you create a photo-realistic view of your design. It understands the photographic environment better than others.
To know more about the design, visit www.lumenrt.com

SketchUp Plugins for Rendering

 Read more

~~~~~~~~~~~~~~~~~~~~~~~~~~
Published By
Rajib Dey
www.sketchup4architect.com
~~~~~~~~~~~~~~~~~~~~~~~~~~
Tuesday, October 17, 2017

Eneroth Auto Weld – The newest sketchup plugin

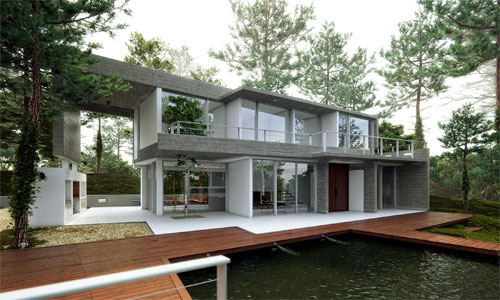
Eneroth Auto Weld is the newest sketchup plugin that supports SketchUp 2016, SketchUp 2017, SketchUp 2018.

This plugin can be used to weld the opted edges collectively as well as look for edges to be welded and weld them at the same time. The search is restricted to the selection if there exist one, or else all edges in the existing drawing context are verified.

The plugin also automatically searches edges to weld when Follow Me Tool has been used. It means you don’t need to handle with all the exploded curves whenever you apply the tool.

Finally, the plugin creates perfect arcs and circles whenever probable, not like generic curves, which among other things facilitate you to view the radius in Entity Info.

Run the plugin from Extensions > Eneroth Auto Weld > Weld or Toolbar. Settings are available under Extensions Eneroth Auto Weld > Settings.

The extension can be downloaded from extension warehouse extensions.sketchup.com

Watch the following video for online demonstration.


Read Continue

~~~~~~~~~~~~~~~~~~~~~~~~~~
Published By
Rajib Dey
www.sketchup4architect.com

~~~~~~~~~~~~~~~~~~~~~~~~~~

Thursday, October 12, 2017

SketchUp 3D Basecamp Benelux 2017

SketchUp 3D Basecamp Benelux 2017 will be held on Fri, November 24, 2017 from 8:30 AM – 6:00 PM CET at Het Evoluon, Noord Brabantlaan 1A, 5652 LA Eindhoven, Netherlands.

There will be instructional Keynote sessions about several SketchUp Pro workflows as well as supplementary scopes like rendering, Virtual Reality, 3D printing and more at 3D Basecamp for the sketchup enthusiast. Besides, an exclusive SketchUp, LayOut and V-Ray workshop will be conducted to transform your SketchUp Pro skills to the next level.

Given below, the lists of some renowned keynote speakers :-

Matthijs Kraan - Freyr Architecten about SketchUp Pro all the way
Nick Nijmeijer - ITCAD about SketchUp Pro & BIM
Dave Wayne - CADalog inc about SU Podium
Stijn Brilman - Canon Nederland about 3D Printing Architectural Models


Venue of the basecamp :-

08:30 - Reception with coffee / tea / refreshments
08:30 - Registration and Wardrobe
09:00 - Opening session in the Main Hall
09:15 - Keynote sessions in the Main Hall
10:00 - Workshop sessions in the Small Hall
10:45 - Intermission

11:00 - Continuation Keynote and Workshop Sessions
12:30 - Lunch
13:15 - Continuation Keynote and Workshop Sessions
15:30 - Intermission
15:45 - Continuation Keynote and Workshop Sessions
16:30 - Closing session with raffle in the Main Hall
17:00 - Drinks
18:00 - End


To book your seat online, click on the following link www.eventbrite.nl

SketchUp 3D Basecamp Benelux 2017

Read Continue

~~~~~~~~~~~~~~~~~~~~~~~~~~
Published By
Rajib Dey
www.sketchup4architect.com
~~~~~~~~~~~~~~~~~~~~~~~~~~