Friday, December 28, 2018

"Quantities and Cost estimates with Quantifier Pro in SketchUp"

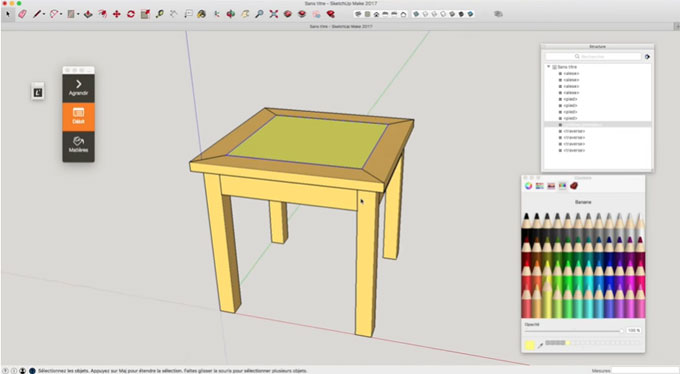
SketchUp’s Quantifier Pro is a brand new extension and amazing extension that is used to quantify and help to apply pricing to things within the SketchUp model.

Quantifier Pro: SketchUp 2016 or the newer version is suitable for Quantifier Pro and it is also compatible with both Mac and PC. This is the ultimate tool to get instant quantity and cost information from the SketchUp model. It has various features like:
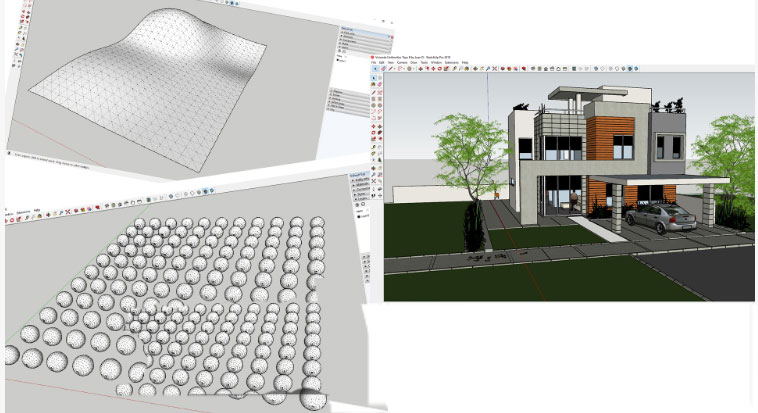

  • Selecting the objects in the model will instantly show the total length, area, volume, weight and cost
  • After using the model all the reports are model-driven and automatically update while the model will change.
  • Fully Customizable Component Reports are found there which will show length, width, height, projected area, surface area, volume, weight, cost and many more things.
  • There are also detailed cost reports.
  • Instant Material Report will show the surface area of all materials in the model
  • Assign re-usable cost rules are shown by layer, material, object or to the whole model
  • Cost Inspector tool will show total cost calculation for the selected object to verify accuracy
  • In Windows, Microsoft Excel is used to share unified cost data across many SketchUp models
  • This extension also supports many languages and international currency
  • There are full control of units and accuracy shown in reports
  • If Profile Builder 3 is added with this extension, then it will be even more colorful.
This Plugin cost $79 alone and if it is bundled with Profile Builder 3 then it will cost 25% off of each extension

Functions of Quantifier Pro: This particular extension is designed to help in quantifying and price in different things within the SketchUp models; at first the users have to select different objects within the model and then apply cost data to them within quantifier. Within quantifier, users can select different objects and can be viewed within the quantifier dialog. It should be kept in mind that while using quantifier, users have to put the objects on the same material on their own layers; as an example if one is going to quantify a block wall then he/she will try to put all the block wall objects on a block wall layer. After this, this extension will allow the users to apply various cost properties to the objects on the layer. Moreover that, this extension can be used to apply costs to objects by other units within the model like length; and it also works with profiles that have not been created with Profile Builder or by the users themselves.

Users can also apply costs based on SketchUp materials also and this will calculate the cost based on materials that have been applied to front side faces only to avoid double counting back side materials. It is also possible to directly overrule the cost added with an object using the object opinion and while modeling an object that are punching a bunch of holes it; then it is better to model that as standard geometry rather than a profile builder assembly as they actually calculates using the bounds of an object. Finally besides all of these one can create reports within quantifier that can either viewed within SketchUp or can be exported to Excel, theoretically one an import cost data from an Excel spreadsheet also.

Justin Geis: Justin Geis is the founder of The SketchUp Essentials and started using SketchUp while he was working as a general contractor in 2008 and after using it he found that SketchUp is extremely powerful that he just started to use it in his personal works also. Then he started The SketchUp Essentials as a place where he could share his ideas of using SketchUp easily through some tutorials and tips to help other users controlling the power of 3D Modeling in everyday lives.


Quantities and Cost estimates with Quantifier Pro in SketchUp

~~~~~~~~~~~~~~~~~~~~~~~~~~~
Published By
Rajib Dey
www.sketchup4architect.com
~~~~~~~~~~~~~~~~~~~~~~~~~~~

"Multiple Profiles can be handled by Follow Me extension"

SketchUp Warehouse is full of various wonderful and useful extensions and tools that make the design thing a lot easier, Follow Me is the newest of them with some unique features.

Aaron Dietzen this time comes with his new useful creation of importing and exporting via SketchUp Shop which is the newest thing for SketchUp users. This article will describe the whole process according to Aaron and his video tutorial where the new tool Follow Me Tool is introduced and Aaron is in love with this tool as it can be used as a substitute of Push/Pull tool.

About Follow Me Tool: The SketchUp Follow Me tool is the Pied Piper of 3D geometry as it leads a face with a path to build a 3D shape. Though this is the only thing this tool does but it has a pack of applications and enables the users for drawing difficult 3D models with only a few clicks. The Follow Me tool can find in many places in SketchUp like Tools menu, Edit toolbar, Large Tool Set toolbar and Tool palette (macOS).

Aaron has been using as a replica of Push/Pull tool and also as a modification tool; in his words though Push/Pull tool is great but while he wants to seep a molding profile around a room or round-off the corner of a table he can easily does with this tool. But there are lots of places when he finds difficulty to use this tool such as while working with a bunch of shapes and have them all follow the same path. Follow Me tool will do the work but with an unwilling way where lots of selecting, path picking, then Follow Me tool, and then again picking the profile etc. which will continue to the next shape again. So it is a time taking matter for everyone and Aaron tried to solve this problem with using some idea and through his video tutorial he has presented the whole matter well. This article is a little description of his taken steps and here is also the tutorial link for further help; so let’s begin:


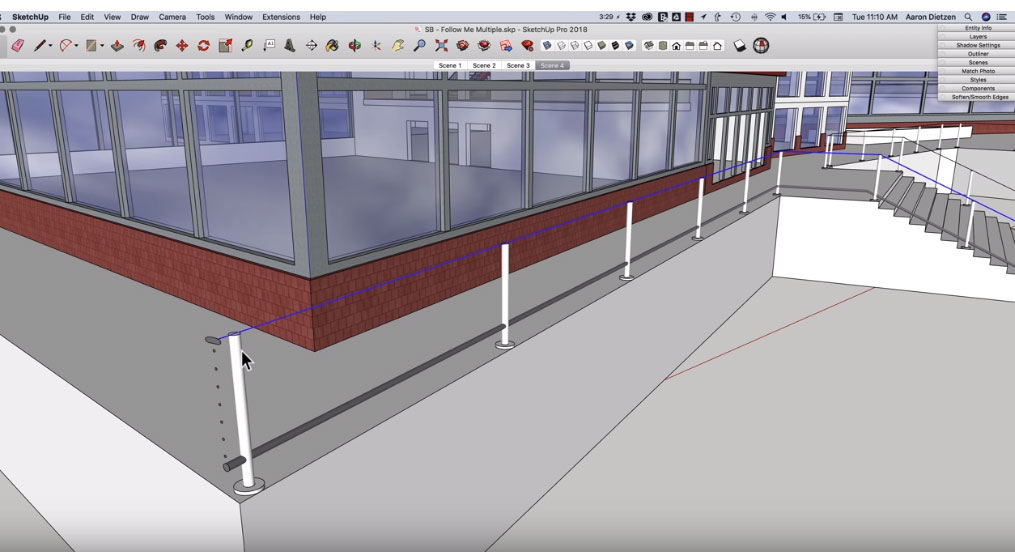
Aaron has created a wonderful model where he has used a lot of shapes of different sizes and he has made all those shapes and sizes to follow a single path in one click. At first he has selected the path and then click on Follow Me icon; after clicking the exact work the tool does as it name replicates it created a whole Follow Me path on the selected areas. Again he did the same thing; selected the path and clicked the Follow Me tool to create another path from the shape and it will continue till the last shape gets completed under Follow Me path. Actually the shapes like circle or rectangular are made at the end of the Railing bar to make them able in using the Follow Me tool; he has created some little shapes there and he drew a rectangle over the first shape and then copy it through all the shapes that created another thing. He just used the Follow Me tool and clicked on the rectangular shape to make it a covered area. Next he took the top of the shape and deleted couple lines which created a followed path with detailed design. The same thing he has done with his next shape; like working with the stairs, he created inside and outside to make a voy, then copied the ‘N’ shape on the other side and repeated the whole process again.

Source: www.youtube.com
Multiple Profiles can be handled by Follow Me extension
~~~~~~~~~~~~~~~~~~~~~~~~~~~
Published By
Rajib Dey
www.sketchup4architect.com
~~~~~~~~~~~~~~~~~~~~~~~~~~~

EYECAD VR – The real-time rendering engine for Sketchup & Revit users

eyecad VR is the new real-time rendering engine that is compatible with an extensive range of software suite like Revit, ARCHICAD, Rhino, Cinema 4D, ALLPLAN, SketchUp Pro, Maya, Max, Blender, Mudbox, ACCA Edificius, and 3CAD Evolution.

It facilitates AEC professionals like architects to delve into and examine their designs with some exclusive features like dynamic environments, interactive lights, moving objects, the importing of HDRI images of the real world from project sites, and the inspection of materials and library objects. As soon as an environment is set, one click renders up to 4k resolution are created with a single mouse click and interactive exploration of the environment occurs with output to different VR options.

Eyecad VR Start

The basic version is known as Start and it has the capability to import your model, apply VR interactions, and function with objects and materials and the material editor itself. It is also possible to distribute your work with your clients to mobile and desktop.

Eyecad VR Advanced


The Advanced version includes lighting sources, the environment editor, photo-realistic rendering, and ultra quality options. There are more than 400 PBR (physically based render) materials accessible in eyecad VR. eyecad VR Pro

The Pro version comprises of the Landscape toolset that can be used to produce amazing landscapes. Besides, there are Videomaker and Worldmap features. By applying the robust terrain editor, make realistic natural environments along with water like as in rivers, ponds, lakes as well as with animated vegetation, hills and mountains and more.

The DEM (Digital Elevation Map) support in Pro facilitates the user to arrange their project in the real world. The WorldMap function sets in actual map-based context data and the height of all buildings can be easily decided. This tool is based on GIS technology. With the real world visible the user can then arrange their building into this environment. The Pro version offers some ground-breaking technology to create stunning video animations and several water simulations for renders.

Virtual Reality Apps for Mobile


There are also both Apple iOS and Google Android mobile apps called eyecad VR. These free apps can be utilized for viewing projects in virtual reality and in Cardboard.

To download the software, click on the following link www.eyecadvr.com

EYECAD VR รข€“ The real-time rendering engine for Sketchup & Revit users

~~~~~~~~~~~~~~~~~~~~~~~~~~~
Published By
Rajib Dey
www.sketchup4architect.com
~~~~~~~~~~~~~~~~~~~~~~~~~~~

Thursday, December 27, 2018

"Hiding things in a Model"

SketchUp Tools are making things easier and by its constant upgradation, it is solving many problems such as Hiding things in a model while editing single geometry.

While working with a model, users or designers often places geometry into groups or components as it helps in two ways; one is that this geometry makes the model more functional and secondly it becomes easier to guide. But often placing geometry can make things difficult to edit and there the user faces problem though there are ways too like: 1) the users could move the group out of the model or off to the side and then may get it back exactly where it was once edited. 2) The users could make a copy of a component, paste it off to the side and then edit it; this will help to assume the changes in the original component while making. 3) One could simply delete the remainder of the model, and then can make other changes by selecting group and redrawing everything again.

These above options are little difficult and time consuming processes, they could be hard to adopt for users to do in a model, so Aaron has found a way to manage this thing in his new video tutorial which will describe the way of controlling the visibility of containers. This process has made the process easier to see the working while editing groups and components.

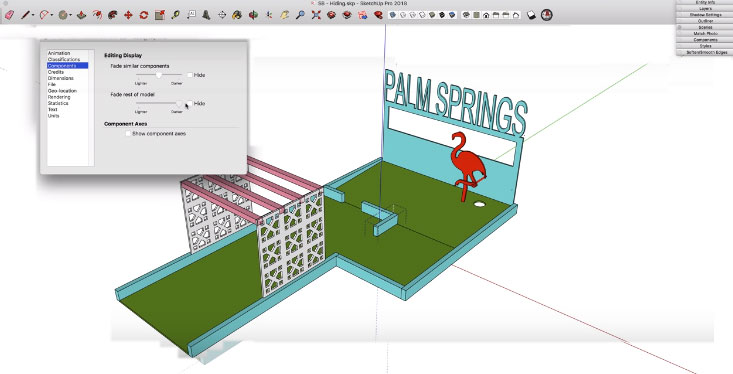
Hiding rest of model: Groups or components are very essential in every model but while adding geometry here it become little difficult when the geometry is needed to edit that’s why Aaron finds a way to edit by hiding the rest of model while editing geometry. If anyone follows the video properly he or she will see a model existed there which is grouped and the inner geometry has to edit within the group; so for this he double clicked on the group which is need to edit. Now while clicking inside the model a little box will be created like a shell that will disconnect the edit object from the rest of model. Then at first he clicked on the window and chose the option ‘Model Info’, from there he went to components tab and clicked on it; it opened a pop-up where some sliders can be seen and by moving the sliders it will seen about the faded color of the rest of the model in similar of the selected component or group.

Beside the sliders option, there is another check-box called ‘Hide’ and checking it the rest of the model will hide leaving the selected group. In that components dialog box, one can also separately control the fading capacity of the rest of the model; now for editing same process need to do: first double click on the component and then chose view menu. In the drop down of view menu, there is an option called component edit having two options: hide rest of model components and hide similar components. The first option hides the rest of model without the clicked area and the selected parts can be changed or edited easily; moreover that this Hide option can be made hotkey under the Windows menu for future easy use.

Source: blog.sketchup.com

Hiding things in a Model
~~~~~~~~~~~~~~~~~~~~~~~~~~~
Published By
Rajib Dey
www.sketchup4architect.com
~~~~~~~~~~~~~~~~~~~~~~~~~~~

"An Architectural Visualist: Alejandro Soriano"

SketchUp user and Architectural Visualist, Alejandro Soriano has been working with SketchUp from a long time and has discussed about his works and interest in a current interview.

This article is dedicated on Alejandro Soriano and his awesome creations, here are some details about the creator and his creations. It is a description of the interview between Alejandro Soriano and Charlotte Shepard.

Alejandro Soriano: He is a one-of-kind Architectural Visualist who has a specialist in SketchUp and learned SketchUp skills from a friend in Valencia, Spain over ten years ago. After learning he became a SketchUp professional and becomes a complete 3D modeling expert with a traditional yet modern style. He studied Architecture in the Polytechnic University of Valencia, Spain and in the first year he has learned SketchUp form a classmate and after realizing the speed of modeling and the simplicity of learning he started to love it.

According to him, an architectural visualizer has to explain how a building will be going to be through detailed pictures and/or videos. There are various other ways also to connect and communicate with clients about the way of doing a project like through illustrations, drawings, cardboard models etc. but the main purpose is for any viewer to get a particular idea about the progress of a project. As an architectural visualizer, Alejandro tries best to convey to the viewer any unbuilt project creating 3D models with SketchUp and sometimes he translates these models with a rendering software or use Photoshop to create matte paintings.

The style of work: Alejandro has his own style of work; before starting any modeling first of all he treats the model as a piece with intrinsic value where the model may be anything like everyday objects, traditional furniture or modern design etc. He mainly looks for the internal beauty of the object through a meticulous modeling and minimalistic renders. He generally works on testing extensions, plugins or new techniques with topics which he is not used to work as he loves to push himself to think about modeling an object in different ways that provides him a new angle to facing the modeling process.

Reasons to rely in SketchUp: Anyone experienced with SketchUp will agree that it the easy one to learn but yet tough to master so it is really important to know the way of dealing with components and layers, way to organize the models etc. according to him, SketchUp is really a great tool for modeling from CAD and BIM files where it is easier to learn the way of dealing with solids properly and it also has a toolset to work with solids. That toolset helps users to work with Boolean operations like union, subtraction, trim, intersection and split etc. and this solid tool also works great with the Scale tool. If anyone can get appropriate CAD/BIM files then it will be easier to import them and modeling the project in SketchUp. While creating a project from scratch, there are some awesome extensions for speeding up the modeling process; also DIABC for SketchUp, made by the good people from รscar Software is a wonderful tool for architectural design.

His works: Alejandro loves modeling existing buildings and objects; here it is important to represent its surroundings to contextualize a project and he uses Match Photo that helps to model any environment quickly. He also likes to play with the edges and profiles, uses hidden geometry as an aid to his illustrated models; everything just super fabulous in his models.

He also told something on modeling with Quads; in his words, there are many ways to model an object and among them one is a polygonal mesh that could be created from polygons with three sides or tris, four sides or quads and five or more sides called n-gons. In case of working with quads, the model behaves differently while subdividing or editing turns out predictable and it is so reliable in working.

More: He has currently focused on learning two new SketchUp extensions; one is WrapR, it is an extension that helps to create a UV mapping on any SketchUp quad-faced model and another is VR.

Source: blog.sketchup.com

An Architectural Visualist: Alejandro Soriano

~~~~~~~~~~~~~~~~~~~~~~~~~~~
Published By
Rajib Dey
www.sketchup4architect.com
~~~~~~~~~~~~~~~~~~~~~~~~~~~


Friday, December 21, 2018

Choose entity perfectly with Grabby Sketchup Extension

Rafael Rivera has developed grabby, the newest sketchup extension available in extension warehouse. This sketchup extension is compatible with SketchUp 2017 and SketchUp 2018.

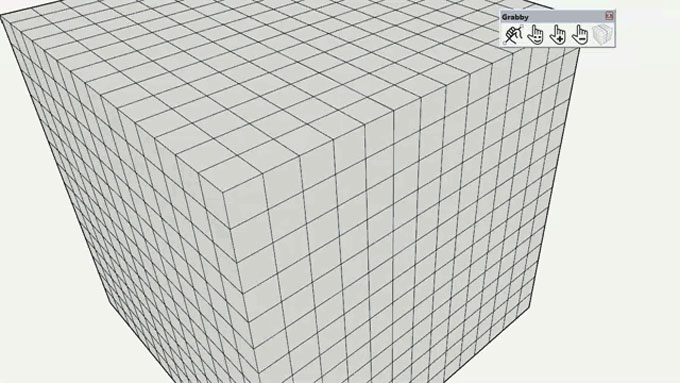
Grabby comprises of a set of tools to be utilized for choosing entities efficiently & precisely. The details of all the tools are given below :-

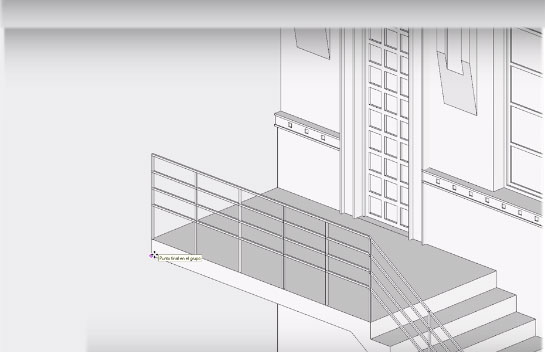
EdgeGrab Tool: EdgeGrab applies the mouse as a brush to choose edges.

• Click & press the mouse button.
• Hover over the edge entity required to be included to the selection.
• By pressing SHIFT key, the edge will be deselected.
• Press Esc key to leave the tool as soon as the selection becomes perfect.


FaceGrab Tool: FaceGrab applies your mouse as a brush to choose faces.

• Click & press the mouse button.
• Hover over the face entity to be included to the selection.
• By pressing SHIFT key, the face will be deselected.
• Press Esc key to leave the tool as soon as you make a perfect selection.


ExpandGrab Tool: ExpandGrab extends the selection with one more polygon.

To download the plugin, click on the following link in extensions.sketchup.com

ShrinkGrab Tool: ShrinkGrab compresses the selection with one more polygon.

LoopGrab Tool: LoopGrab chooses the edges which develop a loop.

Initially, choose a single edge for connecting loop.
• Ensure the edge is part of a quad face.
• Activate the tool…
• And, if every remains as per plan the loop should be chosen.


Choose entity perfectly with Grabby Sketchup Extension
~~~~~~~~~~~~~~~~~~~~~~~~~~~
Published By
Rajib Dey
www.sketchup4architect.com
~~~~~~~~~~~~~~~~~~~~~~~~~~~
Thursday, December 20, 2018

Bending Objects in SketchUp with Truebend by Thom Thom

SketchUp Warehouse is full of various wonderful and useful extensions and tools that make the design thing a lot easier, TrueBend is the extension that helps to bend the designs.

Aaron Dietzen this time comes with his new useful creation of importing and exporting via SketchUp Shop which is the newest thing for SketchUp users. This article will describe the whole process according to Aaron and his video tutorial where the new tool TrueBend is introduced which is discovered another SketchUp experienced person, Thomas Tomassen.

About Aaron Dietzen: Aaron Dietzen is mainly seen in various SketchUp Live or any of the Skill Builder videos or been on the SketchUp forum, that means Aaron is fond of SketchUp and serving as a SketchUp employee for two years with more than ten years in the software. He is more than just a simple Trimble employee; he is a true SketchUp fan. He spends his free time in designing things in SketchUp and loves adventurous works.

 About SketchUp: SketchUp or Google SketchUp is mainly a 3D modeling computer program that is used for a broad range of drawing applications used by architects, interior designer, landscape architects, civil and mechanical engineers, film and video game designers also. SketchUp can be getting as a freeware version named SketchUp Make and a paid version with many more extra benefits called SketchUp Pro. SketchUp is software from Trimble Company and there is an online library of free model congregations and 3D Warehouse to which users can add other models; besides that, the program has drawing layout functionality with variable ‘styles’, supports third-party ‘plug-in’ programs hosted on the Extension Warehouse to supply other abilities and enables placement of its models in Google Earth.

 As SketchUp users are most of architects, designers, builders, makers and engineers etc. who works hard to give a nice shape to our physical world, they need great tools to do the work. SketchUp is in mission to bring their best to produce some great tools for drawing as drawing is the key thing of the SketchUp users. They draw to search ideas, to identify the things and to show other people their work that they do with love and love to build; SketchUp understands it truly and trying to improve their software day by day.

SketchUp Warehouse has various extensions and plugins that allow the users to design quickly and accurately and like all other extensions, True Bend is also helpful in bending objects within SketchUp and this extension has found by Thom Thom. Here is some information about Thom Thom and his extension True Bend.

About Thom Thom: Thomas Tomassen is actually known as Thom Thom, he is a modelmaker with a large desire for physical, digital and traditional design in most kinds of the trade. He is also focused on webdesign or programming and 3D visualizations but he is specialist in 3D modeling, SketchUp, Webdesign, graphic design and web programming.

About TrueBend: This extension can be found in SketchUp’s Extension Warehouse and it bends instances for a given degree, saving the original length of the reference segment and in recent this reference segment is the bottom front of the boundingbox. As this works at the bottom front bounding box edge so it is recommended that the instance axis line up with the bend.

Menus & Toolbars:
  • Tools- TrueBend
  • Right Click- TrueBend
  • Toolbars- TrueBend
 Related Links: GltHub Repository

Tool Functions: This tool or extension is totally designed to help users for bending objects within SketchUp for a given degree or radius and it also allows users to bend an object while keeping the length of the object intact. An example will definitely make this matter clear: suppose a user wants to bend a shape which is 60 inches long along a 180° bend then he/she will click and drag the red bar on the SketchUp design page for bending the object. Or the person can just click and drag to enter a value in the VCB to manually set the number of degrees in the bend; here the magic happens, this particular cool extension allows bending object sup to 360° where other extensions such as radial bend in FredoScale, only really allow users to go up to 180°. Moreover that, users can also adjust the number of segments created by typing an “s” behind any entered value and it is useful for things like spiral staircases or many other things where users need to bend as per on a set number of segments. Besides that, users can also adjust their created segments which has become softened or smoothed or may an unhidden geometry is created.

Bending Objects in SketchUp with Truebend by Thom Thom

Read more
~~~~~~~~~~~~~~~~~~~~~~~~~~~
Published By
Rajib Dey
www.sketchup4architect.com
~~~~~~~~~~~~~~~~~~~~~~~~~~~
Modeling SketchUp Frame and Skin Structure

SketchUp Tools are making things easier and creating a Ribbon shaped Spiral structure becomes easier by using the simple tools of SketchUp; it’s just the game of mind.

Aaron Dietzen takes about Modeling the SketchUp Frame and Skin Structure which is called Spiral Ribbon Structure through his video tutorial and this article focuses on that tutorial describing the process in details.

About Aaron Dietzen: Aaron Dietzen is mainly seen in various SketchUp Live or any of the Skill Builder videos or been on the SketchUp forum, that means Aaron is fond of SketchUp and serving as a SketchUp employee for two years with more than ten years in the software. He is more than just a simple Trimble employee; he is a true SketchUp fan. He spends his free time in designing things in SketchUp and loves adventurous works.

About SketchUp: SketchUp or Google SketchUp is mainly a 3D modeling computer program that is used for a broad range of drawing applications used by architects, interior designer, landscape architects, civil and mechanical engineers, film and video game designers also. SketchUp can be getting as a freeware version named SketchUp Make and a paid version with many more extra benefits called SketchUp Pro. SketchUp is software from Trimble Company and there is an online library of free model congregations and 3D Warehouse to which users can add other models; besides that, the program has drawing layout functionality with variable ‘styles’, supports third-party ‘plug-in’ programs hosted on the Extension Warehouse to supply other abilities and enables placement of its models in Google Earth.

As SketchUp users are most of architects, designers, builders, makers and engineers etc. who works hard to give a nice shape to our physical world, they need great tools to do the work. SketchUp is in mission to bring their best to produce some great tools for drawing as drawing is the key thing of the SketchUp users. They draw to search ideas, to identify the things and to show other people their work that they do with love and love to build; SketchUp understands it truly and trying to improve their software day by day.

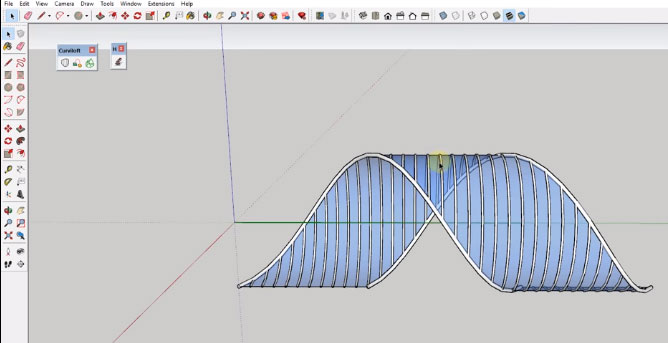
SketchUp is used to create different designs and models using some awesome featured tools like line tool, shape tool, curve tool etc. This time Aaron has shown us of the way to create the Spiral Ribbons those are basically curved and shaped from a single long line; at first he started from his original point in the SketchUp main page to create a Spiraling Shape or can basically named as Ribbon. This Ribbon is originally helix and rotated in a way that it came into a shape of Ribbon, so he drew a line as per the length and line such as he drew a 150 ft line using ‘Line Tool’ from the origin point. To create a helix over this line the line need to simply select and used Extension Helix along Curve to helix it that would be around this line.

After clicking the Extension Helix along Curve to helix option, a pop-up appears showing the measures where some important things need to put like start and end Radius, the laps, the section for every lap etc. These particular numbers are really essential to remember as these exact numbers have to put for the circles to make it a ribbon shape, after finishing the numbers to put and clicking Ok

option a single helix will be created on the line. A copy of the helix is made next by exploded it and moving it through the ‘Move Tool’ and through connecting and shifting the helixes a complete hymen will be created. The Extension Curviloft is used then, in this extension the last option is used upon the created design which will make scan like designs on it with some dotted lines to figure out the exact points get connected or not. It also counts the segments and after clicking the final face will be created; if one offs the curviloft effect the image will appear as a group, then he created a frame along with the helix. For making a frame, at first he has made tubes along the helix to give it a tougher look and in this tube the segments are remained same as in helix.

Next he hid the tubes, makes the helix a group and clicked inside it to create a circle from the origin with the Circle Tool through the same radius at the front of the object. Now the circle is set into same segment, then the whole object is selected and using Copy tool the circle is copied in the same segment; this copied circle is set using the ‘Move Tool’ and putting the exact amount of circle the object will come to end. After adding the hidden tubes and adjusting the circles as rotate lines the last object will appear as a ribbon shape and this whole object is grouped and copied and them using move tool is placed to give the final spring shape.

Source: www.thesketchupessentials.com

Modeling SketchUp Frame and Skin Structure

~~~~~~~~~~~~~~~~~~~~~~~~~~~
Published By
Rajib Dey
www.sketchup4architect.com
~~~~~~~~~~~~~~~~~~~~~~~~~~~
Wednesday, December 19, 2018

SKM tools allow you to convert image to geometry

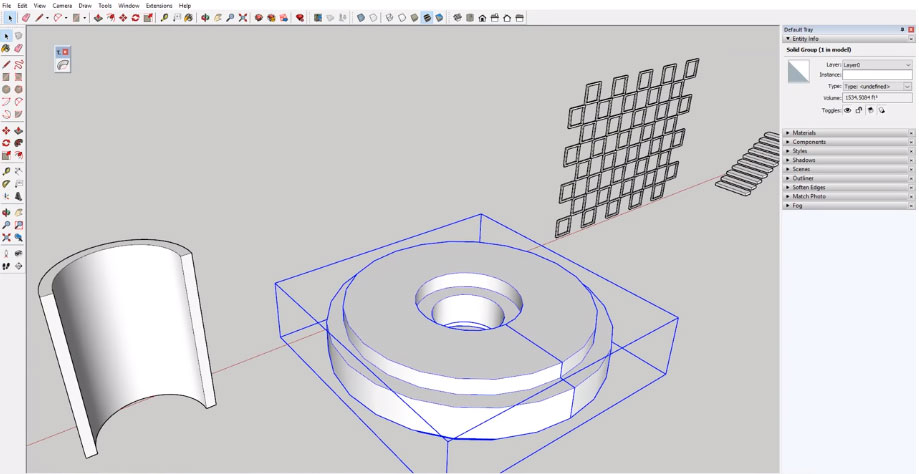
This is an exclusive sketchup tutorial where you will learn how to transform image to geometry with the use of a suite of SKM Tool, Material Tools and Image Tools.

SKM tools is developed by the renowned plugin developer TIG.

SKM tools can be defined as image animation extractor and creator with a set of tools for developpers, related to material and image classes.

To download the plugin, click on the following link in sketchucation.com.

Go through the following video tutorial to learn the functionality of the plugin.

SKM tools allow you to convert image to geometry


~~~~~~~~~~~~~~~~~~~~~~~~~~~
Published By
Rajib Dey
www.sketchup4architect.com
~~~~~~~~~~~~~~~~~~~~~~~~~~~
Top 10 House Modeling Extensions for SketchUp

About SketchUp’s Extension Warehouse: The SketchUp Extension Warehouse is an online resource full of plug-ins and developed especially for SketchUp and these extensions allow users to add special tools and features to SketchUp. Users can find different extensions for a particular application like drawing or 3D printing and industry-definite tools like extensions for architecture, interior design, construction and many more.
Here are some top 10 House Building Extensions for SketchUp which will help users to build models easily:
  • Medeek Foundation: Medeek Foundation is an elaborated foundation building extension that gives permission to the users to build perfect concrete foundations for every building and this extension can also create everything like from anchor bolts to rebar for users’ foundations.
  • Housebuilder: Housebuilder basically an older extension containing a set of tools which are designed to help users in modeling house framing and it has everything like from framed flooring to wall framing. Here users can go back to their previous work and can add and move around created doors and windows to walls as well as also can create roof framing. But this older extension might lead people with some problems while getting it installed in their computers.
  • Profile builder: Profile Builder is actually a smart profile building extension that set up wall bodies instead of creating wall framing within profile builder that includes different things like framing, sheathing, drywall and insulating batt. After creating these assemblies within Profile Builder, users can also arrange a program of materials which allows evaluating the things within the model; users can also create things like stair rails and other objects with repeating pieces with the help of this extension.
  • 1001 Bit Tools: This is a set of tools which is designed to make architectural modeling easier than before and this extension has every kind of building tools like from wall building tools, tools to add openings to those tools, stair creation tools, door and window frame tools, roof framing tools etc. So basically it is a huge toolset that has many useful tools also for every user.
  • Tig Roof: This extension is designed to help users in creating different types of complex roofs easily and it works on simple rectangular roofs with complex shapes that give a lot of flexibility while working with various shaped buildings.
  • Medeek Wall: This is the newest extension from Nathaniel Medeek that helps users in creating detailed wall assemblies within SketchUp and helps users in creating similar framed walls within SketchUp models with a focus modeling walls. The openings may be moved and adjusted in real time as it is still under testing process.
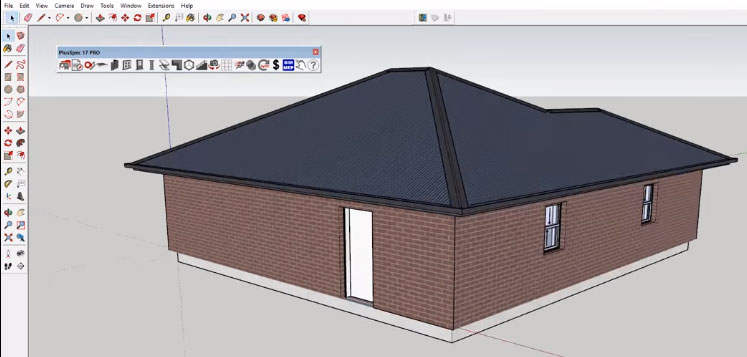
  • Plusspec: This is not a normal house modeling extension rather it is designed to bring true BIM to SketchUp as it has a large case suite of a building creation tools and also some tools to make mechanical and electrical in the drawings, for designing the communication of notes, costs and more.
  • Medeek Truss: This is from the same house of other Medeek extensions and is designed to create accurate trusses in the model; it can also create and show real trusses, though there is a lot of different truss option. Users not only can add different types of roof trusses but floor trusses also
  • Gkware Cabinet Maker:This extension helps users to create quickly accurate cabinets within their SketchUp models and helps to edit every single part of the cabinets. This extension models the cabinets that will give a look of originally built and allows great accuracy in the model.
  • Floor Generator:This helps to create difficult flooring within the models and helps to create shapes like brick, tile, sliding and many more within the model. Users can create flooring with real depth and can apply textures to the materials.
Source: www.thesketchupessentials.com
Source: wwww.thesketchupessentials.com

Top 10 House Modeling Extensions for SketchUp

~~~~~~~~~~~~~~~~~~~~~~~~~~~
Published By
Rajib Dey
www.sketchup4architect.com
~~~~~~~~~~~~~~~~~~~~~~~~~~~
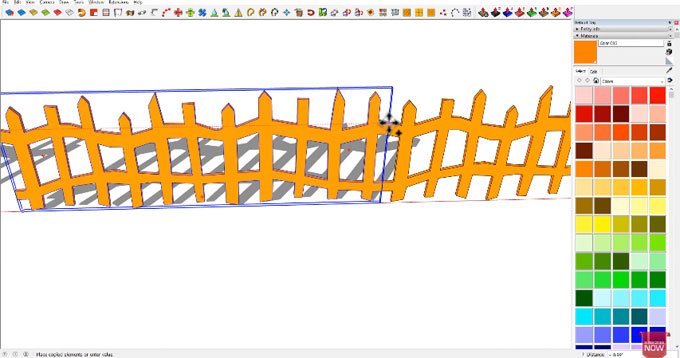
Top 10 features of the Push/Pull Tool in SketchUp

SketchUp’s Push Pull tool is used in the models having flat faces for doing multiple changes or adding geometry or removing geometry etc. it has lots of functions.
About Push/Pull tool: The Push/Pull tool is a simple thing used for emit flat faces into 3D shapes and it worked with simple click. This tool can move the selected objects, vertices, edges or faces closer together by Pushing or further apart by pulling; here specifically each and every element is moved towards or away from the center by the same distance. This specific distance is navigated by the movement of mouse either in up or down position, numeric input or through slider control.
Methods to use Push/Pull tool: Here are some quick steps that will help to learn how this push/pull tool works-
  • At first the Push/Pull has to select form the toolbar and this tool looks like a little box with a red arrow coming out of the top.
  • Net it is time to show it through the work, if anyone clicks the ‘’floor face” then it would be expelled but if anyone chooses wrong face mistakenly, then just click Esc button from the keyboard to cancel the action and can try again.
  • Users can add precision in the next step by moving the cursor to pull up the wall which needs to prevent from extruding.
  • Typing 8’and pressing Enter key, the push/pull distance will be edited to be exactly 8 feet which is the height of the ceilings in a house.
  • Orbit helps to view what is done in the work around the model.
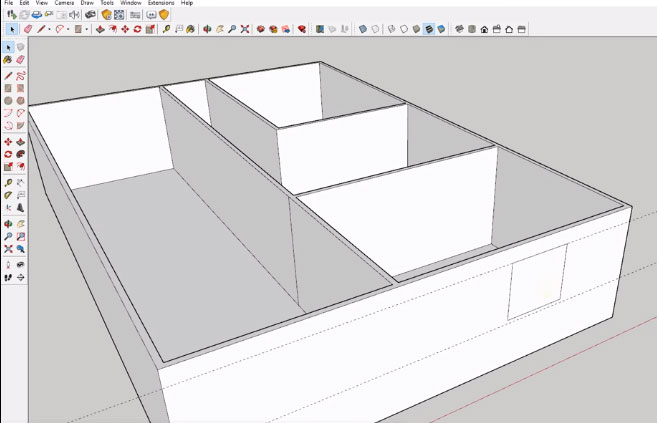
  • While using Push/pull tool for matching the height of the interior walls one need to edit the group at first, then right-click on the exterior wall face and choosing Edit Group from the context menu will help the users to go inside the model.

Functions of Push/Pull tool:

  1. Push Pull large, continuous faces: The push/pull tool can connects faces and it is one of the greatest functions and this particular thing makes it so far great for projecting floor plans. But this tool can be used only on the flat surface to project any object in the same surface.
  2. Push pull with inferencing: It is another great function where when the push/pull tool becomes active, it inference to any other in the model and allows the users to easily push pull things to align with any other thing in the model.
  3. For cutting a hole in a thing: This tool allows creating holes within objects and it can remove faces when it reaches the back side of an object that is equal to the original face.
  4. Push pull precisely: This tool can also help to type a value to set the length of the extrusion which is needed to be created.
  5. To hid geometry: Besides adding geometry in any model, this tool can also removes geometry. It can be used in creating things like roofs and other tapered shapes fast and easily just need to break a face up and use this tool to push that geometry away.
  6. In creating new face mode: Push pull can create new faces which is an unknown function for people, basically this tool allows people to create new geometry within the model which is very useful while creating objects that need to modify with the scale tool.
  7. Double click to repeat: Similar as other tools, this tool also allows repeating the last function by double clicking.
  8. Intersect with face via a curved object: It cannot curve surfaces but coupling with another tool in SketchUp to cut holes in curved surfaces.
  9. Multiple profiles at once: Push pull tool can’t multiple objects at once but it can remove a shape from another to create profiles as 3D shapes.
  10. Push pull with hidden geometry: This tool can curve or smoothed faces.
Sourcewww.thesketchupessentials.com

Top 10 features of the Push/Pull Tool in SketchUp

~~~~~~~~~~~~~~~~~~~~~~~~~~~
Published By
Rajib Dey
www.sketchup4architect.com
~~~~~~~~~~~~~~~~~~~~~~~~~~~
Monday, December 17, 2018

"Extension Inspection: SketchFX ”

Component Finder is a new extension that can easily manage users’ component libraries and help them to place them on the hard drive to manage all the information well.

Aaron Dietzen is a passionate designer in SketchUp who has done many videos in SketchUp Live about SketchUp Skill Builder and made many video tutorials to describe them.

About Aaron Dietzen: Aaron Dietzen is mainly seen in various SketchUp Live or any of the Skill Builder videos or been on the SketchUp forum, that means Aaron is fond of SketchUp and serving as a SketchUp employee for two years with more than ten years in the software. He is more than just a simple Trimble employee; he is a true SketchUp fan. He spends his free time in designing things in SketchUp and loves adventurous works.

Aaron has shared various designing ideas and important tips to utilize various features of SketchUp, in this article we are going to discuss about a new method of using Styles with SketchFX. .

SketchFX: It applies a series of visual effects one after another in a bottom down order and it has three types of effects:

  • Image: SketchFX can generate an image from various sources like file, SketchUp scene, a particular style or may be a constant color and images can be affected by child effects.
  • Filter: SketchFX can modify an image with its particular properties and it can be an image child or can affect all the above effects
  • Mask: SketchFX hides or views only some areas of an image.

Styles is a wonderful method to modify the look of every model but it is not enough every time as sometime more than the simple thing is needed and here SketchFX from Fluid woks where people can take styles to a new level and can get further processing graphics right out of SketchUp. SketchFX gives control to the users over a total heap of effects that can be layered on their SketchUp model and also allows them to create visuals that would easily need them to arouse their favorite photo editing software.

Types of SketchFX: SketchFX has two different flavors, one is SketchFX Pro and another is SketchFX EX, here is some information about them below-

  • SketchFX Pro: SketchFX Pro is a faster visualization plugin for SketchUp and it is simple to learn. It can be learnt in just one click; with a click users can create visually powerful illustrations of 3d models, choosing a range of many artistic styles.
  • SketchFX EX: SketchFx EX has all the features of SketchFX Pro and adds support of rendering animations.
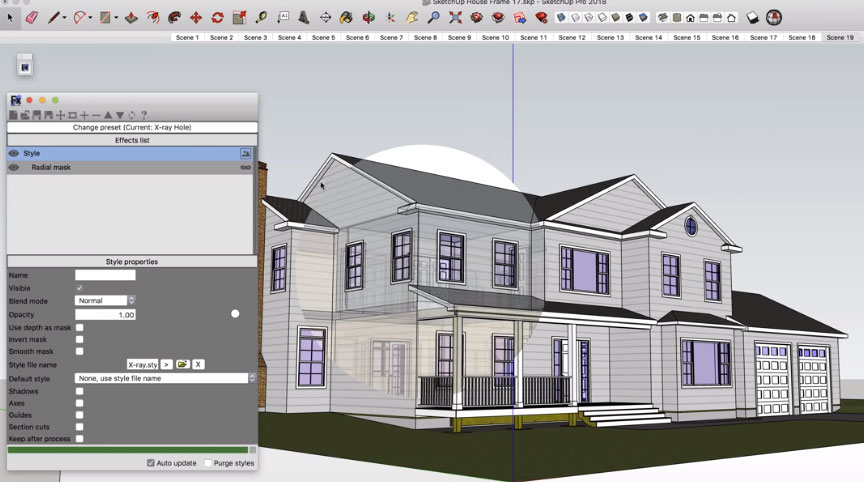
While starting SketchFX, one can find a single button that will help to apply all the default effect and will show the window where all the additional features of SketchFX will be founded. There are a set of pre made drawings or styles to apply on the models like pencil sketches, coloring effects etc. and while applying any of the effects the work of SketchFX will get started. After applying effect there will open a box with changeable effects like any other photo editing tool where some options to change the modeling effects are (like blur, adjusting saturation and brightness, putting light etc.) used on the image to give it a new look.
The difference of SketchFX with other photo editing software is that it includes some combined effects that help to give a neat look in the model and more than that, each of these items in the list can be individually on and off to put effects. The items have more individual actions in their drop down options which can be named later and each individual will put an effect on the model, it is a fun thing to do. People can also apply various effects in a time and all of them will show clearly on the model without any mess which is a huge progress of this software. It also helps to show some details of mechanic drawings, though SketchFX misses some extra details but also adds some other information in the model which can’t be found anywhere. SketchFX is an easier way to show and change different details of a model.
About SketchUp: SketchUp or Google SketchUp is mainly a 3D modeling computer program that is used for a broad range of drawing applications used by architects, interior designer, landscape architects, civil and mechanical engineers, film and video game designers also. SketchUp can be getting as a freeware version named SketchUp Make and a paid version with many more extra benefits called SketchUp Pro. SketchUp is software from Trimble Company and there is an online library of free model congregations and 3D Warehouse to which users can add other models; besides that, the program has drawing layout functionality with variable ‘styles’, supports third-party ‘plug-in’ programs hosted on the Extension Warehouse to supply other abilities and enables placement of its models in Google Earth.
As SketchUp users are most of architects, designers, builders, makers and engineers etc. who works hard to give a nice shape to our physical world, they need great tools to do the work. SketchUp is in mission to bring their best to produce some great tools for drawing as drawing is the key thing of the SketchUp users. They draw to search ideas, to identify the things and to show other people their work that they do with love and love to build; SketchUp understands it truly and trying to improve their software day by day.
Extension Inspection: SketchFX
~~~~~~~~~~~~~~~~~~~~~~~~~~~
Published By
Rajib Dey
www.sketchup4architect.com
~~~~~~~~~~~~~~~~~~~~~~~~~~~
"Managing Component Library with Component Finder ”

Component Finder is a new extension that can easily manage users’ component libraries and help them to place them on the hard drive to manage all the information well.

Justin Geis: Justin Geis is the founder of The SketchUp Essentials and started using SketchUp while he was working as a general contractor in 2008 and after using it he found that SketchUp is extremely powerful that he just started to use it in his personal works also. Then he started The SketchUp Essentials as a place where he could share his ideas of using SketchUp easily through some tutorials and tips to help other users controlling the power of 3D Modeling in everyday lives.

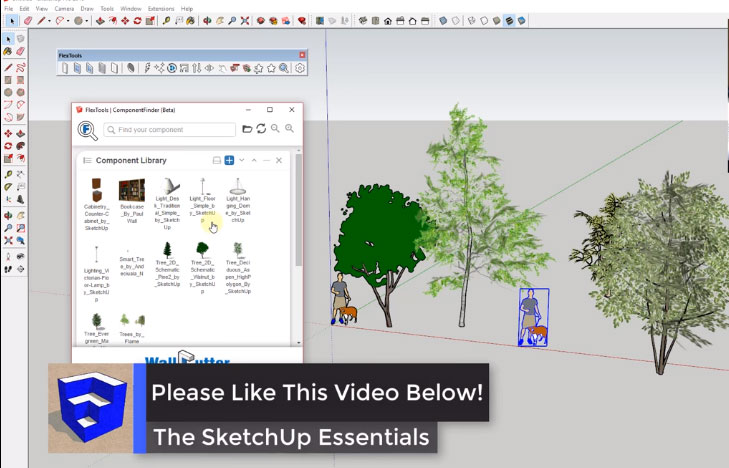
In this article we are going to discuss about an extension from the folks over at FlexTools to manage any SketchUp component model collections on the computer.

Component Finder Functions: This extension is designed in a way that will help users to organize and manage their component library on their hard drive. It is seen that many people have started modifying a library of components that they use across various different models but they really haven’t found any extension that seriously can help them guiding those libraries. The Component Finder Functions will help them to arrange and manage those components in a right order.

The working way of this component is simple, at first the extension has to be downloaded from the FlexTools website by clicking the download button and putting a value that users are willing to pay for the extension. But they want to download the free version, one has to simply type in $0 and click the “I want this” title button. Clicking this button allow the users to download the extension file for installation. After installing the extension, it will show up as a toolbar within the model; having a license for the FlexTools the toolbar will be seen longer but the magnifying glass icon will open up the ComponentFinder Window.


  • The ComponentFinder allows users to add various folders to the list which can be controlled and searched within. The first folder can be added by clicking within the window and controlling the folder need to add and then click the option, “Select Folder”. After clicking the option, it will help users to add the folder to their list.
  • There are two navigation models within ComponentFinder; one is flat view that allows users to view all the components within a folder indifferent of subfolder. The other one is Nav view which allows users to browse the folder structure within a folder.
  • Users also can able to add many different folders by simply clicking the folder at the top of the page and adding the new location.
  • There is also a search bar that helps users to search specific keywords within any open folders.
  • The magnifying glass icon allows users to create their preview files larger or smaller within their folder list.
  • When the users click on the little hard drive button, it will open up the location of the selected folder on the hard drive.
  • Users can save a selected component to a folder by simply selecting it in their model and then need to click the plus button to save it to a location of their choice.
  • The up and down buttons help the users to adjust the layout of their different folders.
  • The minus button helps to minimize the folder previews to adjust the folder names.
  • To delete or remove a folder just click the “x” button to remove it from the list.
  • Users can access other options by right click on the objects within the folders and there they can do many things like opening the containing folder as a separate tab, renaming files, replacing files and updating them out of the models and deleting objects.
Managing Component Library with Component Finder

Article Sourcethesketchupessentials.com

~~~~~~~~~~~~~~~~~~~~~~~~~~~
Published By
Rajib Dey
www.sketchup4architect.com
~~~~~~~~~~~~~~~~~~~~~~~~~~~
Saturday, December 15, 2018

OpenCutList – The newest sketchup plugin added to the extension warehouse

OpenCutList is an useful sketchup plugin that is newly added to extension warehouse group. It can be used to automatically create the cut lists and cutting diagrams for any woodworking projects.

The plugin is compatible with SketchUp 2014, SketchUp 2015, SketchUp 2016, SketchUp 2017, SketchUp 2018.

This extension opts for the current selection or the complete scene when there is no selection and generates a list of parts containing quantities and sizes. The extension arranges the parts by material attributes with several sorting options.

The cut list can efficiently deal with Solid Woods, Sheet Goods and Dimensionals.

It is possible to directly print the "cut list" from the part list dialog or export it as a CSV file.

Cutting Diagrams are produced from Sheet Goods parts.

The development of this extension is connected with the Community Driven sharing platform project : L'Air du Bois. This extension is Open Source and accessible under GNU GPLv3 license on GitHub.

Caution : Update from the Extension Manager dialog in Sketchup do not work for 1.4.0. You need to uninstall the older version first.

New from 1.5.0 :
Cutting Diagrams for parts with material of type Sheet good.
New from 1.4.0 :
New material type : Dimensional
Highlight a part in the model directly from part list.
New from 1.3.0 :
Extension now supports resized components instances. It performs in a superior manner with Dynamic Components.


The extension is available in extension warehouse.

For online demonstration, go through the following video tutorial.

OpenCutList รข€“ The newest sketchup plugin added to the extension warehouse

~~~~~~~~~~~~~~~~~~~~~~~~~~~
Published By
Rajib Dey
www.sketchup4architect.com
~~~~~~~~~~~~~~~~~~~~~~~~~~~