In this tutorial, I want to talk a little bit about using the scale tool to work with three dimensional objects. First, let’s take a second and review where the scale tool is located. Look up at the top of your screen for a little icon that looks like a brown box inside a red box with a red arrow coming out of the corner. This is the scale tool.

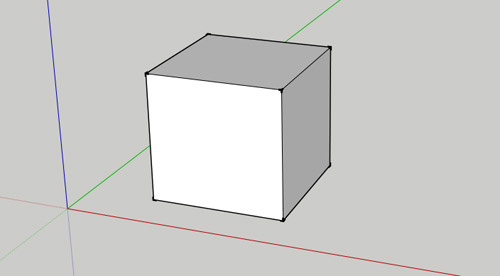
Let’s start off by drawing a box, then extruding it into a cube. You can draw the box using the rectangle tool, and then use the push-pull tool to extrude it into a 3d shape. Once you’ve done that, you should have a shape like the following image below.



I want to start off by talking about how you select your object when working with 3D shapes. When we were working with two dimensional shapes, it didn’t really matter how you selected your object because you were only dealing with a single face. However, with a 3D object, this isn’t the case anymore. You can select any of the individual faces on your cube and scale them without scaling your entire cube. This is useful, but it can also deform your shape, so you have to be careful.
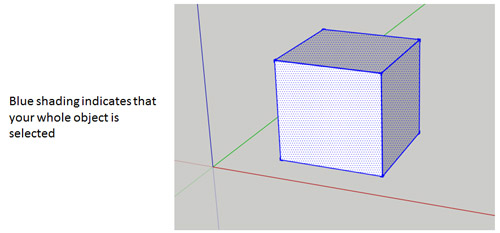
Let’s start by selecting our entire cube. Select the whole cube by dragging a select box all the way around it. If you’ve done this correctly, all the bounding edges and faces in your model should be shaded blue, like the image below.

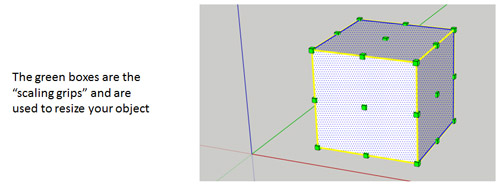
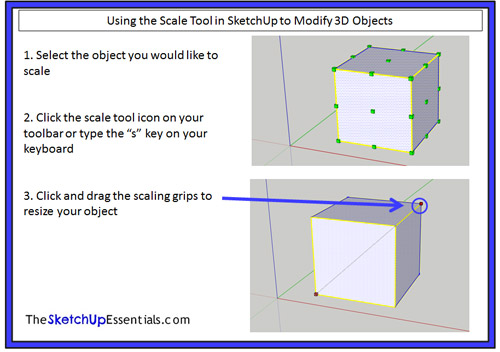
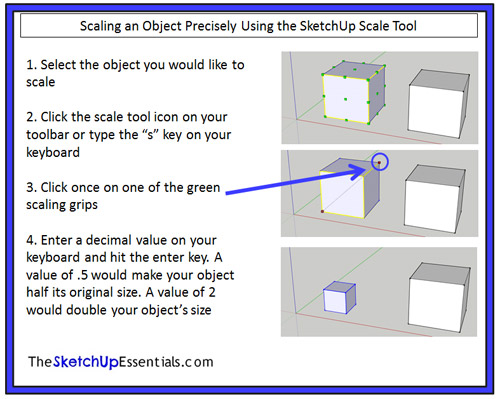
Now, just like with our two dimensional objects, we’re going to activate the scale tool by clicking on the scale tool icon above or just pressing the “s” key on your keyboard. When you do this, you’ll notice a bunch of little green boxes show up on your cube. These are the “scaling grips.”

These grips work exactly like the ones we talked about in the two dimensional scaling tutorial previously. You can click and drag any of these grips to resize your object.

Like with our 2d objects, if you want to scale them uniformly, it’s best to use the corner grips. However, if you want to scale your object along only one axis instead of scaling your whole object, you can use the other edge grips. For example, if I wanted to keep my box the same length and width, but I wanted it to be shorter, I’d select the edge grip in the middle of the top face of my box.

While this would make my box shorter, I would only be changing my object along one axis while keeping the other two axes the same, meaning that my object’s proportions would be different.
The scaling grips work exactly the same way they did with the two dimensional objects, meaning if you want to scale your object precisely, you can click once on your scaling grip, then type in a decimal value and hit the enter key on your keyboard. This will scale your object based on the value you entered. A value of .5 would make your object half the size it was before. A value of 2 would double the size of your object.

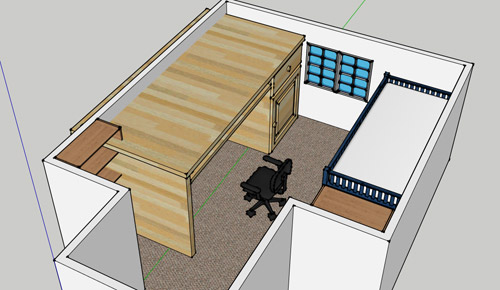
This is especially useful when dealing with objects that you download from the 3D warehouse, because a lot of those objects are not drawn to scale, so they need to be resized either bigger or smaller to fit in your model. For example, I did a quick model of the room that I’m sitting in now, using objects from the 3D warehouse to furnish the room. As you can see from the image below, the desk that I selected is far too large for the room I’ve drawn.

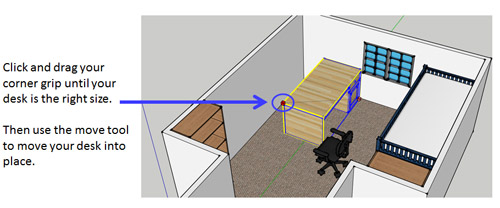
It’s taking up an entire wall, and it’s taller than the windows in the room. What I’d do to make it fit is click on it once to select it, then activate the scale tool and click on one of the corner grips (because the corner grips scale your model while retaining its proportions). I’d drag the corner grip until my desk is resized properly and it looks like it fits in the room.

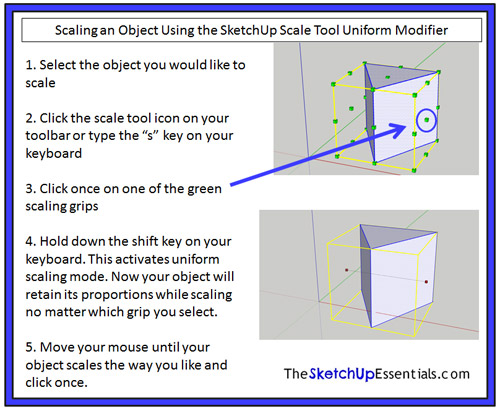
Also note that if you want to scale an object while retaining its proportions, but you don’t want to use the corner grips, you can also use a modifier called “uniform scaling.” To use the uniform scaling option of the scale tool, simply hold down the shift key while resizing your object with the edge grips. This allows you to scale your object using any of the edge grips while still retaining your object’s proportions.

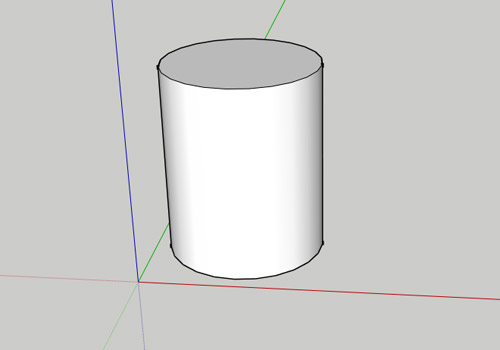
Now we’ve talked a lot about using the scale tool to resize a complete object, but the scale tool can also be used to resize parts of objects in order to adjust shapes. For example, let’s draw a cylinder by drawing a circle with the circle tool, then extruding it with the push pull tool. This will give us an object that looks like the image below.

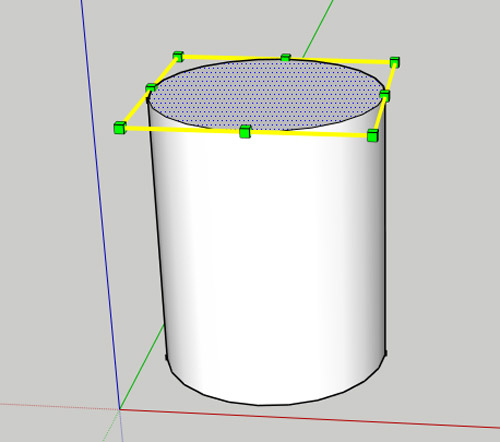
Now, select the top face of the object by clicking on it. Once you’ve selected your top face, activate the scale tool using the “s” key. You’ll notice that you get scaling grips only around the top of your cylinder.

This is because you’re only going to scale this one face. Click and drag one of the edge grips. As you can see, the size of your top face changes, and SketchUp resizes the rest of your model accordingly.

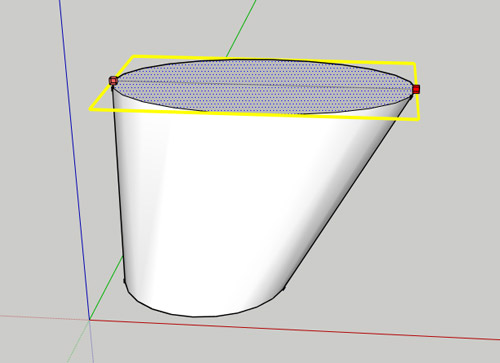
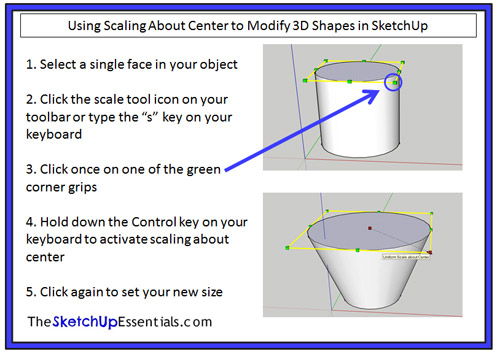
However, let’s say you wanted to make this entire face larger in all directions at once, instead of just one, so you can retain symmetry in your model. To do this, you would use the “About Center” modifier. This modifier works the same way in 3D objects as it does in 2D objects. What you would do is select your top face, activate the scale tool, and select one of the corner grips. Once you’ve selected one of your corner grips, hold down the “Control” key on your keyboard. What this does is force SketchUp to scale your top face around the center of the face you have selected, instead of about a fixed point on the opposite side of your face.

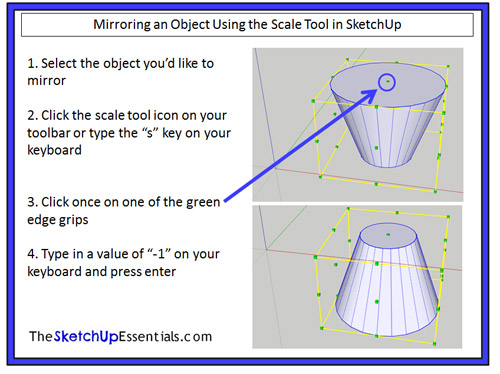
As we discussed in the two dimensional scaling tutorial, SketchUp does not come with a dedicated mirroring tool (it does contain a tool that allows you to flip your objects about an axis). If you want to mirror an object (flipping it so it maintains proportions), the scale tool has this functionality. Let’s use the cone we created above as an example. I’d like to flip this cone over so the wider face is facing down, instead of up. There are two ways to do this. The first way is to select your object, activate the scale tool using the “s” key, and click on one of your edge grips. Then type a value of “-1” on your keyboard and hit enter. This will mirror your object about the opposite edge grip from the one you selected.

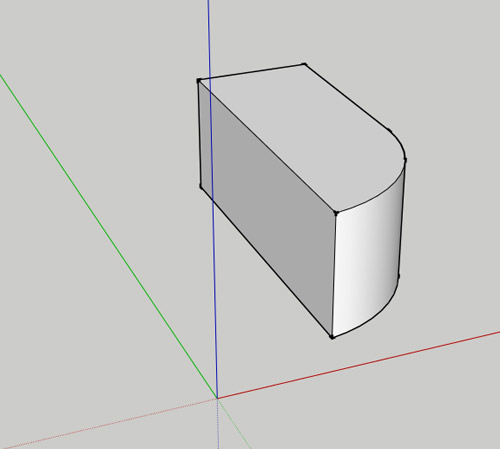
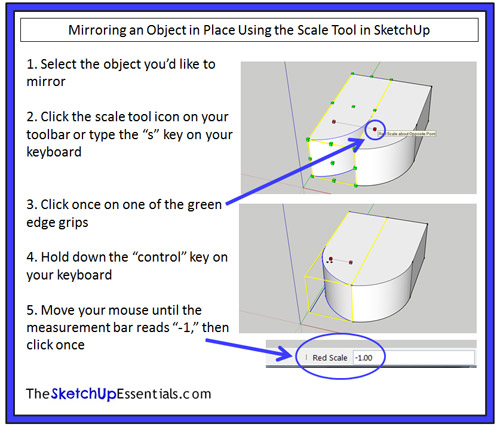
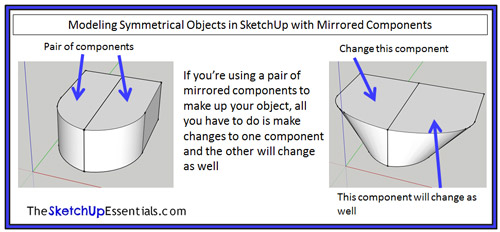
This is an good way to mirror objects in SketchUp. However, sometimes, you want to mirror 3D objects in place instead of moving them with the scale option. To do this, we’re going to use the “About Center” modifier to the scale tool. Here’s a great example – sometimes in SketchUp, you want to copy and mirror components when working with symmetrical objects, because then you only have to spend time modeling half of your object, and the other half will automatically update with your changes. Let’s say you have a 3D shape like the one below.

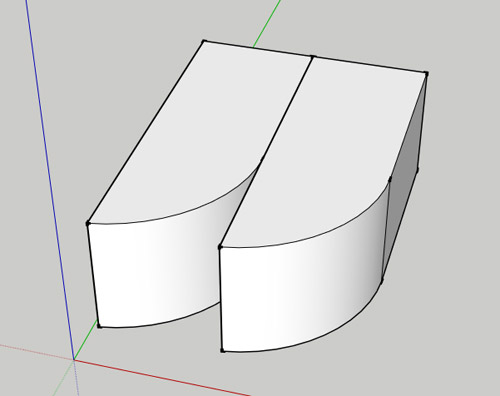
I’ve made it into a component, and I’m going to create a copy using the move tool.

Now if I used the method discussed above to mirror this object, I’d have to mirror my object, then move it so the sides are aligned the way I want them. Since I already have my object where I want it, I’m just going to mirror it in place using the “about center” modifier of the scale tool.
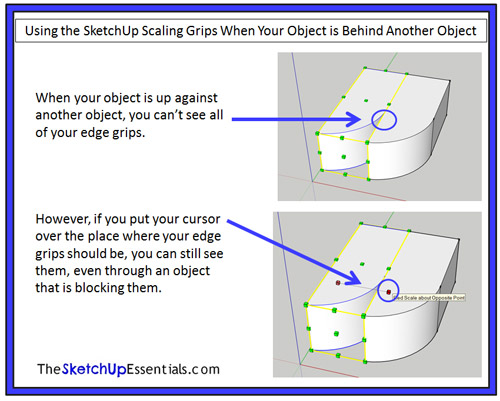
Before I do that, I want to mention one of the great things about the scale tool. If you go ahead and select the copy of the object that you just created, then activate the scale tool, you can see that your scaling grips are blocked by your first object. However, if you place your cursor in the area where your grips should be, SketchUp will show you your grip, even if it is behind another object.

Now let’s mirror our object in place. To do this, we’re going to select the edge grip that was hidden by the other object. Click on it, then hold down the control key on your keyboard to activating scaling about center. Now move your mouse across the object until the value in the measurement bar below reads “-1.”

This will mirror your object while keeping it in the same location. The nice thing about this is as long as we are modeling an object that is symmetrical (the same on both sides across an axis), all we have to do is make changes to one half of our model and the other half will change as well.

As you can see, the scale tool is a very powerful, useful tool that can really help you harness the full power of SketchUp. If you can incorporate it into your modeling workflow, it can save you a lot of time and effort.
~~~~~~~~~~~~~~~~~~~~~~
Published By
Rajib Dey
~~~~~~~~~~~~~~~~~~~~~~
No comments:
Post a Comment