Monday, September 25, 2017

Some useful tips on Sketchup’s Arc Tool

This exclusive sketchup video is a part of sketchup skill builder series. In this video some useful tips are provided for using Arc tool in sketchup efficiently. The following topics are covered in the video :-

Different version of the Arc Tool
Variation among single and double clicking to finish an Arc
How the Arc cursor notifies you regarding the step of drawing of an arc that you are working with.

If the users click on the drop down menu of Arc Tool, there are four diverse types of arcs like Arc, 2 point Arc, 3 Point Arc and Pie.
• 2 Point Arc tool: This tool facilitates you to set two points and then draw out a bulge to produce the arc.
• Arc tool: This tool allows you to set a center point. There is a protractor that can be used to set the beginning and ending of the arc depending on your preferred angle. This tool generates an open arc.
• Pie tool: This tool functions just like the Arc tool, but generates a closed shape that turns out to be a face.
• 3 Point Arc tool: This tool allows you to draw an open arc on the basis of a pivot point.
Prior to draw arcs, learn how the arc entities function:
• An arc comprises of several connected line segments, but it is suggested to choose and edit an arc as a single entity.
• An arc can describe the edge of a face and divide a face.
• Even though an arc is one entity, the SketchUp inference engine views all the segments that form the arc and show up any geometric point if you hover your cursor over one.
• You can notify SketchUp how many segments should be applied in an arc entity. The default is 12 segments. If lots of segments are utilized, the arc turns out to be more complicated and it becomes difficult for SketchUp to display your model. If there are under 12 segments your model becomes simple, but the arc may appear as blocky.

To get more details, watch the following video.

Read more

~~~~~~~~~~~~~~~~~~~~~~~~~~
Published By
Rajib Dey
www.sketchup4architect.com

~~~~~~~~~~~~~~~~~~~~~~~~~~

Friday, September 22, 2017

my.SketchUp – Take along Your 3D Models Wherever You Go

SketchUp grows with time to offer more advanced and simplified option to the designers and artists. Today, the application is considered to be the widely used one because of its easier approach to the 3D designing. It outruns its contemporaries with its clean and simplified user interface that allows even the beginners to design like an expert. With my.SketchUp, the application takes a step further and makes its features available on the cloud – a computing system that allows users to access data and information stored in remote computers and systems.

my.SketchUp is designed in collaboration with the Timber Connect to offer a wider use than its stipulated applications. As said, it is the most connected SketchUp modeler for people. From the very beginning, SketchUp has been renowned for its accessibility. The tools and extensions let designers sketch their plans in 3D as accurately as an expert paints thoughts. This quick access of the application increases its popularity and brings it to the world of budding designers and 3D modelers.

SketchUp generally works on the desktop computers with an operating system from Microsoft or Apple. This kind of confined attitude keeps this application away from the eagerly waiting network pool bending to the ubiquity of the browser. To solve the issue and reach a greater designer network, my.SketchUp has been introduced with a great promise. This new version will run satisfyingly in a web browser allowing you to perform your task better and faster.

The use of the internet is speeding tremendously. Losing this fastest pace means you are behind the time. SketchUp captures the recent needs for being more flexible. The extension of SketchUp to the could computing opens up an array of new possibilities for the SketchUp users. The shortcoming of SketchUp running on a desktop computer only gets completely solved with this latest announcement.

My.SketchUp performs just like the original SketchUp does with the same features and functions. With this, your models are available in the cloud which you can access anytime, anywhere. These models can be shared with others and modified as per your design.

The users’ experience says that my.SketchUp is a true companion for your travelling. It gives you an access to data from your clients’ offices and the computers connected to networks. The clean and easy-to-access functions always keep the SketchUp first among others. This new feature will definitely enlarge the perspectives for the designers and artists.

Source: blog.sketchup.com


Read more

~~~~~~~~~~~~~~~~~~~~~~~~~~
Published By
Rajib Dey
www.sketchup4architect.com
~~~~~~~~~~~~~~~~~~~~~~~~~~

Know about Edges and Faces of 3D model in SketchUp

Though SketchUp provides you with the simplest way of designing, it needs a proper knowledge of models to sketch an object correctly. Like other software application, it also follows a few steps you should know about them completely before starting your 3D design in the application. In designing, edges and faces play a very important role that makes your model the same as you want. Though all edges are not visible in a model, they exist in the design like other components. You also have a complete idea about the faces of a design. Otherwise, you will end up messing surfaces. The content discusses the importance of faces and edges for designing a model on SketchUp properly.

What are edges in your design?

Edges are basically lines of your model. SketchUp provides you with different tools to draw them as per your design. Different tools perform different tasks to give the edges the perfect shape, and you have options like erase, move, hide and stretch the lines. Here are a few facts about the edges of 3D models.

• Edges are straight
• They do not have thickness – edges are lines and they come up with no thickness.
• 3D models have many edges but you do not probably see every line of the objects.

What are the faces of your design?

Faces are mainly the surfaces of the model you are designing. There are a few facts that you need to learn to have a complete idea about the faces. Knowing deep about this segment will help you draw a design accurately without making any mistakes.

• Faces always come up with the edges – faces would not be formed if there were no edges. It is said that you need to have three coplanar edges to design a loop.
• Faces are flat – faces are flat, but you may think about the curved faces. Generally, curved faces are made of multiple flat faces.
• Faces do not have thickness

The relationship between Faces and Edges:

Since edges and faces are the core objects of a 3D model, you have to have a comprehensive knowledge about them. The content discusses further the inevitable relationship shared by these two important parts of your design:

• SketchUp generates faces as soon as you complete the design – there is no face tool available in the SketchUp. It generates automatically with your design. A face is formed by the three coplanar edges.
• You can erase face, but cannot stop the application from generating faces.
• A face will be eliminated if you delete the edges that define the face.
• You can recreate the missing face by retracing the edges – if your design misses a face, retrace it by using line tool that detects the edges and draws the face for the design again.

Edges and faces prove to be the main things for designing 3D objects in SketchUp. Having complete information about these two will assist you in designing models and objects creatively.


~~~~~~~~~~~~~~~~~~~~~~~~~~
Published By
Rajib Dey
www.sketchup4architect.com
~~~~~~~~~~~~~~~~~~~~~~~~~~

Thursday, September 21, 2017

How to Use Orbit, Zoom and Pan Tools to Get the Best View

To design flawlessly and creatively, SketchUp offers you some simple, understandable view tools concentrated completely on the object you draw on. The orbit, pan and zooms tools allow you to navigate your drawing smoothly observing each part of your model. Working on SketchUp is an interesting task as it stresses more on your design than on different applications of features. These tools are designed to keep the process simple while you are drawing an intricate 3D part. These options come in handy to view your model from any corner. Let’s know how they work on your favorite 3D application.

Orbit tool: Orbit tool is used for rotating your model to view it from different angles. This tool proved to be handy for the beginners as they can easily check the view of the model. Quite popular among others, this tool leads you the right design that you are looking for. You can activate the orbit tool from camera menu, getting started tool bar, or a large tool set tool bar.

Zoom tool: Zoom, as used traditionally, takes you closer to the model you are drawing. If you are working on small models, zoom helps you make it larger to fit your style. The best way to activate the zoom menu is rolling the scroll wheel that lets you zoom in and out instantly without clicking any menu bar and toolbar.

Zoom Extent is another option that is different from the usual working of zoom itself. Zoom Extent is used for making the model perfectly fit as the size of the window.

To use this tool, choose Zoom Extent from Camera.

The Pan Tool: The pan tool is another known view tool to observe your model from different angles – left, right, up and down. This tool brings to you different sides of your model and allows you to check the corner.

Things you should know about the pan tool:

• Pan stays in the camera menu
• Pan is in the tool bar
• Pan can also be activated through clicking on mouse’s scroll wheel button and press shift


These three tools are commonly used by the designers to set different viewpoints of the model. They are simple yet effective to understand the model the better.


Read Continue

~~~~~~~~~~~~~~~~~~~~~~~~~~
Published By
Rajib Dey
www.sketchup4architect.com

~~~~~~~~~~~~~~~~~~~~~~~~~~

3D Model of London for SketchUp

AccuCities is a London tech start-up, focusing on capturing accurate and detailed 3D city models. Starting in London, we are capturing 3D Models of this beautiful city in 4 basic levels of detail. As many of our customers from areas such as architecture and urban planning use SketchUp, customers can chose to buy the dataset as a sketchup files.

Depending on their needs, customers can buy a subscription to the entire dataset or chose small sections of the model and purchase those only. Prices for quarter square kilometer tiles of this High Detail 3D Model start at £500 per tile and the subscription to the entire 25 km sq dataset starts from £1,000 per month. The sketchup models of London are easy to use to inform Architectural design, create CGI renders and animations but could also be 3D printed.

AccuCities 3D City models are manually captured, using photogrammetry, from the latest high-res aerial survey data. In High Detail 3D Models we capture all visible features of the roofs, including chimneys, parapet walls and dormer windows. The 3D Model is accurate to an incredible 15 centimetres in each axis. For customers who require lighter and more affordable models can opt for Level 2 models - Level 2 models omit some features but this makes the models lighter and easier to use. Not to mention they are half the price of Level 3 models.

Link to 500 x 500 meters Free Sample files of 3D Model of London [Please link “3D Model of London” to www.accucities.com ] The Terrain in AccuCites 3D model of London is not flat - it is captured using the same photogrammetric technique as the buildings.


The terrain model is separated into major land use categories such as water, road, greenspace or man-made surface. Trees in this dataset are also captured from the aerial survey with the accurate heights and widths of their canopy. AccuCities can capture 3D Models like these anywhere in London, in the UK or in the world. Visit www.accucities.com for more information about all levels of detail we can provide. On the website you can also directly buy this 3D model and get a quote for 3D Models that are not yet in our library.


Read Continue

~~~~~~~~~~~~~~~~~~~~~~~~~~
Published By
Rajib Dey
www.sketchup4architect.com

~~~~~~~~~~~~~~~~~~~~~~~~~~

Containerhouse.AI – Container Interior Arrangement in SketchUp

Containerhouse.AI is designed particularly to change an interior setting and other spaces in a shipping container.


This extension is developed to import component and automate their arrangements. It mainly changes the container floor plans to accommodate the spaces for components.
The selling and designing ISO standard containers make ways for such extension. To solve the existing problem related to accommodation and customers’ queries regarding spaces of a container, this extension has been developed that presents thousands of potential layouts without crowding spaces.
Cargo packing is another name that does the similar work. It comes up with space management features in a container. The random floor height option allows you to opt for the containerization where collections of boxes are packed to minimize the space.
It changes the interior of a shipping container in a comprehensive way and the application does the work faster than humans can do. Interior designers also appreciate the theme and the performance of the application.
You can easily get different floor plans in a second which is not possible by human resource team. The complete drawing of the space arrangement will be conducted in front of your clients and they will definitely enjoy the visuals just like a game where components find out their spaces.
This product updates with time and offers valuable services to the shipping department. This artificial intelligence presented by the extension will prove beneficial in this sector.
To download the plugin, visit extensions.sketchup.com

Read more

~~~~~~~~~~~~~~~~~~~~~~~~~~
Published By
Rajib Dey
www.sketchup4architect.com
~~~~~~~~~~~~~~~~~~~~~~~~~~

Wednesday, September 20, 2017

4 Reasons why You Need SketchUp for 3D Modeling

SketchUp has become a known name in the world of 3D designing and drawing. The thing that drives designers and artist to the program is its user-friendly functions that allow users to freely sketch their imagination. Though there are many 3D designing programs, SketchUp has been successful in making a unique position among the budding designers.

Generally, two different platforms are designed for the users – Make and Pro. SketchUp Make is for those ones who design 3D objects for the first time. Pro, as the name defines, is designed for the ones who are already expert. It contains the advanced tools and extensions that are helpful to add even complex details.

Using SketchUp is no tough job as it comes up with easy solutions to your all problems related to designing. On this program, you draw designs rather than sculpt the model. It allows you to add or subtract solids to design your model. 4 reasons that keep SketchUp lovers stick to the designing program are given below:

1. Accessibility: SketchUp has a simple and easy user interface with which anyone can access the program without taking much time. Unlike other programs, it has been made of uncompleted tools to design 3D models the way you want. Everything in SketchUp is designed to give you a quick understanding of what it is and what it contains for you.

2. Versatility: The versatility of SketchUp makes it one of the preferred choices for the designers. You can conceptualize almost anything and everything in SketchUp. The concept of designing has become simpler and easier for you since you can earn comprehensive knowledge about designs that stay behind the architecture, woodworking, film production and thousands other practices.

3. Practicality: Practicality is a character that helps you concentrate on your design rather than unnecessary things. Converting your imagination into 3D objects is not only easier but also flawless on the 3D designing platform. You design as per your requirement. Convincing clients comes under your comfort zone. Drawing on SketchUp takes less time to generate your imagination than other 3D programs.

4. Cost: Cost efficient, this software application does more than you can imagine. As compared to the other applications available in the market, it is budget-friendly as well as time-saver. It also has a lower cost entry that ensures your thorough learning without making big holes in your pocket.


These features definitely come under your consideration when using SketchUp for drawing your imagination. The platform is indeed helpful for both beginners and experts.

4 Reasons why You Need SketchUp for 3D Modeling


~~~~~~~~~~~~~~~~~~~~~~~~~~
Published By
Rajib Dey
www.sketchup4architect.com
~~~~~~~~~~~~~~~~~~~~~~~~~~


SketchUp to Vizard workflow

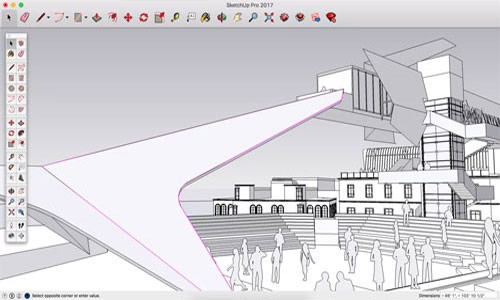
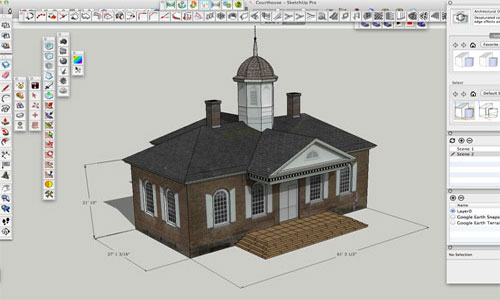
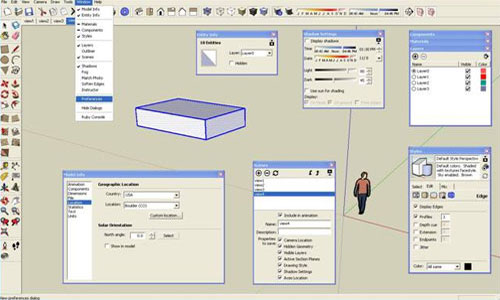
SketchUp is convincingly the most well-known platform for designing 3D models flawlessly and quickly. Nearly everyone can hone their designing spree at this platform as it comes up with a user-friendly interface, and the features are equally easy and satisfied. The world of designing grows like fire with the interest today’s industry is showing at. Exporting SketchUp models to the Vizard allows you to feel your design as real as the other objects of the world are.

Vizard platform has a huge library of VR commands that help them add your favorite detail to the designs that transform your 3D model into an immersive simulation where you can walk through the ambience you create. Vizard workflow erases the line between the virtual world and the reality, and you get an experience like you are strolling on a real landscape instead of your design.

The tutorials and videos are available on the internet, from which you can earn valuable information of how to render and export your SketchUp model into Vizard workflow. It also includes about the small details that are essential to give your 3D model a real-time feel. The features like lighting, shadows, and texture manipulating ensure that you get the best of SketchUp on Vizard.

The things you need to learn for using SketchUp on Vizard workflow are:

• SU export setting
• Introduction to Inspector
• Performance concerns
• Model Hierarchy
• Checking Model origin and scale
• Lighting and Shadows
• Adding Sky and Changing Background color
• Manipulating model sub-parts
• Swapping textures

These features work great to make your design vibrant and colorful. With the use of commands, you can simply add detailing of your liking. Vizard also gives you the needed flexibility by proving VR command libraries where you can easily manipulate your 3D model.

You can also check a glimpse of SketchUp on Wizard at.


Through this video, you will learn about how to import Google SketchUp design on Vizard and how to use commands to add drama to your model. This tutorial will teach you different types of features of SketchUp and mainly Vizard. The final result is interesting to see that gives you an in-depth knowledge about 3D models.


Article Source: www.worldviz.com

Read Continue

~~~~~~~~~~~~~~~~~~~~~~~~~~
Published By
Rajib Dey
www.sketchup4architect.com

~~~~~~~~~~~~~~~~~~~~~~~~~~
Tuesday, September 19, 2017

SketchUp Inferences Position the 3D Model Accurately

SketchUp Inferences in SketchUp make you understand where you design your model. The color lines will appear as soon as you create a new file in SketchUp. These lines are the best to keep your model at the right place you want. It is always advisable to use the color lines while working on the SketchUp as they eliminate the need for typing commands for adjusting the position of the model. You need to work in the intended color direction, and you must align your object with the drawing axes of SketchUp.

Inferences: When you design 3D models in SketchUp, many features appear in the form of color squares, dotted lines, yellow tags, and other objects of this kind. These features are called together as SketchUp inference engine. To design a model accurately and quickly, you have to understand each feature elaborately and its usage.

Point Inferences: Point inferences tell you about different things of your design, they guide you how to add or change details of the models. If you move the cursor on the working window of the SketchUp, you will definitely be introduced with different colored shapes. If you stay on those shapes for a second, a yellow tag will appear explaining the definition of the color spot you put the cursor on. Here is the list of various point inferences and their meaning.

• Green – endpoint
• Cyan or light blue – midpoint
• Black – intersection
• Red – on edge
• A circle, green – centre
• Dark Blue – on face

In SketchUp, two basic elements that everyone should know about are – edges (lines) and faces (surfaces). To design efficiently on the SketchUp, you have a comprehensive idea about these two features first.

Linear Inference: Colors definitely play a very important role in your designing in the SketchUp. Linear inferences also help a designer draw a 3D model precisely and perfectly. These linear inferences are also called ‘help lines’ as they play a big role defining your object. Below are the descriptions of the work of linear inferences.

• On Axis – If the edge you draw is parallel to one of the three drawing axes of SketchUp, the edge takes the color of that particular drawing axe.
• From Point – When you are moving a cursor in the SketchUp, a colored, dotted line appear that tells you are lined up with the end point of the dotted line. The color of the From Point will automatically change as per the color of the axes it corresponds with.
• Perpendicular – the edge you are drawing must be perpendicular to another edge of the design. Your drawn edge will be colored in magenta.
• Parallel – If the edge you are sketching becomes parallel to another edge of your model, the drawn edge turns into magenta.
• Tangent at Vertex – this idea comes into the application when you are drawing an arc that starts at the end point of another arc. When your drawn arc is the tangent of another arc, it turns into cyan.


SketchUp inferences engine defines the basics of the 3D designing, without which your object does not take the expected form. The use of these applications is more than the usual.

SketchUp Inferences Position the 3D Model Accurately


~~~~~~~~~~~~~~~~~~~~~~~~~~
Published By
Rajib Dey
www.sketchup4architect.com
~~~~~~~~~~~~~~~~~~~~~~~~~~

SketchUp Dialog Box – A Complete Tutorial

SketchUp dialogue boxes carry some useful commands and functions that let you navigate your design easily. It has controls with which you can modify the SketchUp setting and customize them as per your use. SketchUp is a simpler 3D designing tool that made the complexity of 3D model simpler. Like other applications, it has come up with essential dial boxes that keep the drawing smooth and straightforward. The content brings inside-out of the dial boxes used commonly by the users.

Preferences: The preference dial box contains everything about the working of SketchUp. You can change the setting to make a comfortable workplace for you. The commands carried by the dial box control the behavior of the application itself rather than the model you are working on. The preference dial box will appear on the Mac version only, and it is not available for the windows version of SketchUp.

SketchUp preferences contain the commands like application, drawing, extensions, general, shortcut and temples. Each one comes up with an array of options to make your designing experience uncomplicated.

For the preference dial box: SketchUp menu > preferences

Check the video for more information:

Model Info: Model info tool holds all important details of the model you are working on. It shows you everything starting from the animation time to the geo-location. Every command comes up with a set of features that define your model in the best possible way. In the ‘window’ menu, you will get the model info dialog box.

You can set the information the way you like before designing a model. The other options that you would get in this dialog box are – animation, components, credits, dimension, files, texts and more.

Check the video for more information:

Entity Info: Entity info in SketchUp tells you about the entity of your model as per the selection area. You can get a comprehensive detail about the layers, materials, dimensions and component names of every single entity of your model. Changing material is also easy with this tool. It notifies you about different parts of the model because each part has different structural details. Entity Info dialog box is in the window option.

Check the video for more information:

Instructor: Instructor dialog box happens to the best guide for the beginners. It clearly shows you the instruction of using a tool you are using presently. It presents every detail about the tool to make you understand how to draw a certain thing. In window menu, you will get the instructor option.

To know more, visit


With the dialog box options, you can easily draw the model as well as enhance the knowledge of different commands used in SketchUp.

SketchUp Dialog Box – A Complete Tutorial


~~~~~~~~~~~~~~~~~~~~~~~~~~
Published By
Rajib Dey
www.sketchup4architect.com
~~~~~~~~~~~~~~~~~~~~~~~~~~

How to use paste in place tool in sketchup

In this sketchup video tutorial, you will be familiar with paste in place tool. This tool can save significant time while detailing and resizing your sketchup model.

Generally, people employs this tool for transmitting objects in and out of components inside a file. But, it can also be applied to copy from one file to another.

This tool can also be used to draw outside a group or component. Just choose Ctrl+X to cut, provide group/component and paste in place.


To learn how does this tool function, watch the following video tutorial.


Read more

~~~~~~~~~~~~~~~~~~~~~~~~~~
Published By
Rajib Dey
www.sketchup4architect.com

~~~~~~~~~~~~~~~~~~~~~~~~~~

Monday, September 18, 2017

How to design a façade of a building with sketchup and v-ray 3.4

This is an exclusive online presentation for sketchup professionals.

In this sketchup video, one can learn how to create the design of the façade of a building with sketchup and v-ray. The model is created with sketchup and rendering work is done by v-ray 3.4 through v-ray frame buffer. The video will continue for 47 minutes.
The V-Ray Frame Buffer belongs to a display window for V-Ray renderings that comprises of a number of V-Ray-specific features. The V-Ray Frame Buffer contains the following exclusive features:
a. Interchanges among render components through a dropdown of all render elements
b. Maintains the image in full 32-bit floating point format
c. Accomplishes Color Corrections on the rendered image
d. Facilitates the users to select the order in which the buckets are rendered
e. Can preserve a list of recently rendered images and interchanges among them or compare them
f. Employs normal Lens Effects to the rendered image
g. Automate the process for modifying render resolution while the VFB window is resized with V-Ray RT ActiveShade and V-Ray IPR
h. The capability for loading progressive resumable files (.vrprog ) and the V-Ray .vrimg file format.


To utilize the V-Ray Frame Buffer for rendering, activate the Enable built-in frame buffer option in the Frame buffer rollout under the V-Ray tab in the Render Setup window.


Read more

~~~~~~~~~~~~~~~~~~~~~~~~~~
Published By
Rajib Dey
www.sketchup4architect.com

~~~~~~~~~~~~~~~~~~~~~~~~~~

Friday, September 15, 2017

Printable for 3D warehouse

3D modeling has become easier with the introduction of many new software applications. The complex things seem easier with the tools and extensions. But making 3D designs in printable format remains a hectic job that involves many tough steps. With the SketchUp application, designers and artists find a simpler way to draw their models without being an expert in the fields. The subtle look of the model seems as accurate as it is done by an expert.

The need for 3D printable designs is felt intensely as the 3D designing industry flourishes with time. The conventional process is not enough to fit the growing need. This is why SketchUp in collaboration with 3D Warehouse and Materialise comes up with a comprehensive solution. It allows users to translate their 3D model into the printable format without going through any hectic steps. 3D Warehouse with their internal expert support makes the design printable-ready STL file – a required process to transform your design into 3D printable format.

3D print is a completely different chapter of study for designing where you are learned to add sizes and lengths to the model for the printable. Different factors are inevitably involved in this process. SketchUp eliminates those tough ones and gives you a way to make the model print-ready for you.

What do they do?

Experts in Materialise do their best job to offer you the desired result. The STL file format of 3D Warehouse is considered to be the solver of such problem. With the help of Meterialise and 3D Warehouse, SketchPlan offers a better functioning tool to you for this purpose.

The Printables of 3D Warehouse: To make your design 3D printable, you need to choose the check box – ‘I want this model to be printable.’ You need to upload the model to the 3D Warehouse. This model is then passed to the Materialise where it is transformed into an STL file. This new STL file goes through an array of gauntlet tests that fix general issues smoothly and provide you with a watertight STL file. Materialise sends this file to the 3D warehouse from where you can easily download your printable format.

How to find out your Printable file: To get the printable format of your 3D design, sign in your 3D Warehouse account and browse the model details page. Type the name followed by ‘is.printable’ in the search bar of the site. If you are searching for all printable objects, type ‘is:printable.’

This is the easiest method so far for making 3D design printable. The application does not require you to perform complex functions like correcting sizes, alignment for getting the better result. Prepare your model first and send to the 3D Warehouse – is just the process you need to maintain.


Printable for 3D warehouse


~~~~~~~~~~~~~~~~~~~~~~~~~~
Published By
Rajib Dey
www.sketchup4architect.com
~~~~~~~~~~~~~~~~~~~~~~~~~~