Sunday, April 28, 2019

"The Constructible Model with M Moser Associates”

M Moser Associated has specialized in the design and delivery of workplace environments since a long time and now using SketchUp, VDC process to deliver 3D modeling designs.

Over past fifteen years, M Moser, a global AEC firm with an extensive track record in workplace design and construction which has used SketchUp not only for design and conceptualization but also as a key communication tool throughout the project delivery process.

According to the Jason Li, Associate and Charles Corley, Director of Organizational Development at M Moser Associates the company believes design can positively impact on people’s well-being and productivity trough work and life. They are also passionate about allowing transformative workplace culture and the team is continuously engaging into new areas of expertise, new applications of design and new regions around the world through the trust of their clients.

Here are a brief discussion about their work, life experience and many more:

The term “VDC” mean to M Moser: The term VDC stands for Virtual Design and Construction that mean the team is an entirely constructible 3D modeling workflow to authorize any stakeholder for understanding and taking part in a project. They believe in creating a working virtual environment that can clearly shows to all project participants in spite of training or experience and without depending on a highly flat and disassembled, abstract set of documents, a visual reference is universal. M Moser prefers to own equal responsibility on every project as possible and throughout all of their offices they use virtual design and construction to make the projects understood for everyone. They also have an array of cultures, understandings and backgrounds in construction as they want to engage people meaningfully and get the best out of each other’s participation and expertise by constructing a project in SketchUp well before going to the site. So VDC is a type of communication tool that connects and gets everybody on the path to the right result.

Projects to focus on as a business: They mainly design and build workplaces like corporate offices, corporate campuses, laboratories, private hospitals, private education facilities and workplaces of all types. According to them, SketchUp is very important to do these kind of projects as these projects are ever-changing and with more traditional building projects the things like permitting, structural calculations and ordering materials can be done finely before construction. But also the workplaces can remain fluid in design though many changes happen.

Unique clicks: They are extreme about changes and are continuously engaging the way of thinking about construction information, they also trying to create any record of construction information a by-product of the real collaboration and 3D work. Their all trades, contractors, suppliers and the client working together in 3D from concept to completion; basically M Moser could be known as quite unique in the industry to focusing on different things in a time.

About designers: Though not every designer has the exact experience to understand construction fully but they tend to draw design intent as after that they have to work with others to find the possibilities. The team collaborates daily as they take their projects trough discussion and brainstorming for giving the best; people have different backgrounds and this way they all can truly avoid misconceptions on the exact need in design. In their every meeting, there would be a group of people from different professions come for a model being rotated on a large screen; the leader of the meetings is not the one with all queries and questions it should be everyone’s participation and advice together they will solve problems. The notion of success comes mostly from the client but opinions are multiple which blend together to form a successful project. They use VDC method as a methodology to assure designers, engineers, professionals, specialists and client can communicate on the same platform.

Time: It is said that AutoCAD is faster than SketchUp but if it is used intelligently SketchUp is always better option. But there is often a false understanding of time efficiency as the drawings need to complete and checked by multiple peoples which VDC make in less time as modeler creates everything in SketchUp and then split the model into different viewports in LayOut to see the faults. They have made a way to complete works faster in SketchUp.

So basically M Moser is taking SketchUp as their main design software through using VDC that can consume less time but deliver 3D modeling works.
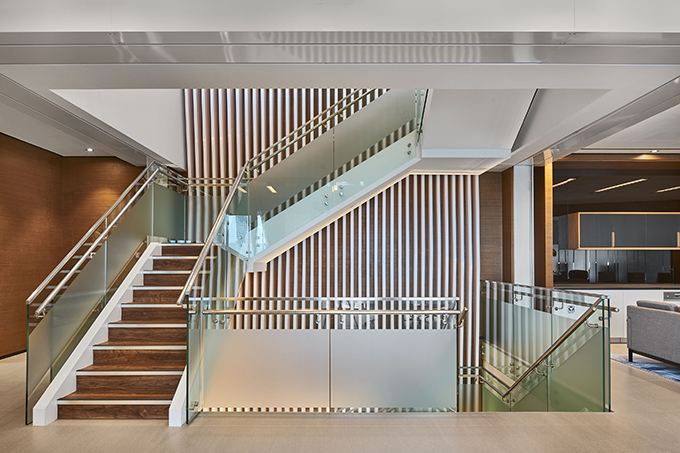
The Constructible Model with M Moser Associates

Read more
~~~~~~~~~~~~~~~~~~~~~~~~~~~~
Published By
Rajib Dey
www.sketchup4architect.com
~~~~~~~~~~~~~~~~~~~~~~~~~~~~
Saturday, April 27, 2019

Demo of transmutr, a brand new sketchup extension

Justin Geis, the renowned sketchup instructor, has presented this useful sketchup video tutorial that focuses on the demonstration of Transmutr, a brand new sketchup extension from the developer of skatter to instantly import and export external models with several formats into sketchup.

It will allow sketchup to read along with the capability to generate proxies for your rendering programs.

This sketchup extension contains some unique features like automated render-ready materials and proxies, geometry simplification. Besides, there are some useful options like scaling, unit conversion, axes/origin transformations and lots other.

Details of the features are given below :-

Automated render-ready materials: Automatically transform render-ready materials or fine-tune them with some simple mouse clicks.

Automated proxies: With a single click, Transmutr can create proxies for V-Ray, Thea and Enscape.

Geometry simplification: Streamline high-poly objects with numerous faces down to a few thousands or hundreds.

Direct link with Quixel Megascans Bridge: With a couple of clicks, it is possible to deliver Megascans assets from Quixel Bridge to SketchUp.

Correct units, scale and axes: Scale the model, amend t the origin or modify the Up Axis with just a couple clicks.

Clean model hierarchy: Transmutr retains the model hierarchy whereas simplifying it to get rid of unnecessary nesting.

To get more details or purchase the extension, go through the following link https://transmutr.com

For online demonstration of the extension, watch the following video tutorial.


~~~~~~~~~~~~~~~~~~~~~~~~~~~~
Published By
Rajib Dey
www.sketchup4architect.com
~~~~~~~~~~~~~~~~~~~~~~~~~~~~
Friday, April 26, 2019

"Medeek Wall in SketchUp Extension”

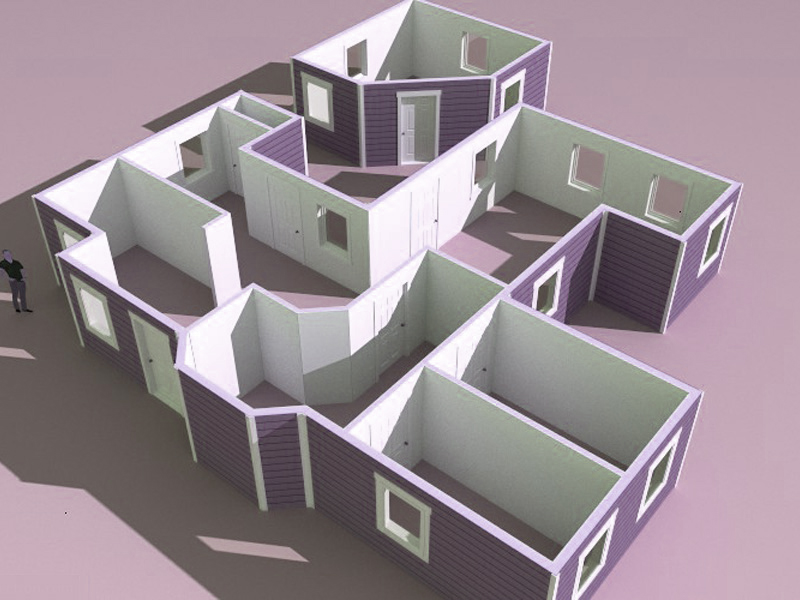
The Meedek Wall Plugin is another one from SketchUp Extension Warehouse that provides a simple interface to create accurate 3D Wall framing geometry within SketchUp.

About Extension Warehouse: It is an online resource with various plug-ins developed made especially for SketchUp and these extensions help to add some special tools and features to SketchUp. These extensions can be found for any particular application like drawing or 3D printing and some industry specified tools for architecture, interior design, construction and many more. So basically in this Extension Warehouse people can do the following things:

  • Users can search extensions by name or as per the functionality.
  • They can also install various extensions with a single click of a button.
  • Or users can also control all the extensions from easy-to-use location in the My Extension page.

About Meddek Wall (BETA): The Medeek Wall Plugin is another SketchUp Plugin that provide a simple interface to create accurate 3D wall framing geometry within SketchUp. This plugin also uses the SketchUp Ruby API programming interface and is consistent with the newest SketchUp versions like SketchUp Make 2017 and SketchUp Pro 2018 as well as earlier versions like 2015, 2016 and 2017.
Currently the plugin allows the making of the following types or panels of wall which are in Metric and US/Imperial:
    Rectangle (Ext-Int), Rectangle (Int-Int), Gable and Shed.
    • Door types in Rectangle: Solid, Six panel, Half Glass, Full Glass, Double Solid, Double Six Panel, Double Half Glass, Double Full Glass
    • Window types in Rectangle and Half Round: Picture, Slider, Single Hung
    • Garage Doors: Under Construction
    • Columns in Wall: Dimensional Lumber and Timbers, Parallel Strand Lumber
    • Pre-Fabricated Shear Panels: Simpson Strong-tie Wood Strong Wall®, Simpson Strong-tie Steel Strong Wall®, Mitek Hardy Frame® HFX Panel.
    • Engineering(US/Imperial): It is under construction

All these wall types are designed using industry standard practices, there are some other wall types for doors and windows which are in the process to add on weekly basis. Some Advanced options and features like crown moulding, baseboard, chair rails and wainscoting are also now under development. So basically this plugin allows users to create wall panels in a polyline mode; after selecting the rectangular wall tool and choosing the line mode, the wall is then defined by selecting two points from the start to end of the wall panel. After choosing this polyline mode each point defines a wall panel end point and the next wall panel starts point, when the auto-corner configuration is allowed within the global settings the wall panels will automatically form inside or outside corners as per the angles between the wall panels. When the wall panel is created then it can be moved while at the same time

remaining fixed to other adjacent wall panels; wall framing with other options are automatically re-calculated and re-drawn. This automation will provide a design tool that will reduce the need for manual modifications to the model; custom layers can be enabled in the global settings to allow various walls, window and door components to be placed on specific layers.

The Medeek Wall Plugin thus help users to accurately depict conventional wood frame construction will fully integrated windows and doors within SketchUp and better confirm the architectural models.

Medeek Wall in SketchUp Extension

~~~~~~~~~~~~~~~~~~~~~~~~~~~~
Published By
Rajib Dey
www.sketchup4architect.com
~~~~~~~~~~~~~~~~~~~~~~~~~~~~
Thursday, April 25, 2019

Demonstration of curic section view

This sketchup video tutorial provides the demonstration of Curic Section Veiw, an exclusive sketchup plugin.


Curic Section View can be applied to check views and observe everything in the model. Besides, it can automatically locate and manage section planes in the model to instantly interchange to next or previous.
This sketchup plugin is compatible with SketchUp Version: SketchUp 17, SketchUp 18, SketchUp 19 as well as Windows and Mac platform.
To avail the plugin, click on the following link. https://gumroad.com/l/curic_section_view
The plugin is also available in extension warehouse. https://extensions.sketchup.com/en/content/curic-section-view-0
For online demonstration of the plugin, watch the following video tutorial.

Read more
~~~~~~~~~~~~~~~~~~~~~~~~~~~~
Published By
Rajib Dey
www.sketchup4architect.com
~~~~~~~~~~~~~~~~~~~~~~~~~~~~
Skimp – The newest sketchup extension to import high-poly models rapidly

Mind Sight Studios released skimp, a new powerful import extension that can be used to import high-fidelity models into SketchUp rapidly and easily.

This sketchup extension supports SketchUp 2018 and SketchUp 2019.

It is specifically designed for Interior Designers, Architects, Game Developers, Landscape Architects / Civil Design etc.

The extension contains the following exclusive features :-

Get rid of slow, bloated models! Skimp retains your model light and prompt by streamlining it to the correct balance of detail and performance.
Choose any object in your SketchUp model, streamline and restore.
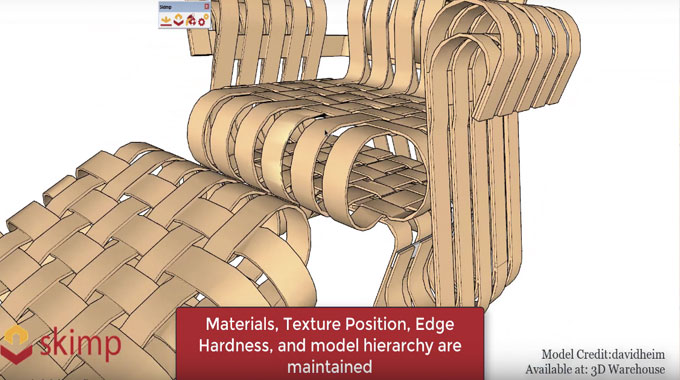
Import and decimate models with numerous faces instantly. Skimp can import FBX, OBJ, STL, DAE, 3DS, PLY, and VRML.
Perfect metric-based simplification.
It is possible to truly preview the model prior to importing with the purpose of modifying the scale, orientation as well as minimizing the polygons.
Skimp can significantly lower the size of your SKP file with some simple mouse clicks whereas retaining the visual appearance of the model.
It is exceptionally rapid and effective for both importing and polygon diminution.
It can sustain model hierarchy.
With skimp, it is possible to identify a metric-based tolerance while simplifying that is useful for CAD / CAM and 3D Printing applications.
Preserve Materials, UVs, and Normals at the time of importing and simplifying.
Skimp – The newest sketchup extension to import high-poly models rapidly

~~~~~~~~~~~~~~~~~~~~~~~~~~~~
Published By
Rajib Dey
www.sketchup4architect.com
~~~~~~~~~~~~~~~~~~~~~~~~~~~~
Monday, April 22, 2019

Point Gadget 2 (2016+) – The newest sketchup extension

Point Gadget 2 (2016+) is the newest sketchup plugin available in extension warehouse. It is an upgraded version of point gadget.

The newest version is compatible with SketchUp 2016, SketchUp 2017, SketchUp 2018, SketchUp 2019.

Point Gadget 2 (2016+) comprises of several tools like Point Creation Tools, Line Creation Tool, Modification Tools, Importer & Exporter tools etc.

Point Creation Tools:

Set Location – This tool can be utilized to set the xyz of the station location or model origin.

Trick: With the help of the SketchUp model axis, precisely align imported data (images, cad info, etc) prior to shooting points. The green axis is taken as the North / backsight

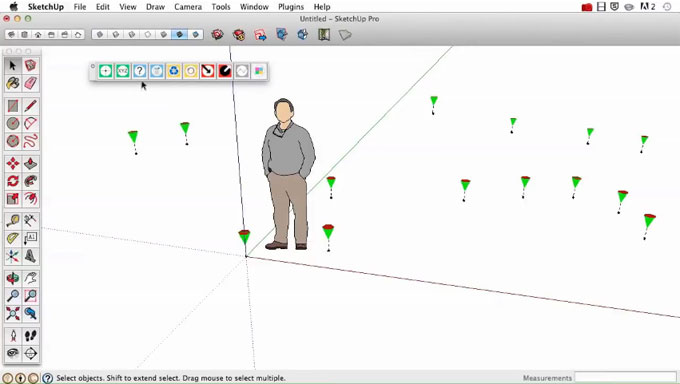
Shoot Tool – This tool can be applied to set point markers with the mouse. The markers, and the points to be demonstrated, will be attributed ID numbers automatically.

Tip: While applying the Shoot tool, it is a good idea shoot onto an actual surface.

Tip: The point markers applied via this plugin are components. If the users are reluctant to apply the Point Gadget tools to set a point marker and as an alternative apply the Component Browser to set your point, ensure to employ the Point Gadget UPDATE tool to register them with the plugin.

XYZ Tool – This tool can be used to arrange point markers simultaneously with specific XYZ coordinates.

To get the details about other tools, click on the following link extensions.sketchup.com

Watch online demonstration of Point Gadget 2 (2016+)

Point Gadget 2 (2016+) – The newest sketchup extension

~~~~~~~~~~~~~~~~~~~~~~~~~~~~
Published By
Rajib Dey
www.sketchup4architect.com
~~~~~~~~~~~~~~~~~~~~~~~~~~~~
Friday, April 19, 2019

"Eight new components to Rock the School Year: SketchUp for Schools”

SketchUp for Schools has started a year ago where the creators have started to put some information to manage SketchUp tools for students and teachers they are adding features now.

SketchUp for Schools: It is a free 3D modeling browser application which is available to any primary or secondary school that has signed up with G-suite for Education. This is the first time SketchUp ever offered an education-specific product and SketchUp team has taken the view of users and their EDU community about the classes. SketchUp management are bringing SketchUp for Schools out of beta just in time for the school year and after an wonderful Summer of sifting through many positive feedback the team has brought the two most needed features: STL exploring for 3D printing and SketchUp curriculum. So SKetchUp for Schools also offering age-definite curriculum attached to the International Society for Technology in Education (ISTE) Standards and also the curriculum is made by Teachers like Mike and Mike.

Last year, the SketchUp for Schools had started various classes to teach the students about SketchUp and people gave feedback which helped them to make improvements so that students and educators can use it more smoothly in 3D. So, this year they are again bringing SketchUp for Schools with new improvements, let’s check them out.

Better 3D printing functionality: After SketchUp for Schools launched, SketchUp has come in now Chromebooks and then they have added a couple more features to make the 3D printing experience better. The features are:

Solid Inspector:

It is the web-child of Solid Inpector2 and is ranked number 1 extension to prepare models for 3D printing on SketchUp’s Extension Warehouse. It is located on the right side of the new 3D printing panel.

3D Printing Guide:

3D printing guide is a complete guidance package consisting with three new lesson plans and these plans are now delivered in Google Slides. They all can be found either on the Web or directly in the SketchUp for Schools application.

Solid Tools:

Solid tools have different kind of tools which are Outer Shell, Union, Subtract, Trim, Intersect and Split. All these features are very useful to create cool geometry and can also help in preparing any model for 3D printing.

STL import:

There are many exciting Thingiverse models in the SketchUp for Schools application which students will love to play around with and it is as easier as exporting to STL.

Better 3D printing functionality: The team also added more of SketchUp’s desktop functionality to SketchUp for schools and here are those new features:

Style Editor:

It allows users to create own custom styles or to edit one of SketchUp’s many default styles.

Downsave .skp files to 2016 or 2017:

SketchUp team has added the ability to downsave the files of users’ while working on any earlier version of SketchUp Pro in Desktop so that they can work between SketchUp for Schools on the Chromebook and SketchUp Pro on the desktop.

Importers & Exporters:

Last year, the most popular exporters were used in primary and secondary schools: in both STL and PNG. So, this year they have added a lot more exporters so that students can flex their creative skills on the last cutter, image editing software and other 3D modeling tools.

Material Editor:

Users can give their own unique touch in the SketchUp’s material library by editing material fuzziness.

Eight new components to Rock the School Year: SketchUp for Schools


~~~~~~~~~~~~~~~~~~~~~~~~~~~~
Published By
Rajib Dey
www.sketchup4architect.com
~~~~~~~~~~~~~~~~~~~~~~~~~~~~
Thursday, April 18, 2019

"Bending an object in SketchUp”

David Richards always works on different tools from different SketchUp extensions to create some differentiates in his models and this time he made a tutorial on Radial Bend tool.

About David Richards: He is a Biomedical Equipment Technician and provides anesthesia and Respiratory equipment for the largest medical facility in southeast Minnesota. Beside that he works in his garage woodworking shop where he has made various wooden items, he is a regular SketchUp user who uses it for designing projects, working out joinery details and solving the order of operations in time. He has made a various range of SketchUp models like tiny parts for medical equipment, large architectural and other construction projects. Most of his models are furniture and other woodworking related things, besides being a SketchUp users and woodworker; he helps other woodworkers around the world to use the program through his blogs in ‘Fine Woodworking’ which has become very popular among the woodworkers.

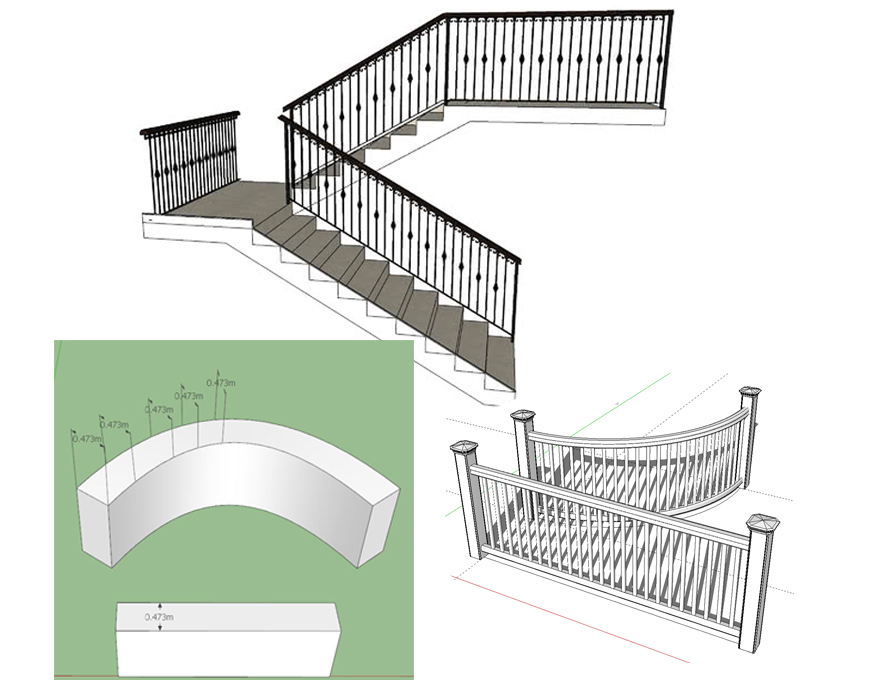
David Richards has drawn a SketchUp model and going to show his viewers the tip of bending any object in it; at first he drew a SketchUp model while creating plans for Michael Robbins’s Contemporary Desk that is marked in the current issue of Fine Woodworking Magazine. The desk mixes practical utility with elegant details like its slender base with turned legs and curved side profiles; the construction is divided into two parts that are top and base. The joinery for the top section is elementary mortise and tennos; the two-part desktop is part solid wood and part plywood and covered with leather to make a blotter. The base with its turned legs is a straightforward frame secured by bridle joints. This leather on the blotter surface is represented by creating a component at first that is twisted up at one corner.

The work of this bending is easily done with the help of the Radial Bend tool in the FredoScale extension and here is a little detail of that work.

Radial Bend tool: Radial Bend deforms an object by radically bending the deformation axis which is perpendicular to the base reference plane. The radial bend is applied to the selected end of the deformation axis while the opposite end stays fixed and when the mouse moves, the shape radically bends in either a clockwise or counterclockwise direction as per a circular bending track that is displayed and is subdivided in degrees. The orientation of the bend may be rotated around the deformation axis and done through the rotation handle attached at the bottom of the axis. This control is activated by clicking on it and an extra rotational track is shown to assist users with the positioning of the rotation.

In this model, David started working from the base for the blotter; he took a component, copied it pasted outside the component. Next he took Push/Pull tool to give the component a little thickness; next he thought took the curve tool to start the guideline to set the arbitrary. Now it is the time to bend the object, so he took the Radial Bend tool from FredoScale extension, placed it on the object, here users can set the number of faces they want in the curved object, next he drag the cursor along the guideline click on the corner and bring that corner up to make it a bended corner.

Source:www.finewoodworking.com

Bending an object in SketchUp


~~~~~~~~~~~~~~~~~~~~~~~~~~~~
Published By
Rajib Dey
www.sketchup4architect.com
~~~~~~~~~~~~~~~~~~~~~~~~~~~~
Wednesday, April 17, 2019

"FredoCorner is the new SketchUp extension”

Fredo6 has released their new extension named FredoCorner which is an upgrade version of previous RoundCorner that become now a paid version to work in the corners and splits.

Justin Geis: Justin Geis is the founder of The SketchUp Essentials and started using SketchUp while he was working as a general contractor in 2008 and after using it he found that SketchUp is extremely powerful that he just started to use it in his personal works also. Then he started The SketchUp Essentials as a place where he could share his ideas of using SketchUp easily through some tutorials and tips to help other users controlling the power of 3D Modeling in everyday lives.

About Extension Warehouse: It is an online resource with various plug-ins developed made especially for SketchUp and these extensions help to add some special tools and features to SketchUp. These extensions can be found for any particular application like drawing or 3D printing and some industry specified tools for architecture, interior design, construction and many more. So basically in this Extension Warehouse people can do the following things:


  • Users can search extensions by name or as per the functionality.
  • They can also install various extensions with a single click of a button.
  • Or users can also control all the extensions from easy-to-use location in the My Extension page.

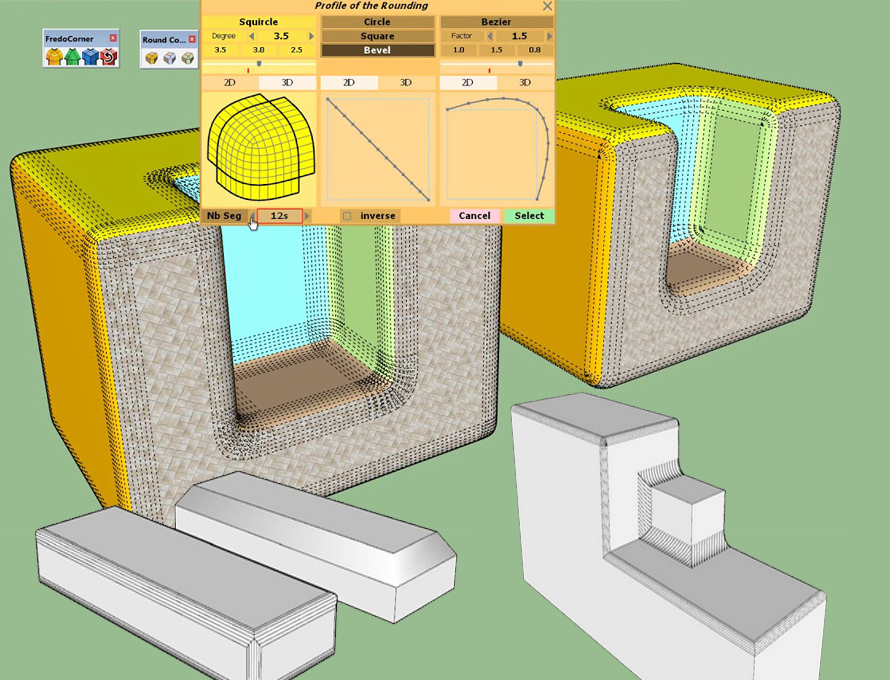
FredoCorner is a new extension from Fredo6 designed to help the users in generating rounded corners or edges within SketchUp; this extension is as similar as the old RoundCorner extension, but it creates rounded edges with an improved algorithm and also has added some new tools. It works in stripping of edges and corners of 3D shapes, in 3D modes: Round, Bevel and Subdivision Mesh; this tool also has a Repair tool to undo any kind of generated shape rounding. But it doesn’t exchange the old RoundCorner extension and remains supported as it will become a paid plugin after a 2-3 month free period.

FredoCorner is placed on a different algorithm and has many additional features, like:

  • Handling more difficult shapes with triangulation at vertices
  • Subdivision mesh
  • Repair/ Undo/ Redo
  • Preview mode
  • Asymmetrical offset
  • Variable offset with borders
  • Works across boundaries of groups and Components
  • Corners are symmetrical
  • Edible corner profiles with Squrcles and Bezier
  • More types of corner geometrics are supported

New functions of FredoCorner:


  • It is may be the biggest change within FedoCorner as it is opposed to RoundCorner where the corners are all balanced and they can be edited with the Profile Rounding Function; this tool allows users to adjust the way of creating rounded curves with FredoCorner.
  • This new upgraded tool also offers the ability for reversing the curves that allow creating corners which move both inward and outward.
  • This extension can also handle much more difficult corners now than previous did in RoundCorner.
  • There is a new preview button added which helps users to quickly view the created geometry with the look without creating it.
  • Besides that, it also allows live editing the curves by clicking and dragging with preview mode active.
  • The offset line lengths can also be edited now by clicking on them and adding a new value; users can offset individual lines or full offset by double clicking.
  • The major thing is that users can now select a group or component and active FredoCorner without editing the raw geometry.
  • There is also a subdivide function that allows to split object into squads that allows users to use an extension like SubD or Artisan to subdivide the shapes without any deformation.

SketchUp or Google SketchUp is mainly a3D modeling computer program that is used for a broad range of drawing applications used by architects, interior designer, landscape architects, civil and mechanical engineers, film and video game designers also. SketchUp can be getting as a freeware version named SketchUp Make and a paid version with many more extra benefits called SketchUp Pro. SketchUp is software from Trimble Company and there is an online library of free model congregations and 3D Warehouse to which users can add other models; besides that, the program has drawing layout functionality with variable ‘styles’, supports third-party ‘plug-in’ programs hosted on the Extension Warehouse to supply other abilities and enables placement of its models in Google Earth. As SketchUp users are most of architects, designers, builders, makers and engineers etc. who works hard to give a nice shape to our physical world, they need great tools to do the work. SketchUp is in mission to bring their best to produce some great tools for drawing as drawing is the key thing of the SketchUp users. They draw to search ideas, to identify the things and to show other people their work that they do with love and love to build; SketchUp understands it truly and trying to improve their software day by day. SketchUp is a worth useful software for its ease of use, it can be downloaded or installed o computer and right after that user can work on it. Though SketchUp can easily handle but still there are some sides where people will find some difficulties and lots of solve also are there like YouTube tutorials upon SketchUp or visiting SketchUp website or search Google etc. But people will get confused to have lots of information from different places upon one thing so there should a proper place or website where all the answers can be found.


FredoCorner is the new SketchUp extension

~~~~~~~~~~~~~~~~~~~~~~~~~~~~
Published By
Rajib Dey
www.sketchup4architect.com
~~~~~~~~~~~~~~~~~~~~~~~~~~~~

Some vital steps in rendering with v-ray for sketchup

This exclusive v-ray for sketchup video tutorial, Alex Oliver, lead instructor at Sketchup School, provides some useful tips for the user so that they can’t omit some vital steps while rendering with v-ray for sketchup. The users always miss these vital steps and waste huge time for recreating the rendering.

The video focuses on the following crucial points :-

1. How to place the Sun in SketchUp in order that V-Ray can perfectly shine sunlight into your model
2. Guidelines for applying Groups, Components & Layers in SketchUp to transform your rendering workflow more effective in V-Ray
3. Guidelines for arranging your materials to simplify them to perform with in V-Ray
4. The variation in how V-Ray renders details, and why it is necessary to add more of them in SketchUp to improve the quality renderings remarkably.
5. How to maximize your polygon count in SketchUp for rapid, superior quality renderings in V-Ray.


The first important step is to ensure your model is render-ready. Render-ready checklists comprise of the following five important steps :-

a. Orient your model
b. Optimize Your File
c. Arrange your materials
d. Include realistic details
e. Recall your polygons


To get detail explanations about these important steps, go through the following video tutorial.

Video Source Architecture Inspirations

~~~~~~~~~~~~~~~~~~~~~~~~~~~~
Published By
Rajib Dey
www.sketchup4architect.com
~~~~~~~~~~~~~~~~~~~~~~~~~~~~

Tuesday, April 16, 2019

AUGmentecture 1.0 – The newest sketchup extension

Zarik B has developed AUGmentecture, the newest sketchup extension available in extension warehouse. It is compatible with SketchUp 2016, SketchUp 2017, SketchUp 2018, SketchUp 2019.

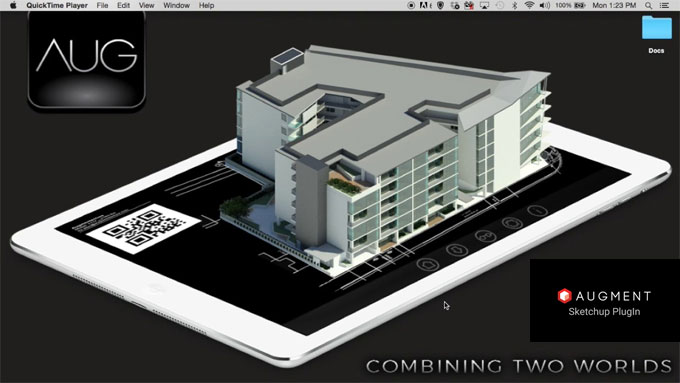
AUGmentecture belongs to a service that allows you to observe complex 3D models on a mobile device in an Augmented Reality format. The AUGmentecture extension facilitates you to coherently and safely upload your 3D models directly from Sketchup to your AUG account to see them afterwards with your mobile device. You have to only choose the model and it is possible to view the model on your mobile device.

The purpose of AUGmentecture is to make augmented reality an indispensable design communication and collaboration tool for architects, designers, and artists.

One will be able to download the AUGmentecture app for iPhone from here (itunes.apple.com) or for Android Phone from here (play.google.com).

Go through the following video tutorial, to get more clear idea.

Video Source AUGmentecture

AUGmentecture 1.0 – The newest sketchup extension

~~~~~~~~~~~~~~~~~~~~~~~~~~~~
Published By
Rajib Dey
www.sketchup4architect.com
~~~~~~~~~~~~~~~~~~~~~~~~~~~~

"Downloading free Textures from Poliigon and using them in SketchUp/VRAY Renderings”

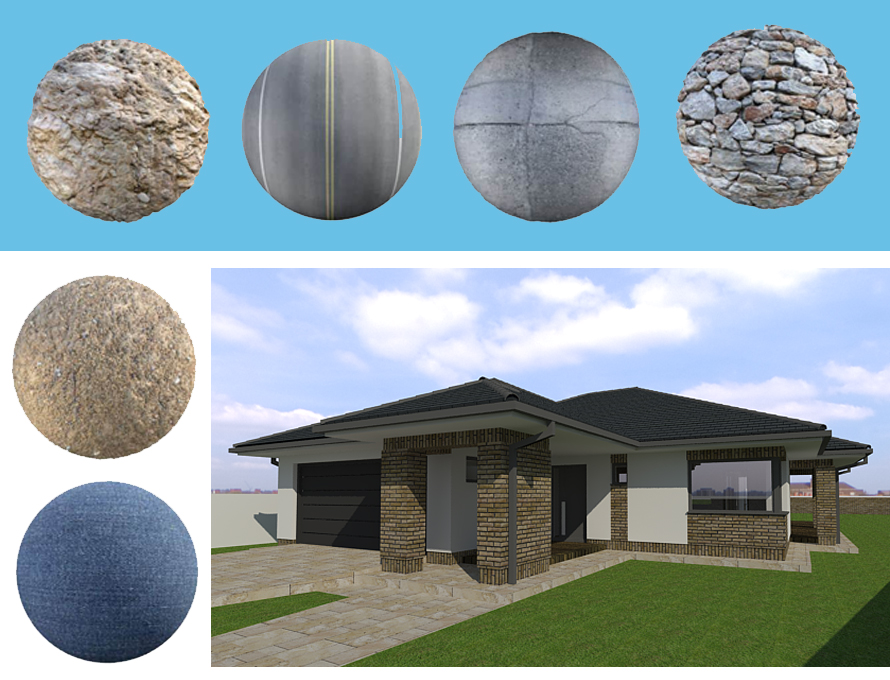
Textures add the realistic look in any model and Poliigon’s website is full of different textures which will increase the rendering view in SketchUp 3D models or in Vray.

Justin Geis: Justin Geis is the founder of The SketchUp Essentials and started using SketchUp while he was working as a general contractor in 2008 and after using it he found that SketchUp is extremely powerful that he just started to use it in his personal works also. Then he started The SketchUp Essentials as a place where he could share his ideas of using SketchUp easily through some tutorials and tips to help other users controlling the power of 3D Modeling in everyday lives.

In today’s article we will discuss about an online source that is contained of textures which can be used in any 3D models and renderings. There are many different websites which can also be used to download textures to use both in the SketchUp models, as well as for some programs like Vray, Unreal Engine and many more. This is a guidance to help the users in downloading and importing materials from Polligon.com into every SketchUp model, besides that there are some tips for setting the materials up within Vray for really creating more realistic renderings.

These free textures can get from www.poliigon.com , where users need to go on the top of the page to click the Sign Up button and it is absolutely free of cost website. After signing up, users can find there premium textures that can be purchased access to, as well as there are some great free textures that can be downloaded. Next they will find the texture stab, from where they have to go down to click on “Free textures” option; after clicking on this it will show a list of all the free textures available through Polligon where are list of wonderful materials to work.

Here is an example of texture-

SketchUp or Google SketchUp is mainly a3D modeling computer program that is used for a broad range of drawing applications used by architects, interior designer, landscape architects, civil and mechanical engineers, film and video game designers also. SketchUp can be getting as a freeware version named SketchUp Make and a paid version with many more extra benefits called SketchUp Pro. SketchUp is software from Trimble Company and there is an online library of free model congregations and 3D Warehouse to which users can add other models; besides that, the program has drawing layout functionality with variable ‘styles’, supports third-party ‘plug-in’ programs hosted on the Extension Warehouse to supply other abilities and enables placement of its models in Google Earth. As SketchUp users are most of architects, designers, builders, makers and engineers etc. who works hard to give a nice shape to our physical world, they need great tools to do the work. SketchUp is in mission to bring their best to produce some great tools for drawing as drawing is the key thing of the SketchUp users. They draw to search ideas, to identify the things and to show other people their work that they do with love and love to build; SketchUp understands it truly and trying to improve their software day by day. SketchUp is a worth useful software for its ease of use, it can be downloaded or installed o computer and right after that user can work on it. Though SketchUp can easily handle but still there are some sides where people will find some difficulties and lots of solve also are there like YouTube tutorials upon SketchUp or visiting SketchUp website or search Google etc. But people will get confused to have lots of information from different places upon one thing so there should a proper place or website where all the answers can be found.

Plaster 17: When users will select this texture they will get a preview window that will show the material and its look while rendering. It also shows a list of different maps that can be downloaded such as normal maps, reflections etc. They also have a pretty worthy set of free textures and one of the nice things about them is that they have different maps which users may need to link up various things like normal maps to coarsen the surface or reflection maps to make the rendered reflections look better and more. Users can select very high resolutions also but it should keep in mind that though higher resolutions look more realistic but SketchUp may face some trouble with working them. After downloading the file, users can unzip it and place the materials in their file; next it need to bring into Vray by opening up the Asset Editor, then go to the Material List and click the “Add Material” button at the bottom of the page and select “Generic”. From here, users can add the maps into Vray material, clicking on the right arrow button will help to expand the window off to the right where they can add texture to this material by selecting the little box next to “Diffuse” and finding the color map. This option will add the texture image to the material and going in the material section, the size of the material can adjust; also adding different maps from the material it become more realistic.

Source:www.thesketchupessentials.com

Downloading free Textures from Poliigon and using them in SketchUp/VRAY Renderings


~~~~~~~~~~~~~~~~~~~~~~~~~~~~
Published By
Rajib Dey
www.sketchup4architect.com
~~~~~~~~~~~~~~~~~~~~~~~~~~~~

Saturday, April 13, 2019

"Design parts in SketchUp to connect for 3D printing”

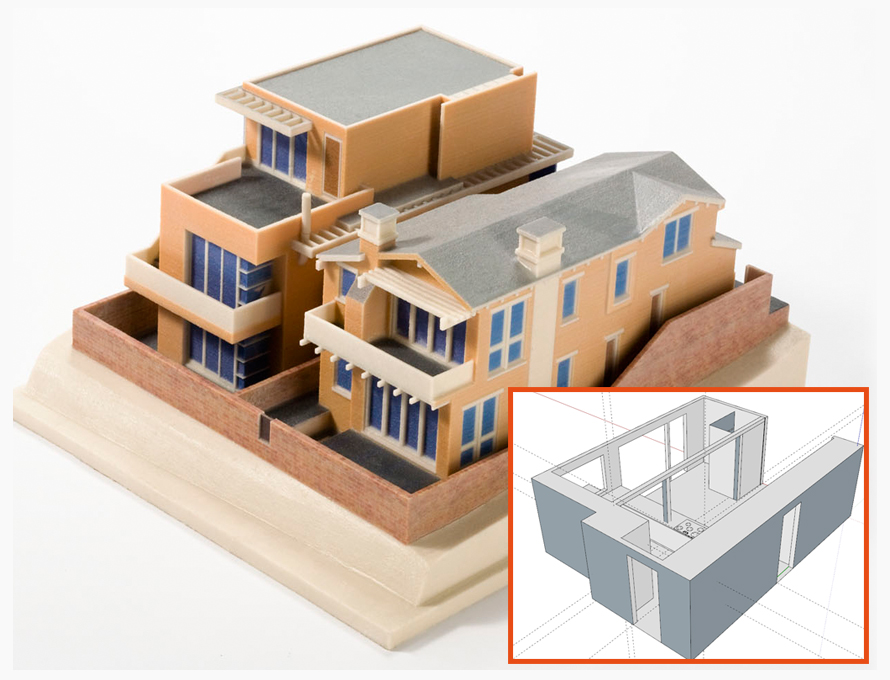
SketchUp models are suitable for 3D printing but it only can happen when the parts of any model are assembled together, there are different ways to assemble those parts.

In the previous tutorials of Sketch Up, Aidan and Rebecca have shown us the way to cut Sketch Up model into parts but the matter is now to assemble them in a way for printing them. There are many other strategies and features in SketchUp like mechanical or else to help in building into the model to assemble the parts together. Aidan and Rebecca are going to show the users through different processes and here is a brief discussion on it.

Tolerance in SketchUp: It is the difference between the sizes of users’ part in SketchUp and the size of the part produced by their 3D printer. Suppose a user has drawn a 10mm cube in SketchUp and printed it, none of the sizes of the printed cube will be shown exactly 10mm; though these are very small differences like a few tenths of a millimeter more r less. But they can create problems if their 3D printed parts have to connect with the parts that already exist in the real world. That’s why the manufacturer of the 3D printers gives a unique number for the machine’s tolerance which may be in either plus or minus value. This value is called the Maximum variation for that machine and users both need to be aware while working.

Tolerance in SketchUp: Clearance is like an extra space for parts to slide past one another but users may face a little difficulty while installing similar size peg in a similar sized hole as they will not go together. The peg and the hole will not fit properly with each other in SketchUp but in real world they will not react like this as there the peg needs to connect with friction. The exterior of the peg is similar as the exterior of the hole that the friction between them will keep the peg from veer going in if the fit is too perfect for them. In that case, users need to add a small amount of space called clearance which will help the two parts to slide past each other; the amount of clearance depends on the exact movement of the part.

Glue in SketchUp: Glue is the universal way to stick things but it is also the weakest and most unreliable way as it has very little strength o keep the things tighter for long.

  • The plastics which are used in 3D prints defined by the names ABS, PLA, PVA, nylon and PETT; all these plastics need a special glue to stick and the glues have to order online.
  • Biodegradable starch plastics consists a crystalline structure that doesn’t go well with liquid superglue which stays liquid and move unexpectedly across the surface of the part.
  • Instead of glue, users can use epoxy which is though a messy stuff but will stick to anything.
  • No glue can stick to the flexible materials for 3D printers so to attach parts, a process called thermal welding.

Snap fittings in SketchUp: These are properly designed to pop the models together after the parts come off the printer and as these are removable so users can change out many parts of the model as per design. In SketchUp, snap fittings are created by two general steps: 1) creating the tongue with the Line and Push/Pull tools; 2) creating a matching capture point on the opposing part.

Press Fit in SketchUp: A press fit is the very little clearance between the two parts while designing and when the parts are pressed together forcibly, friction keeps the joint together without any extra hardware or glue. To make a press fit, the Offset tool is used to create an outer lip on one side of the connection and an inner lip on other side.

Bolts, Screws and Hardware in SketchUp: The strongest connection between 3D printed parts is holding together with metal hardware and these connections are great for things that are more than just prototypes. While integrating hardware into the design, include hardware in the SketchUp model as it will take measurements of the parts users need to use and model them in SketchUp. Then save the components in the component library for using them in further models.


Design parts in SketchUp to connect for 3D printing
~~~~~~~~~~~~~~~~~~~~~~~~~~~~
Published By
Rajib Dey
www.sketchup4architect.com
~~~~~~~~~~~~~~~~~~~~~~~~~~~~